


3D Printing Retainer
Being able to make retainers in office is a valuable service for practices, that benefits both dental offices and patients in many ways specially when patient is wearing brackets. Using a CAD software, debonding and removal of brackets is done, and then the model is made by using a SprintRay 3D printer. This is followed by thermoforming a retainer plastic sheet over the model to ultimately fabricate a retainer.
Here we show and walk you through every step involved in the workflow of fabricating a retainer in your office from impression taking to delivering
the appliance to patient.
What you need: Debonding is done on an Orthodontic CAD software, which can be done in house or through a service provider.
What you need: Thermoforming machine, Plastic sheet, Blackout
resin/composite, Curing light, Releasing agent, Trauma Shear scissors, Curved S.S. Crown smooth scissors, Straight Surgical Scissors,
Sandpaper (fine grid), Lab carbide bur, FuzziesTM polishing wheel.
Digital Impression
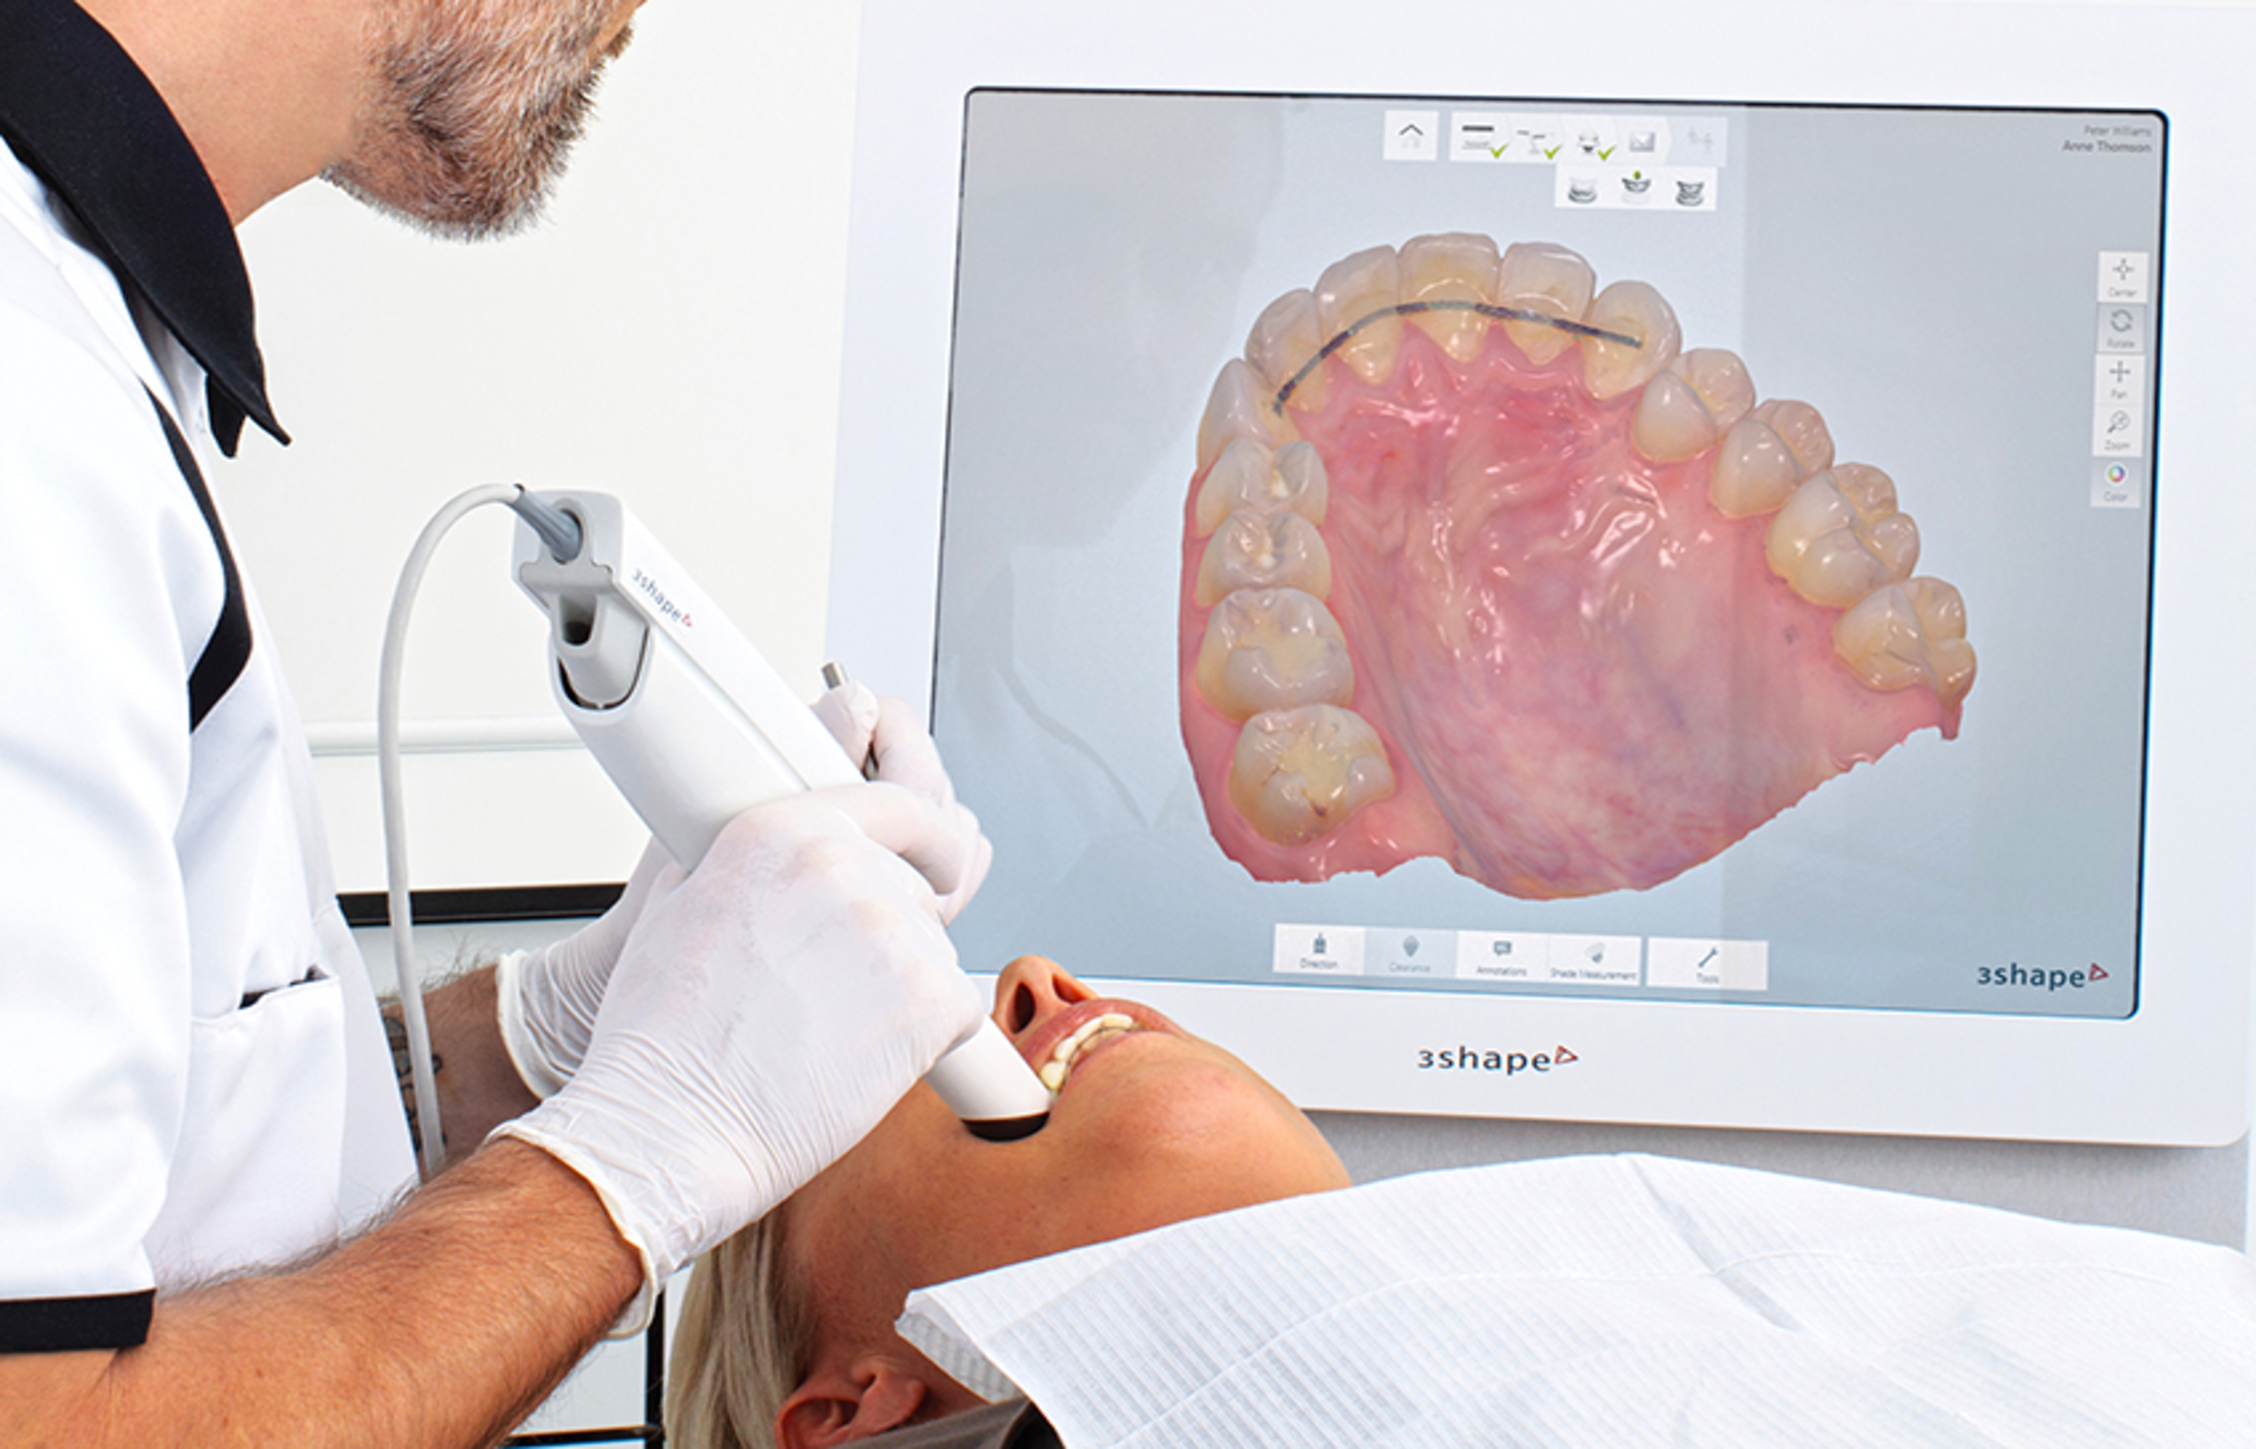
The first step in this workflow is to record the patient’s digital impression for planning treatment in CAD software. We can either take direct or indirect digital impressions.
Time required: 5-10 min
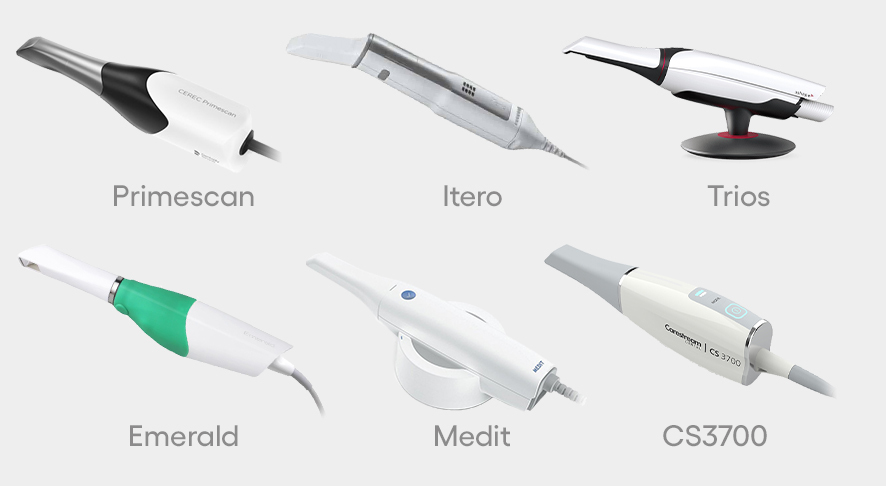
1.1. Using Intraoral Scanner
Use an intraoral scanner to take direct digital impressions, then export STL files. Common compatible scanners include, but are not limited to: Primescan (DentsplySirona), iTero (Align Tech), Trios (3Shape), Omnicam (DentsplySirona), Emerald (Planmeca), Medit (Medit), CS3700 (Carestream).
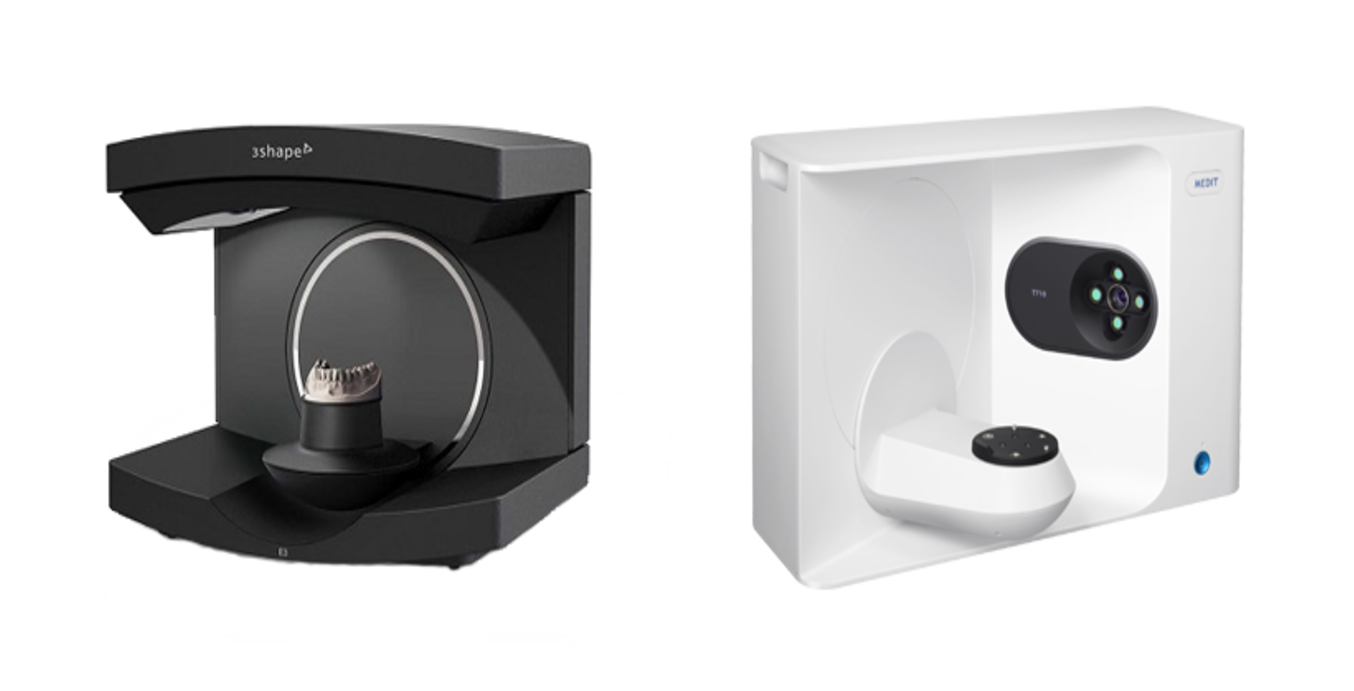
1.2. Using Desktop Scanner
Indirect digital impressions are done by using a desktop scanner to convert a VPS impression or a model into a digital impression. Once the maxillary, mandibular, and bite scan files (digital impressions) are ready, export and save them in the highest resolution (if you have the option of choosing resolution) on your computer in STL format.
Pro Tips
- Primescan does not allow exporting bite-scan as a separate file. By default, Primescan users can only export 2 files: upper and lower. In case you need to export bite-scan as a separate file, you need to follow the steps from this link: Link to “How to export separate bite-scan file from Primescan”
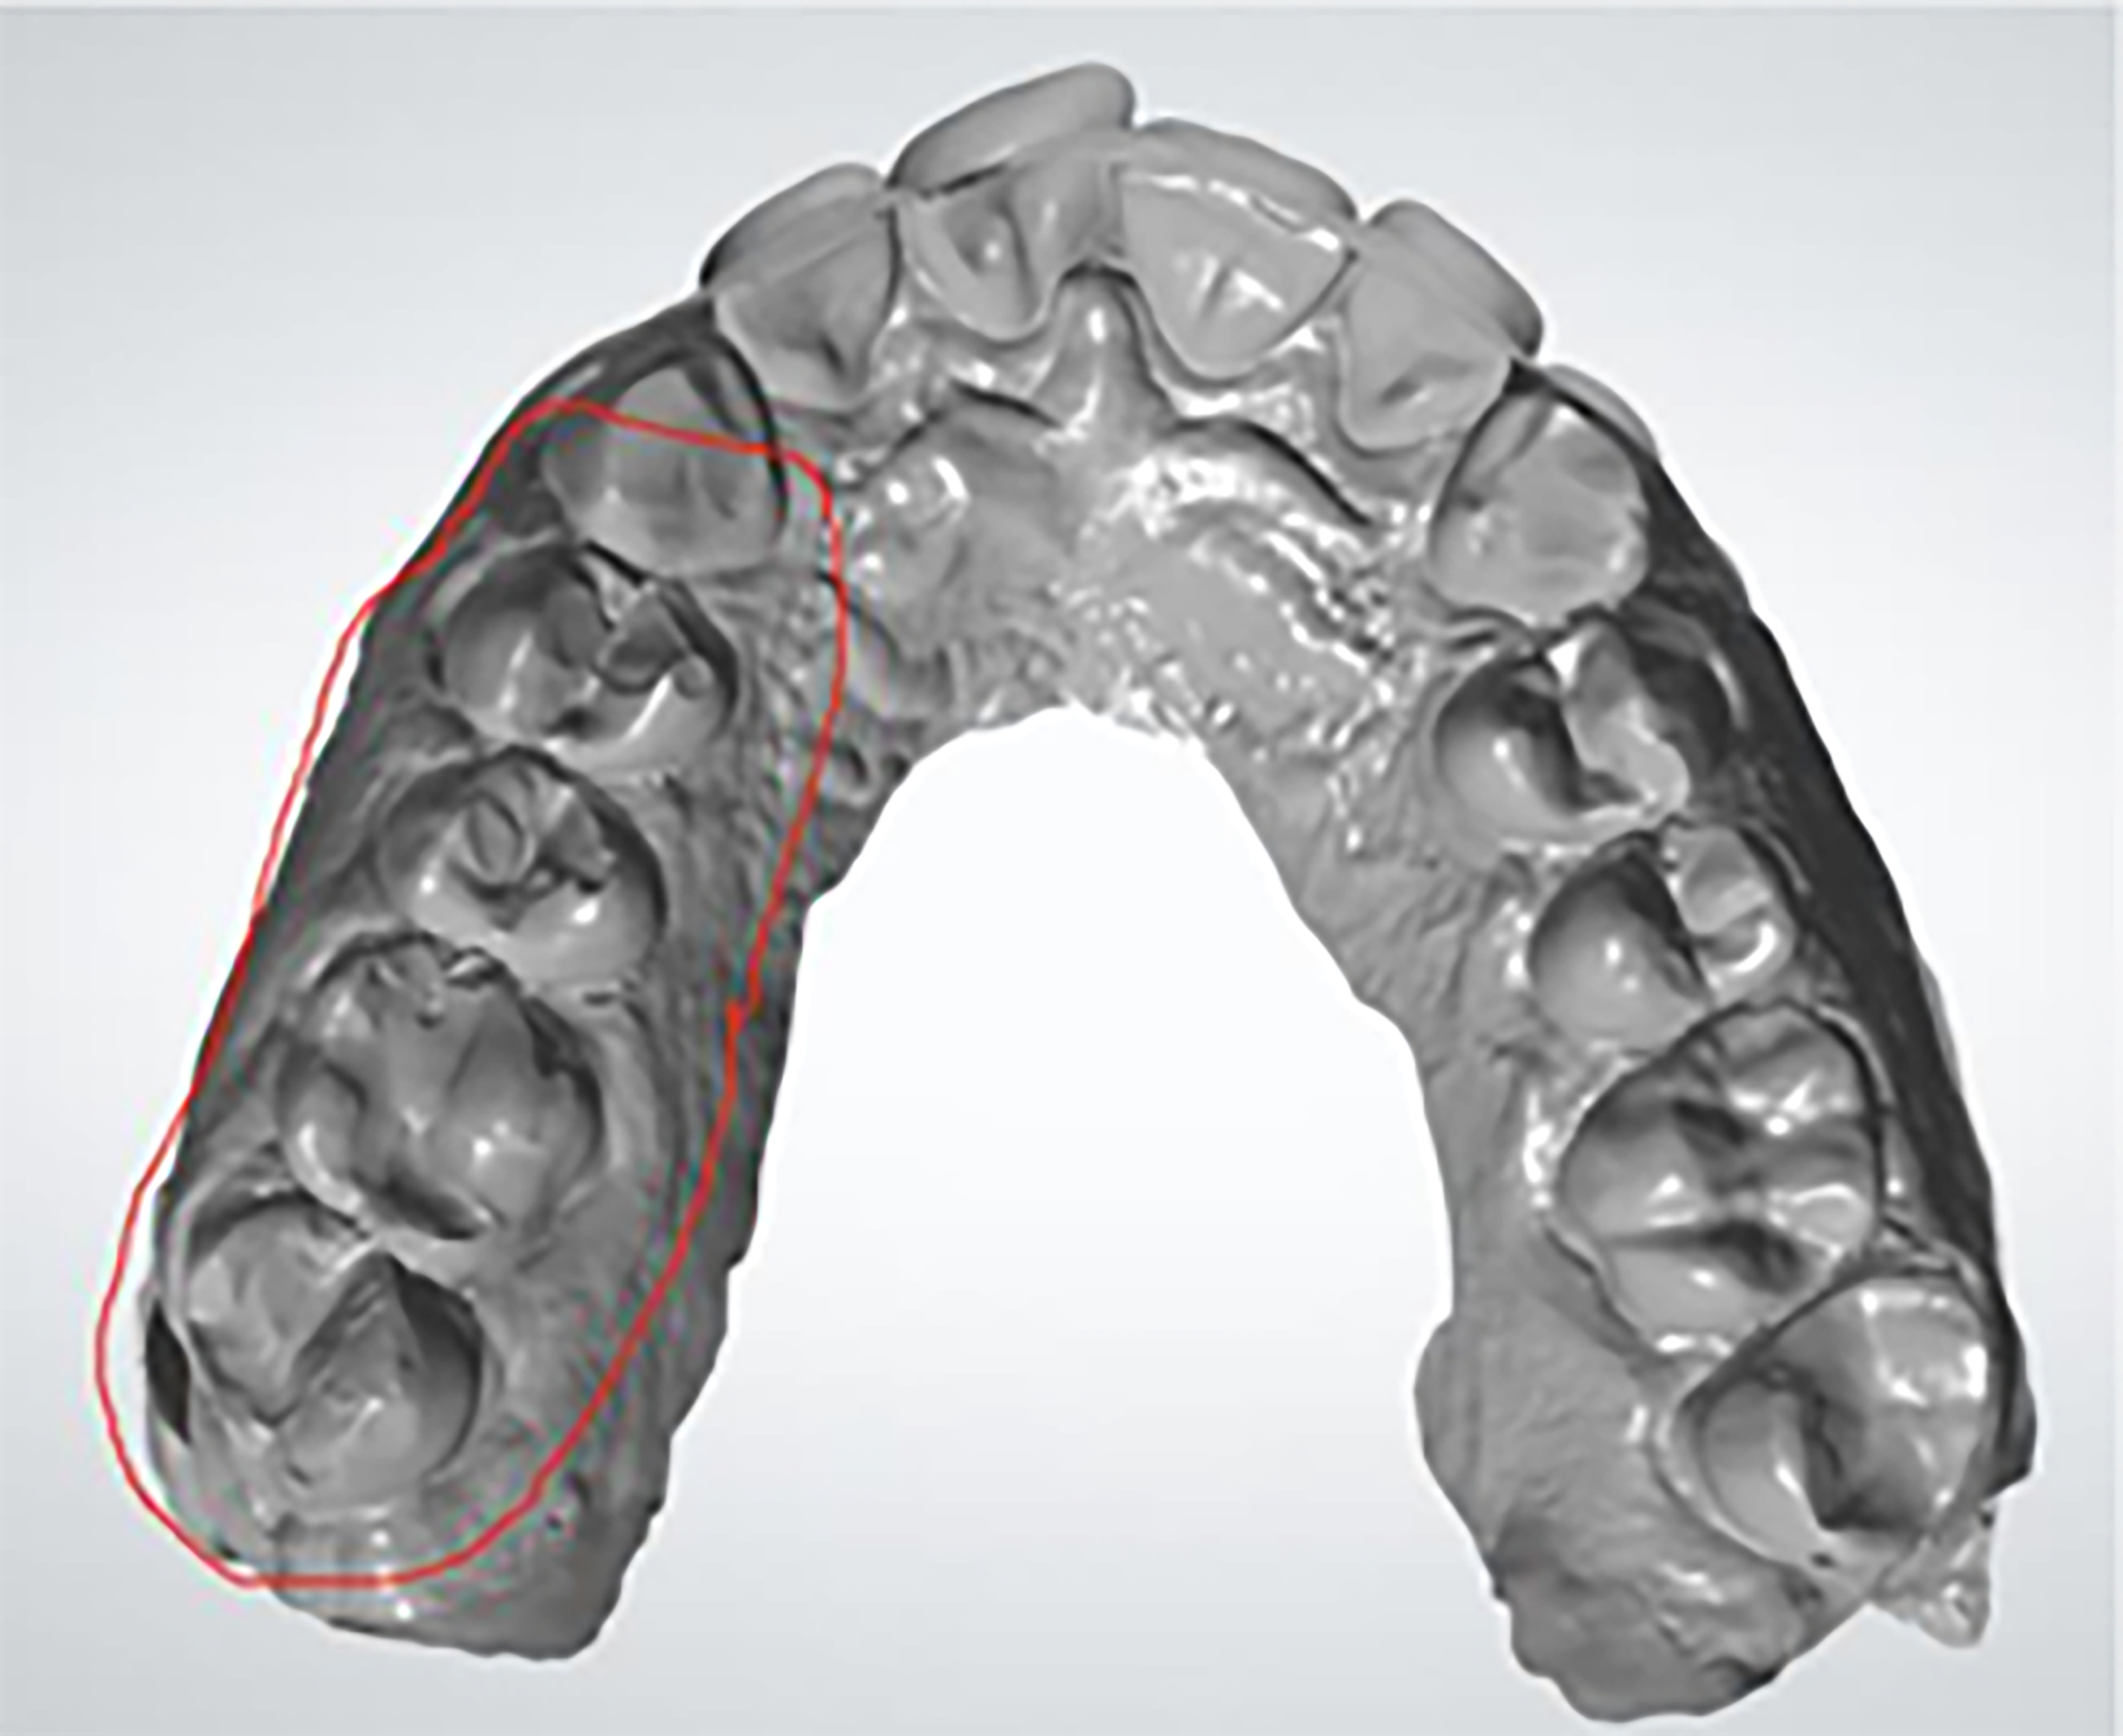
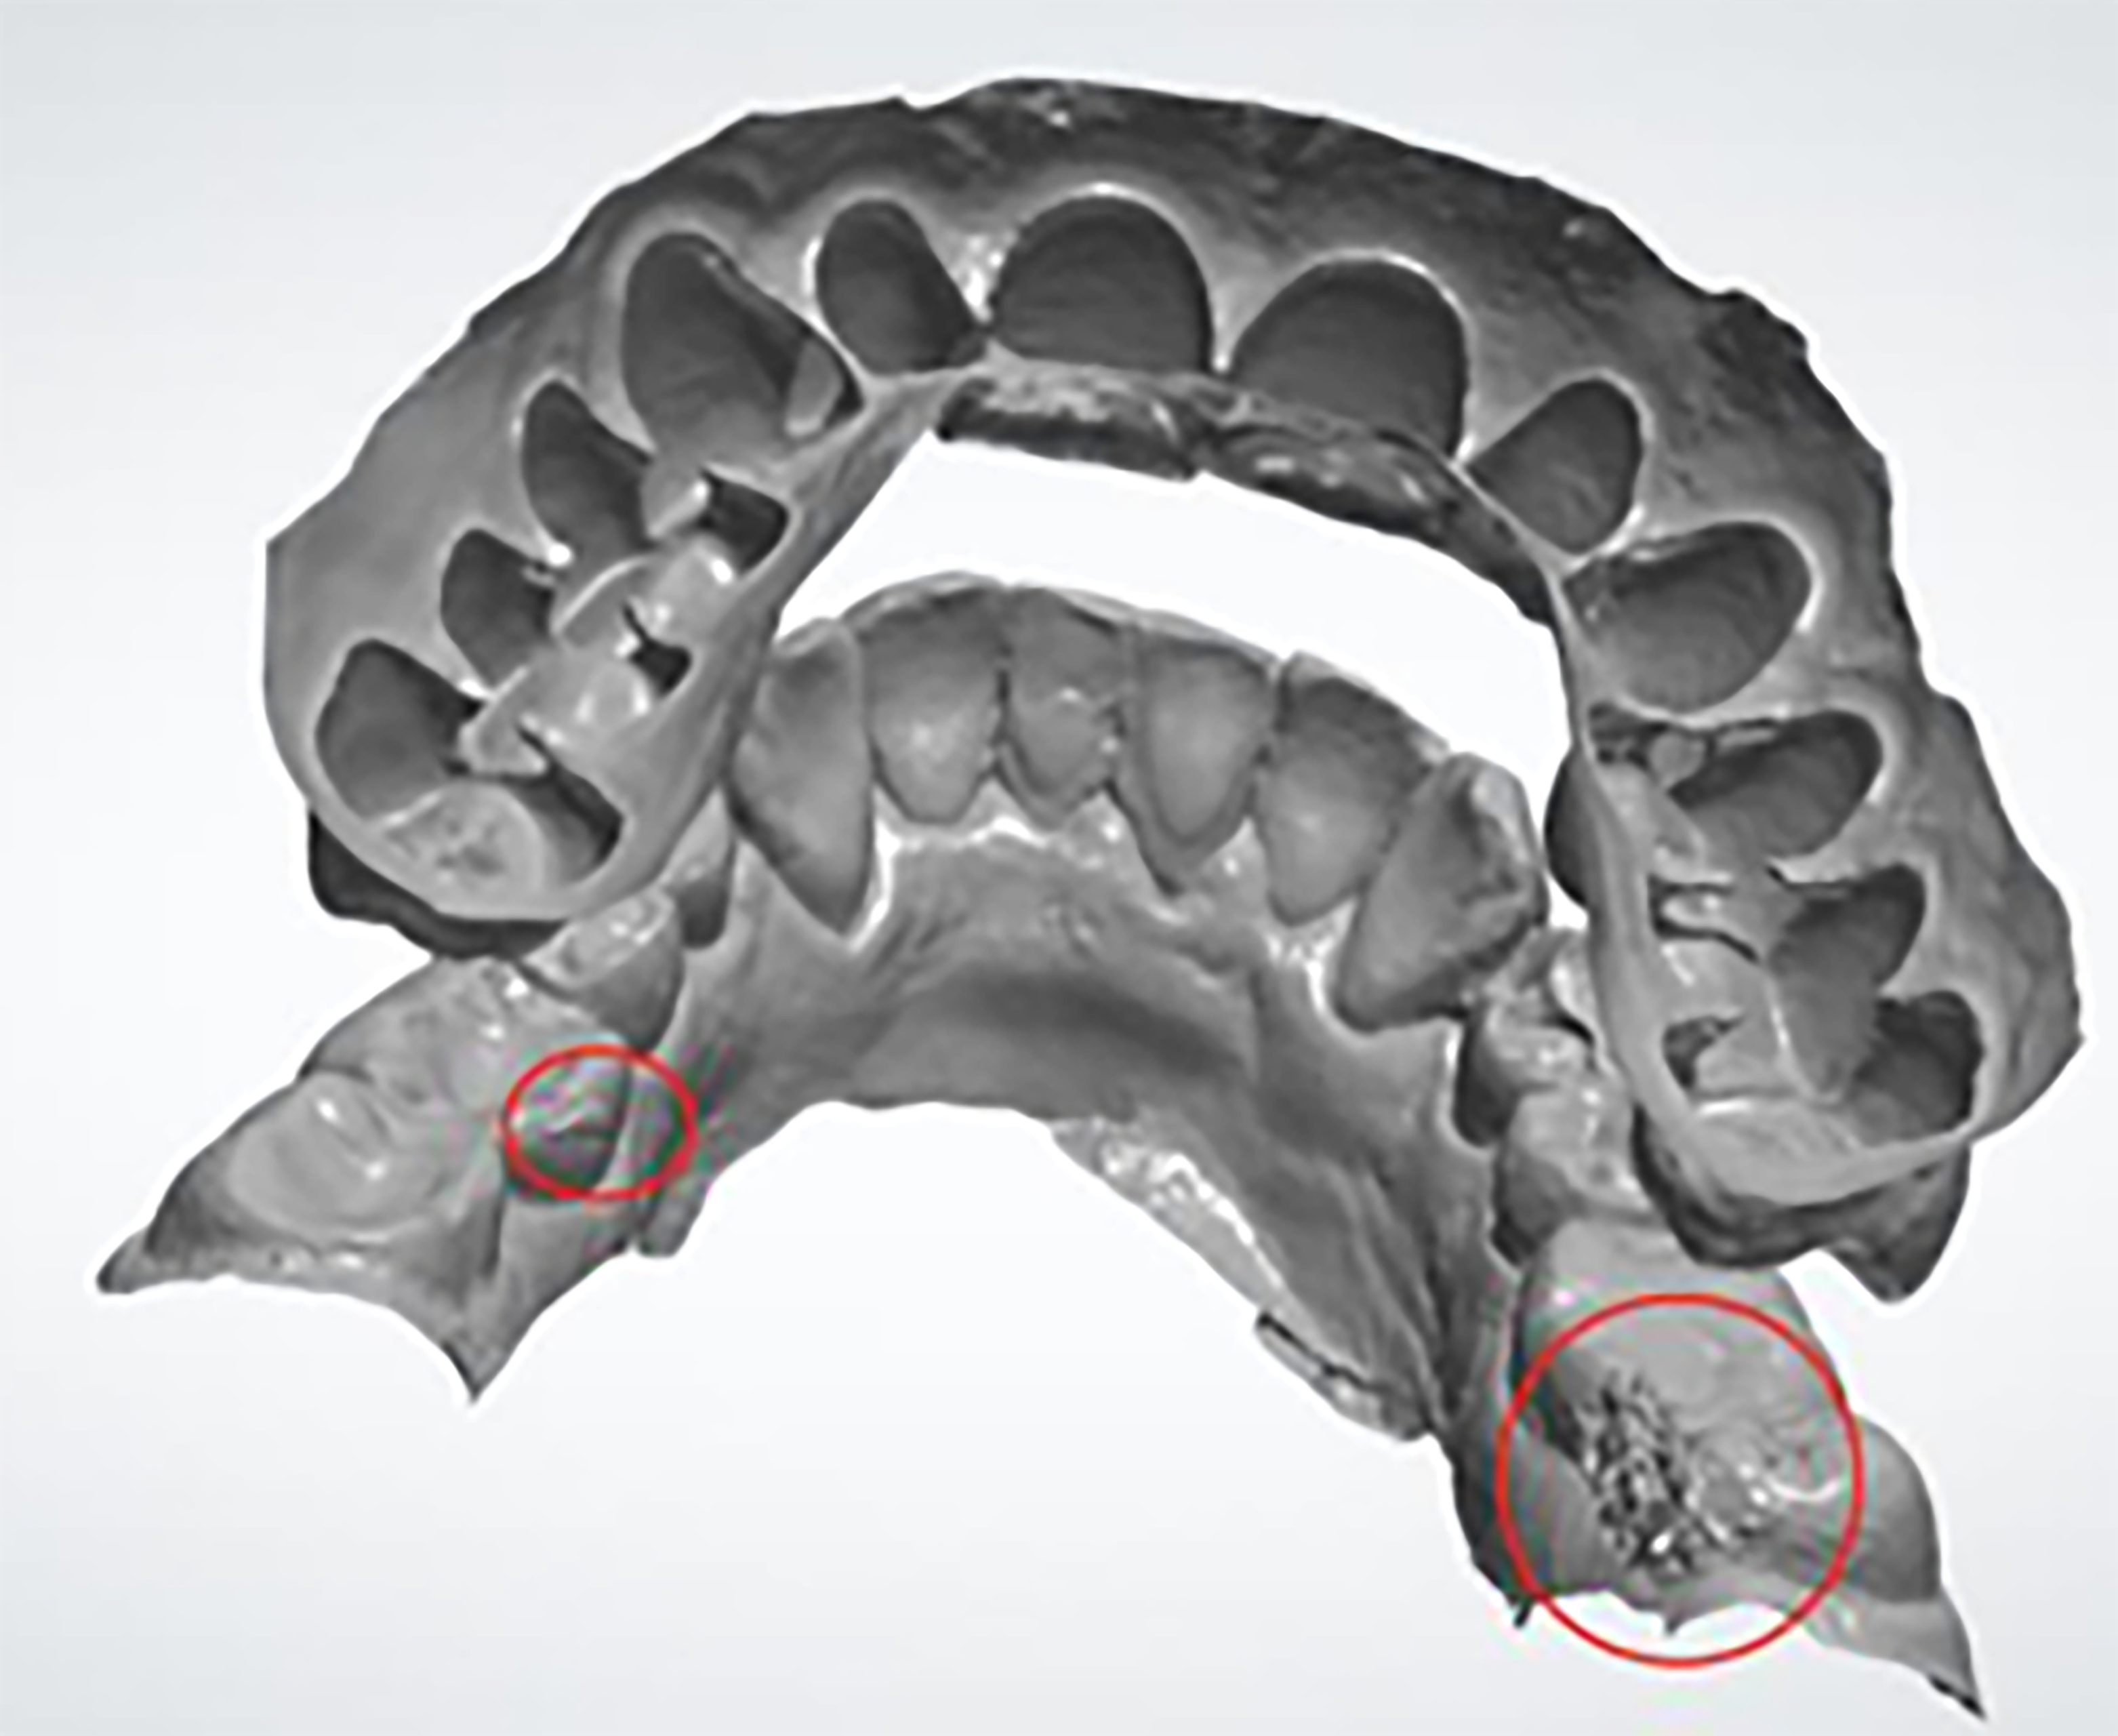
- To avoid rescanning and delays to the workflow, make sure all critical and required areas are scanned and captured. This will mitigate any delays in the treatment and discomfort to the patient. Here are some examples of problematic scans:
Debonding/Removing Brackets
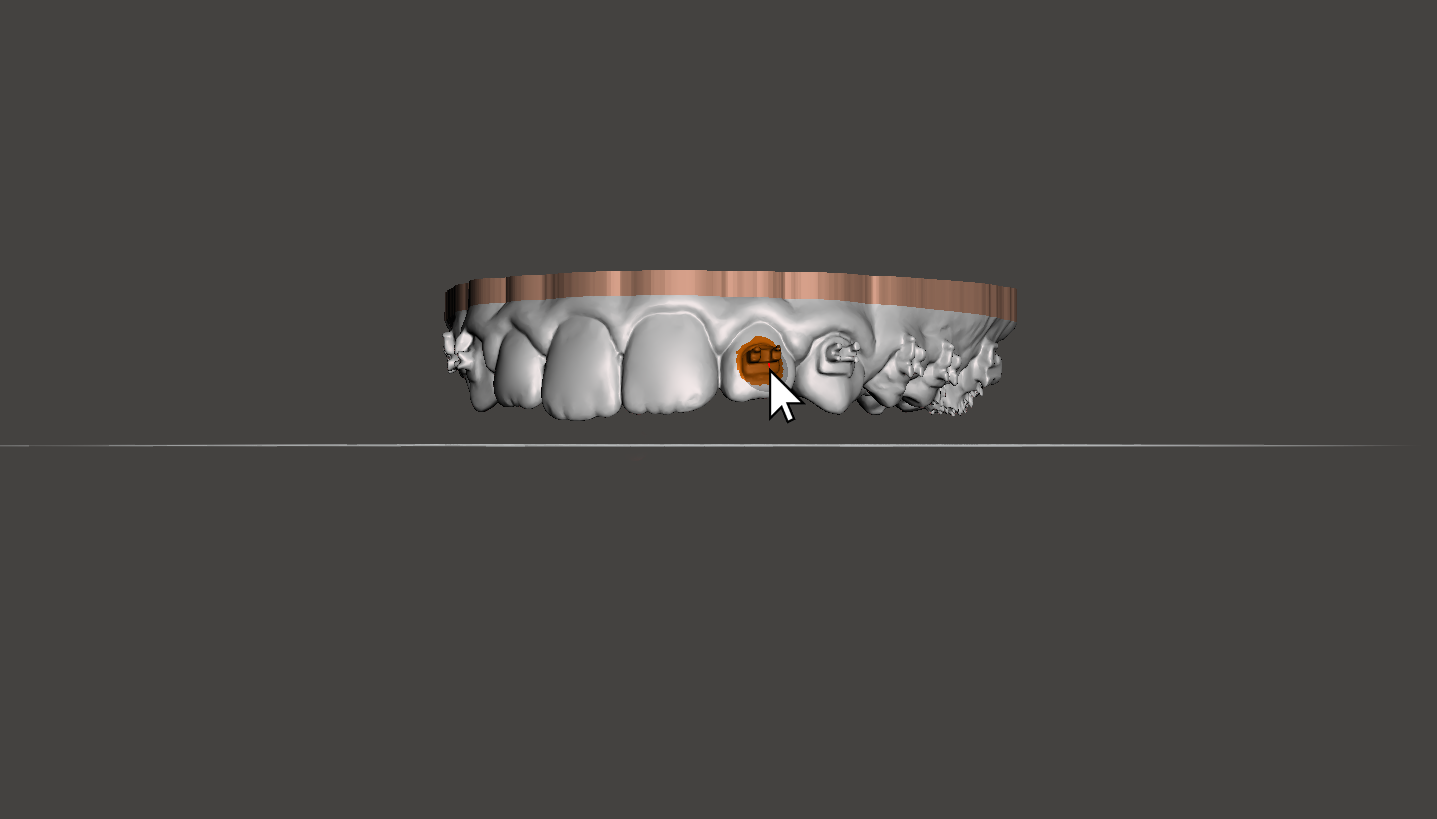
Debonding Brackets is the second step in this workflow. Debonding can be done either by using an outside provider, or it may be done in house by an Orthodontist.
Time required, if done in-office: 9-20 min.
2.1. Out of Office Debonding Service
SprintRay Cloud Design helps and provides with debonding, where you can upload patients scan files and your prescription. Click here for more information on SprintRay Cloud Design services. Once you receive the STL file of the designed model from SprintRay Cloud Design, you may go directly to step 3 (Printing Models).
2.2. In-Office Debonding Services
This is done in an orthodontic design software, or even Mesh Mixer. SprintRay Software allows you to choose the orthodontic design software that best meets your clinical needs. Below is the list showing our recommended options, however our software accepts any design file formatted in STL, which means you can use whichever software you are most comfortable with: U Lab, Blue Sky Bio, Exceed, Orchestrate 3D, 3shape, Easy Rx, MeshMixer.
The treatment design should only be done by a licensed orthodontist.

2.2.1. Proper Software Settings Required
SprintRay recommends a solid base. The base height should be about 3mm from the lowest gingival margin, however, the maximum height from base to the occlusal surface should not exceed more than 19mm. This will not only reduce printing time and cost, it will also provide a uniform thickness and strength in the aligner after thermoforming. Also, try to keep the central incisors’ axis perpendicular to the base. An embossed annotation on the model can help to keep track of your prints or treatment stages.
2.2.2. Export Designs as STL
Once the debonding is done, the designed model should be exported and saved in STL or OBJ format.
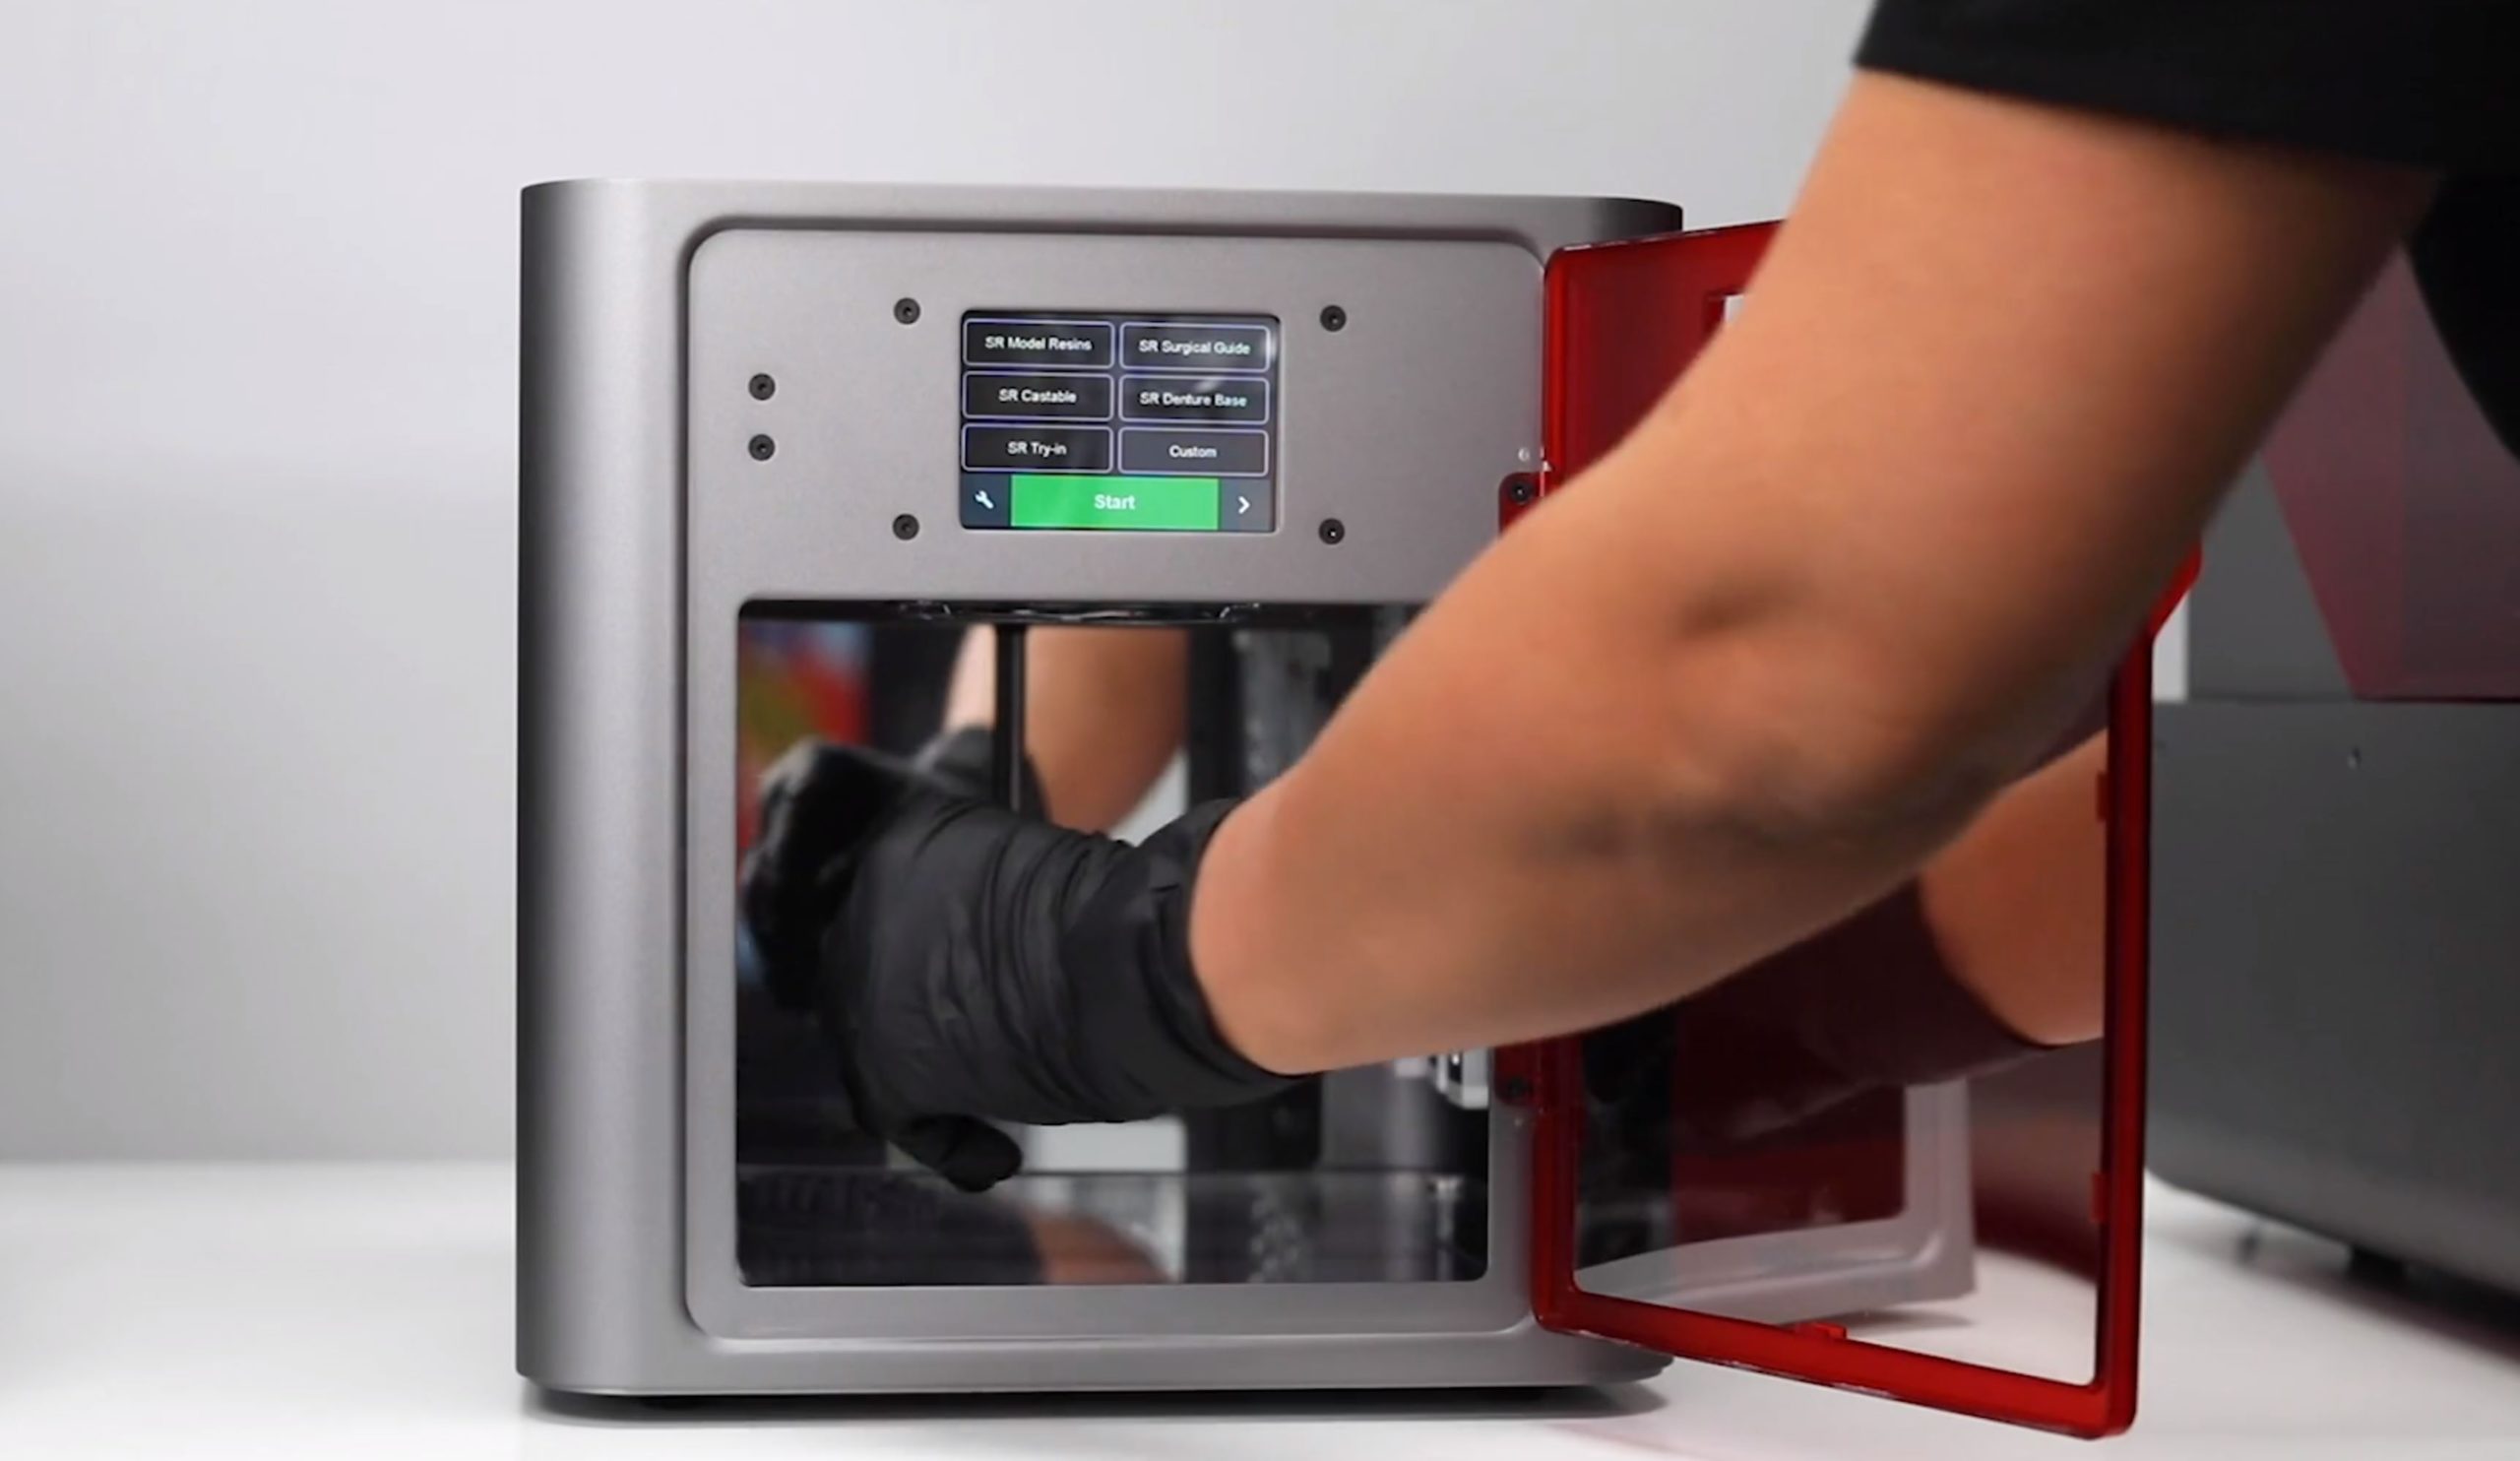
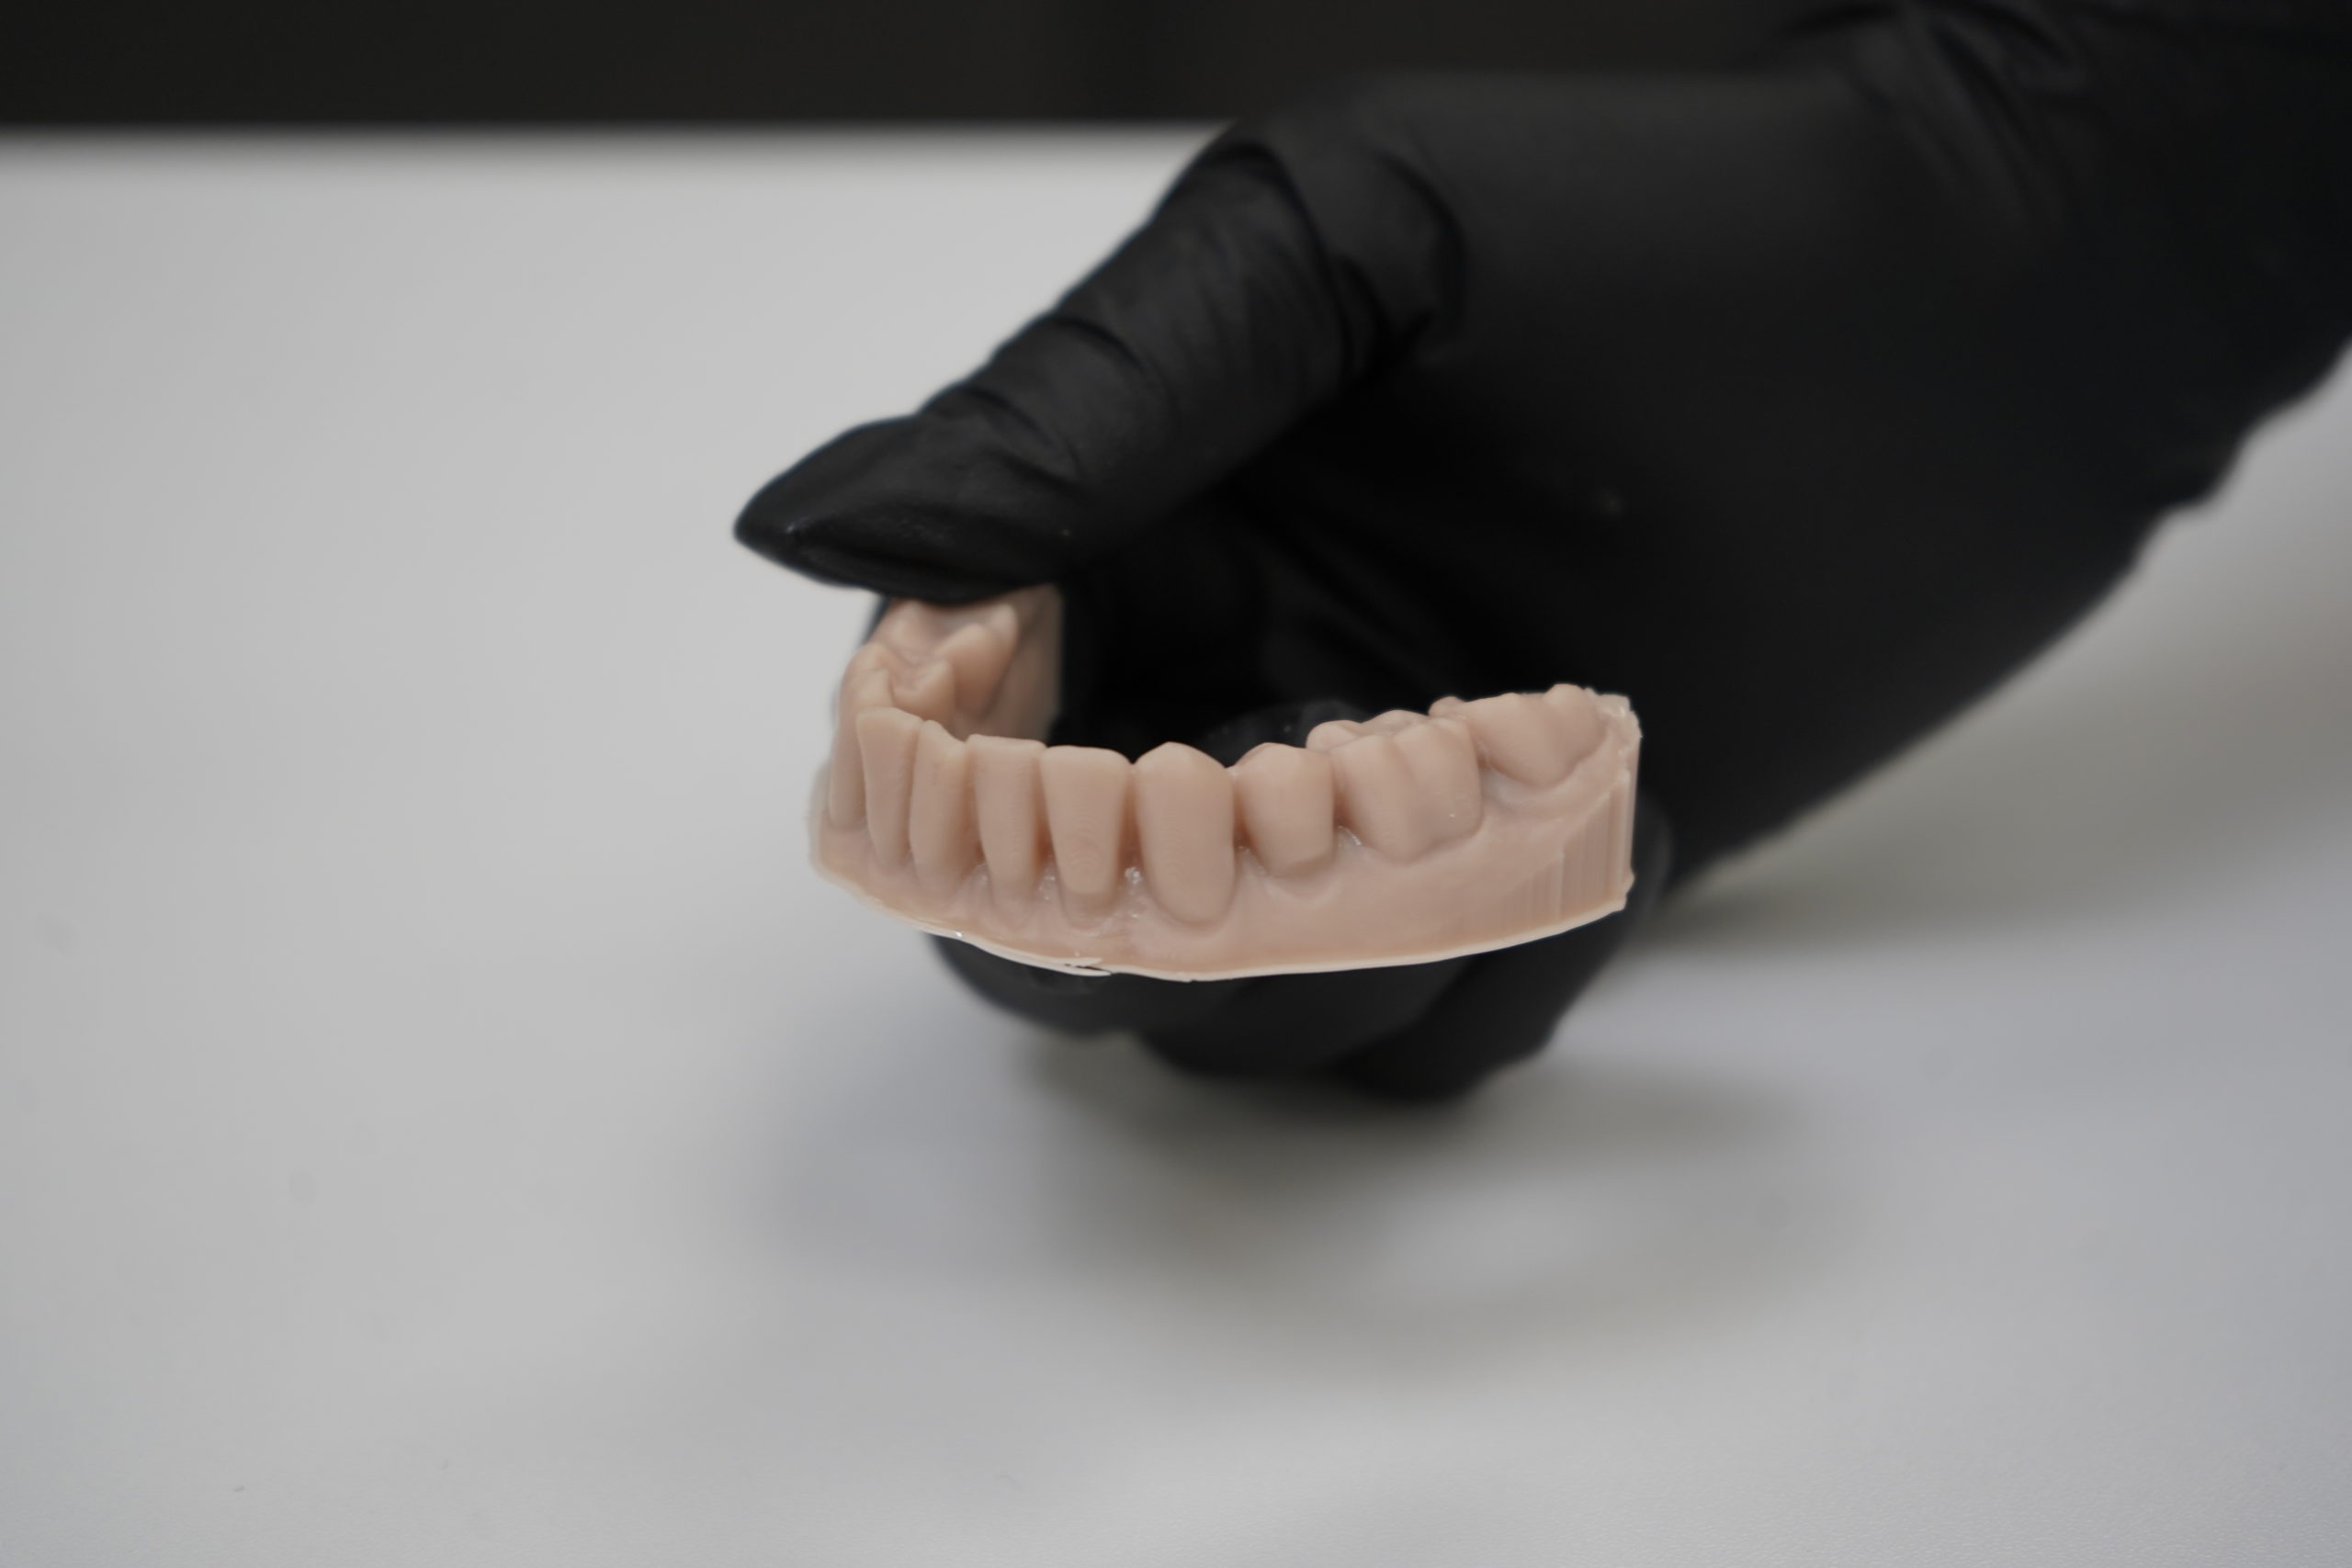
Printing Models
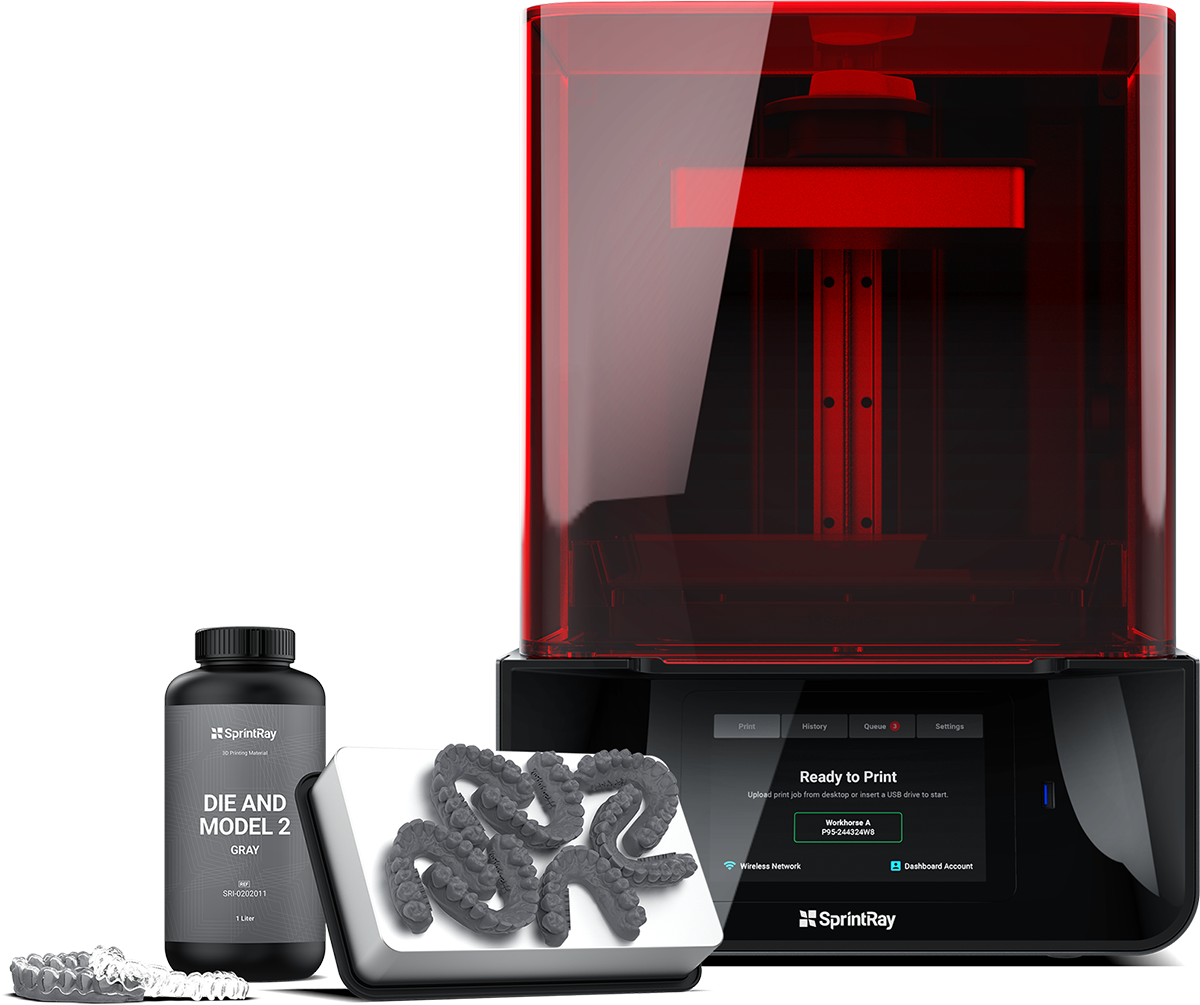
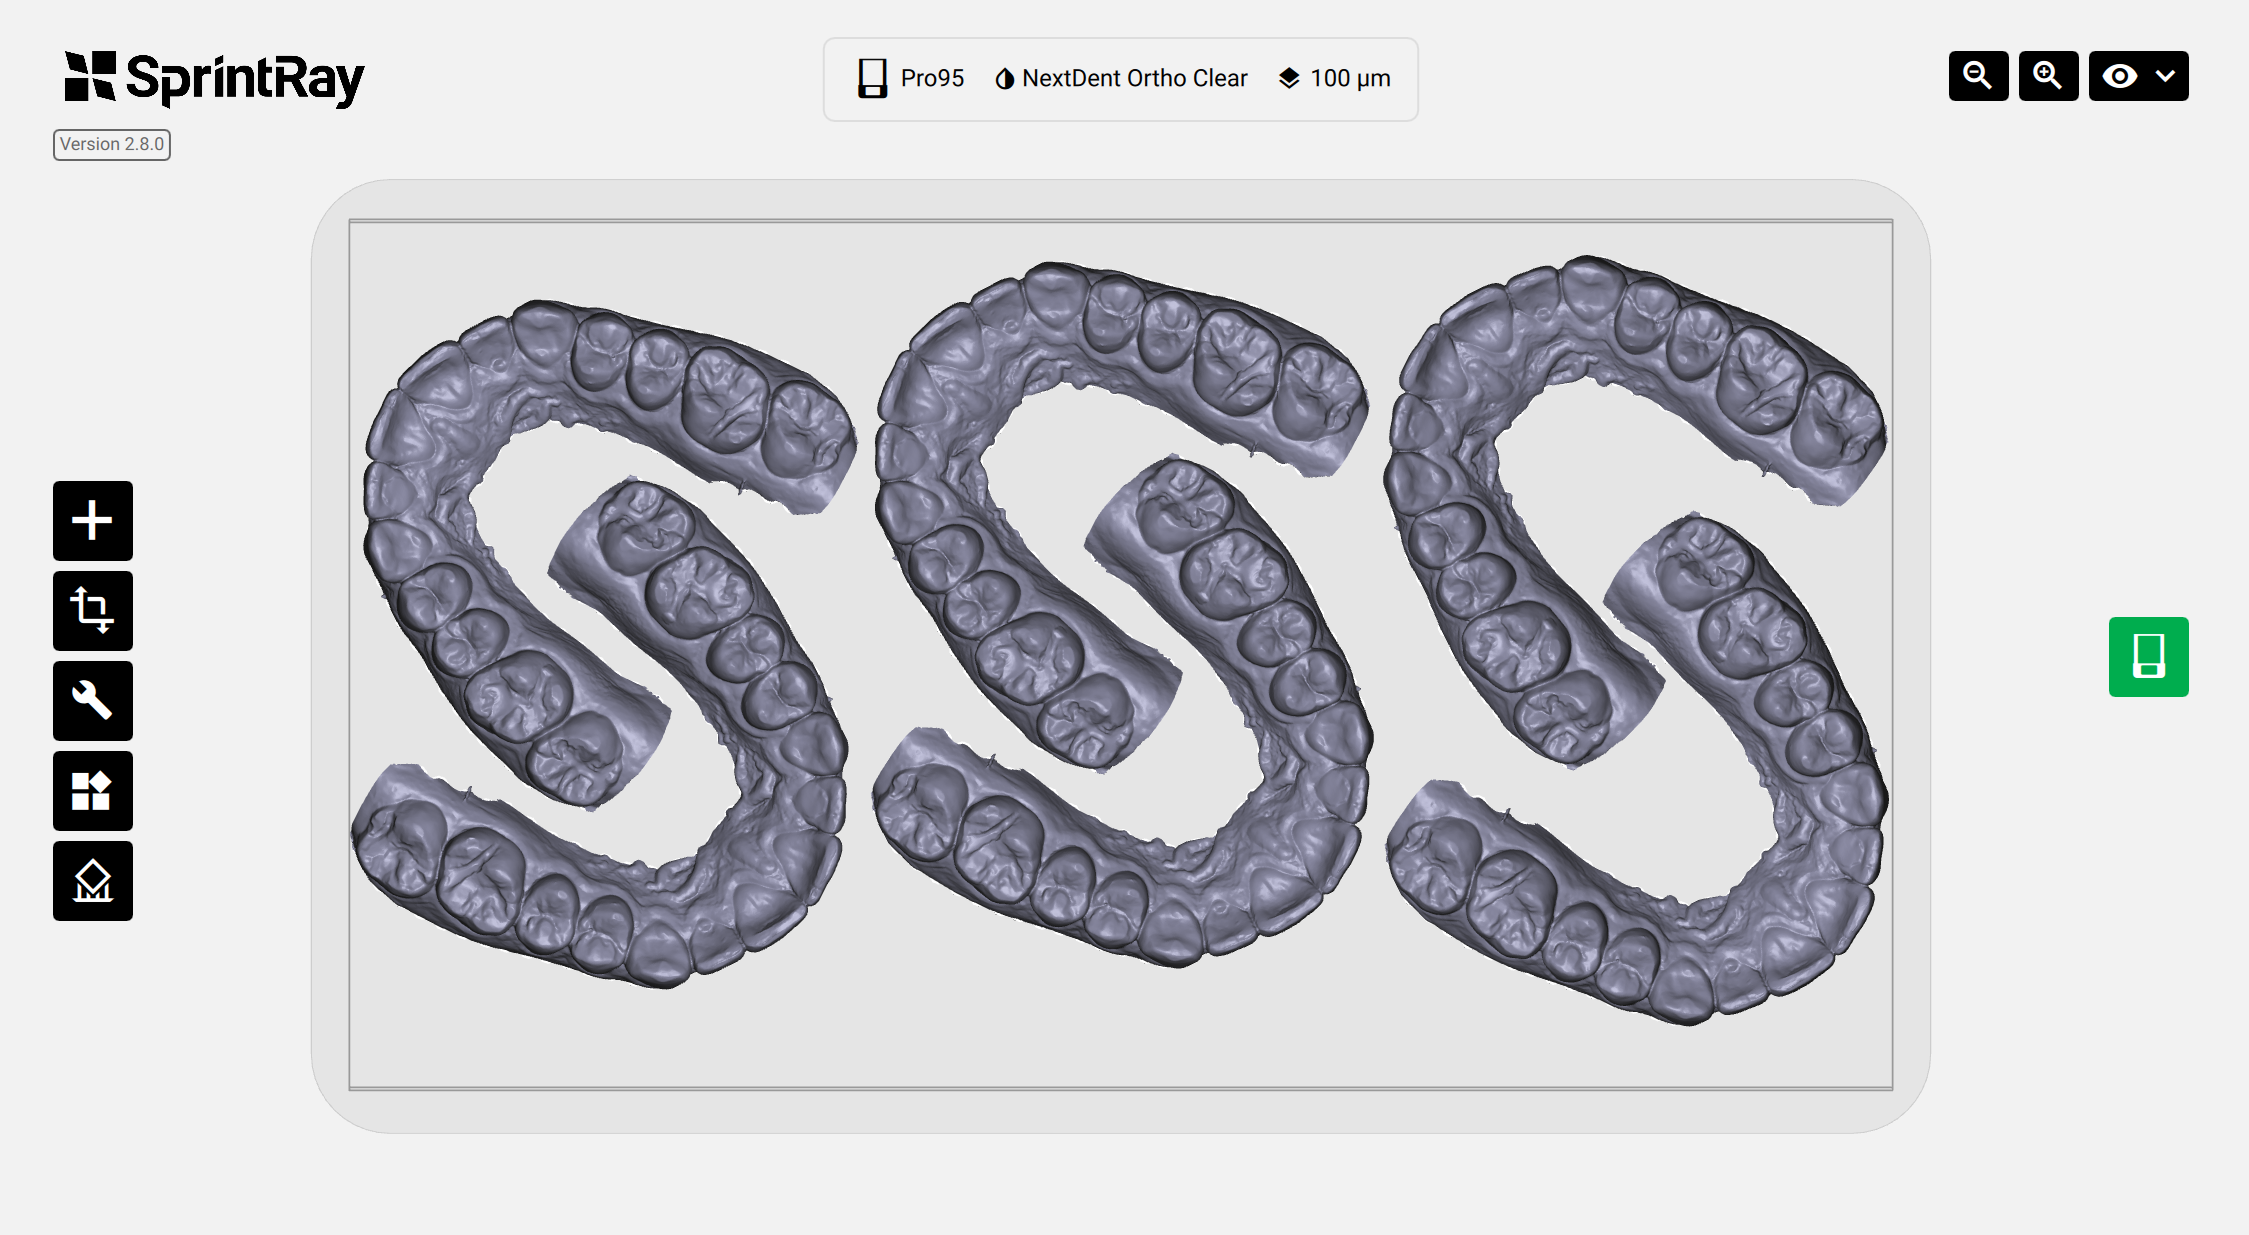
Printing the model is the third step in this workflow. Once the debonded-design model is ready, you may start printing it using RayWare software and SprintRay Pro Printer to get ready for retainer fabrication. Below, we will show you steps involved in printing the model.
Time required: 60-80 min.
3.1. Initial Preparation
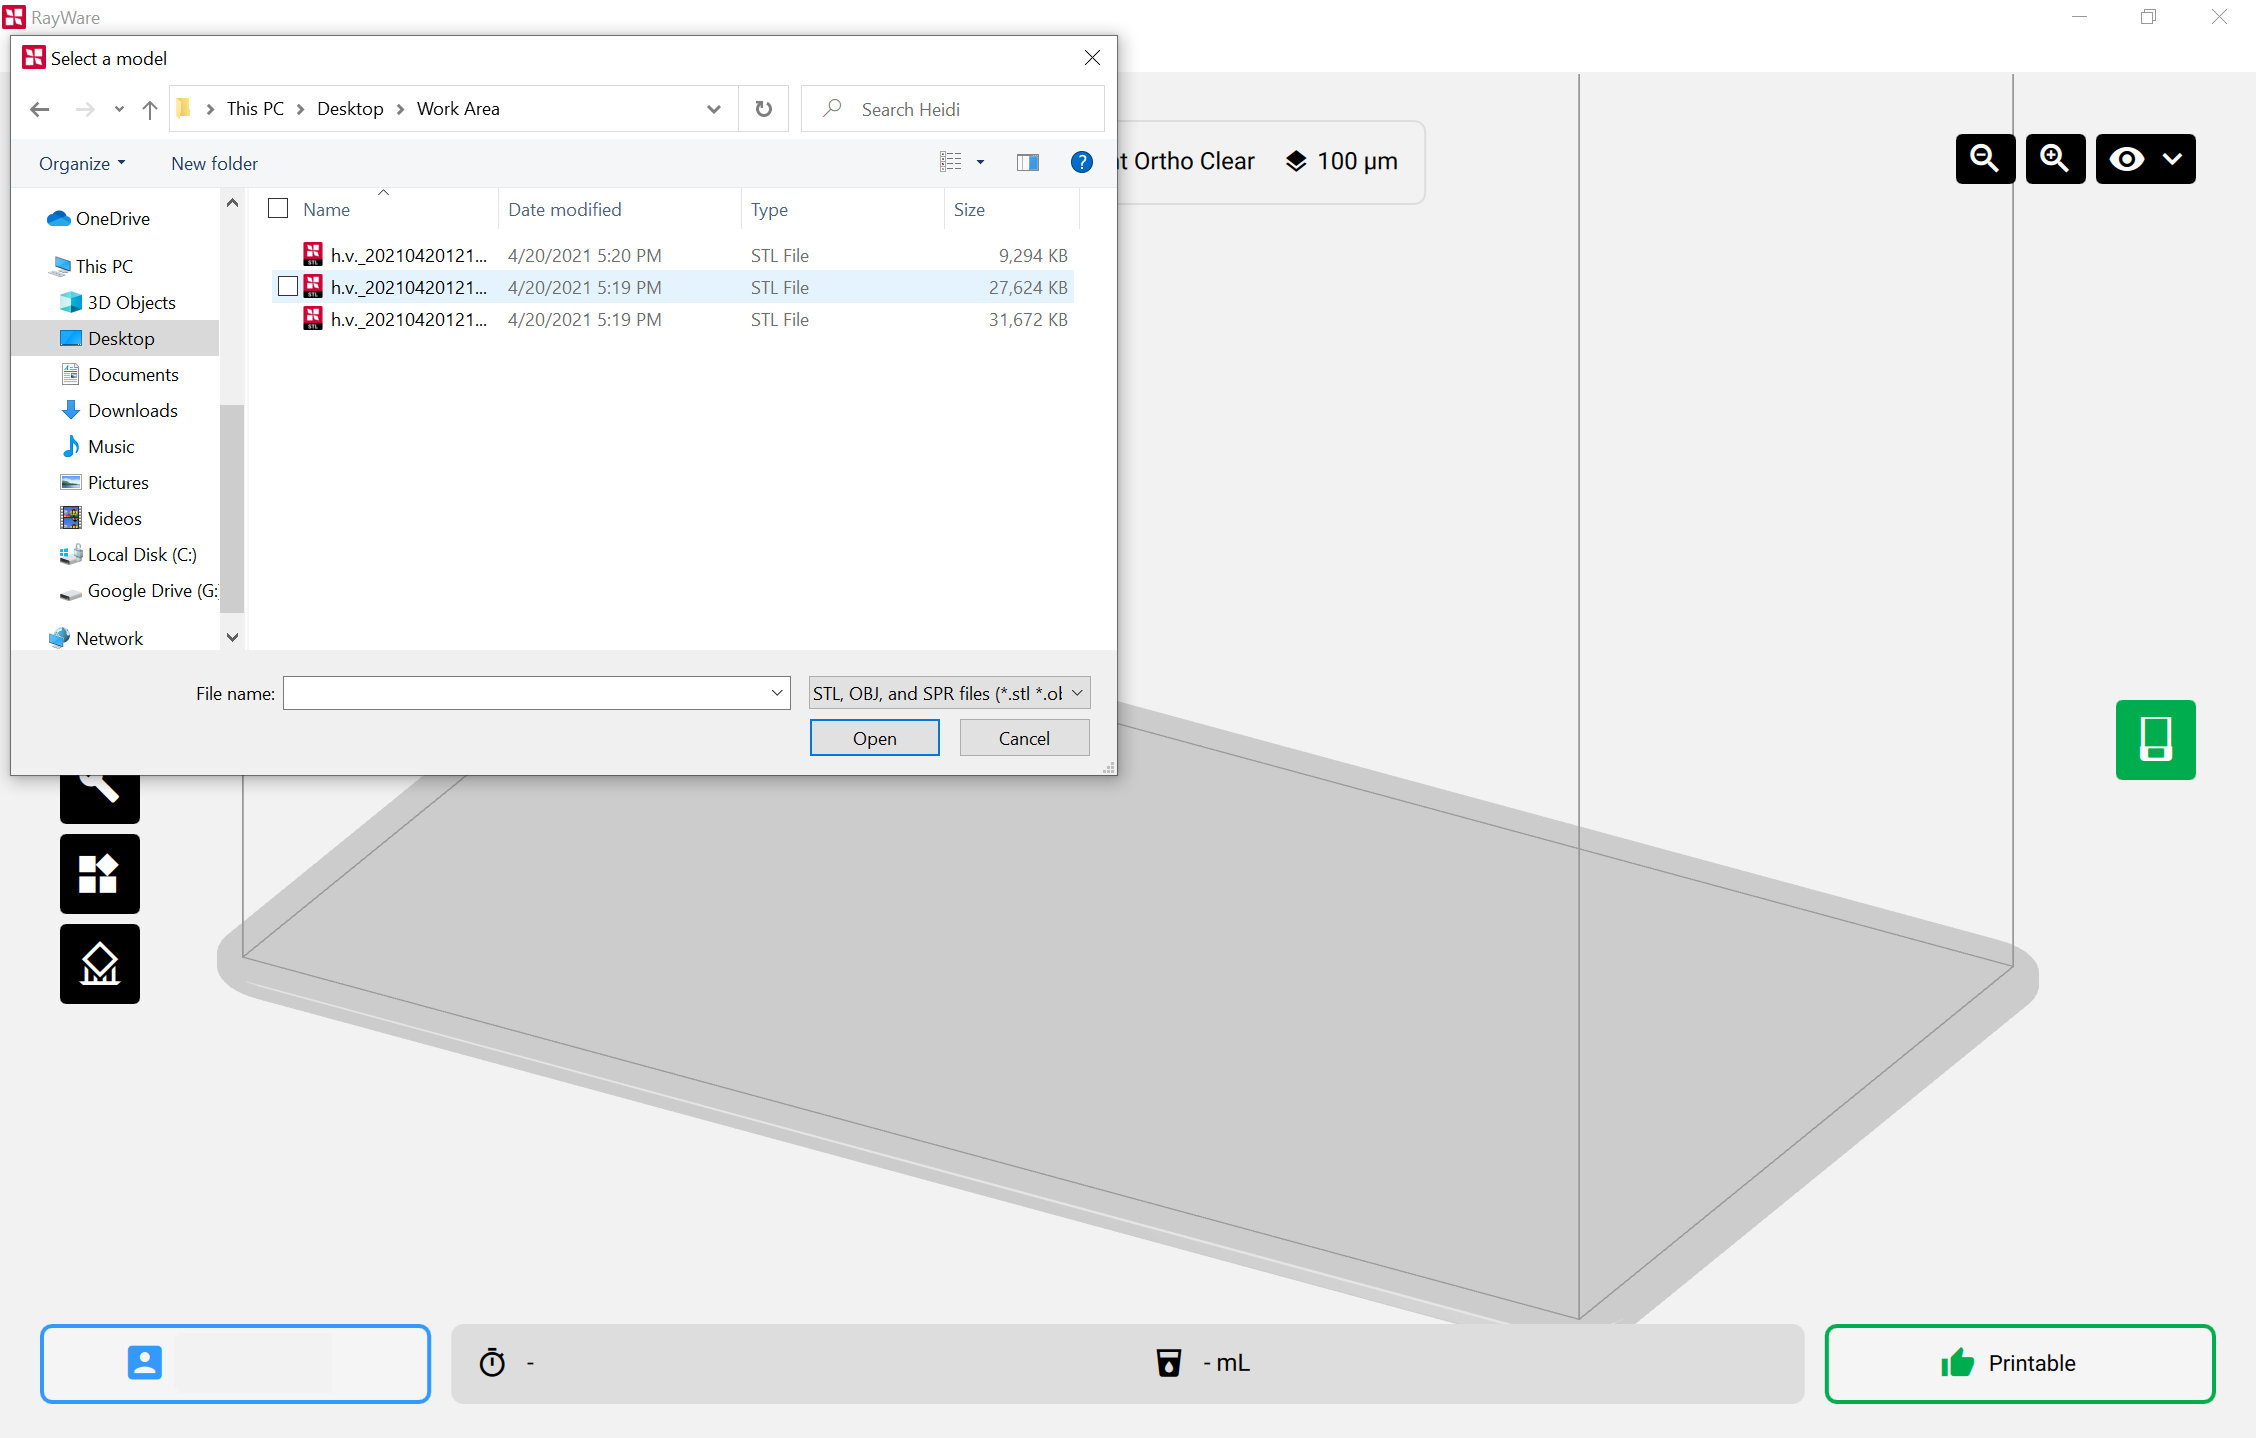
To prepare the models for printing, import them to RayWare in STL or OBJ formats.
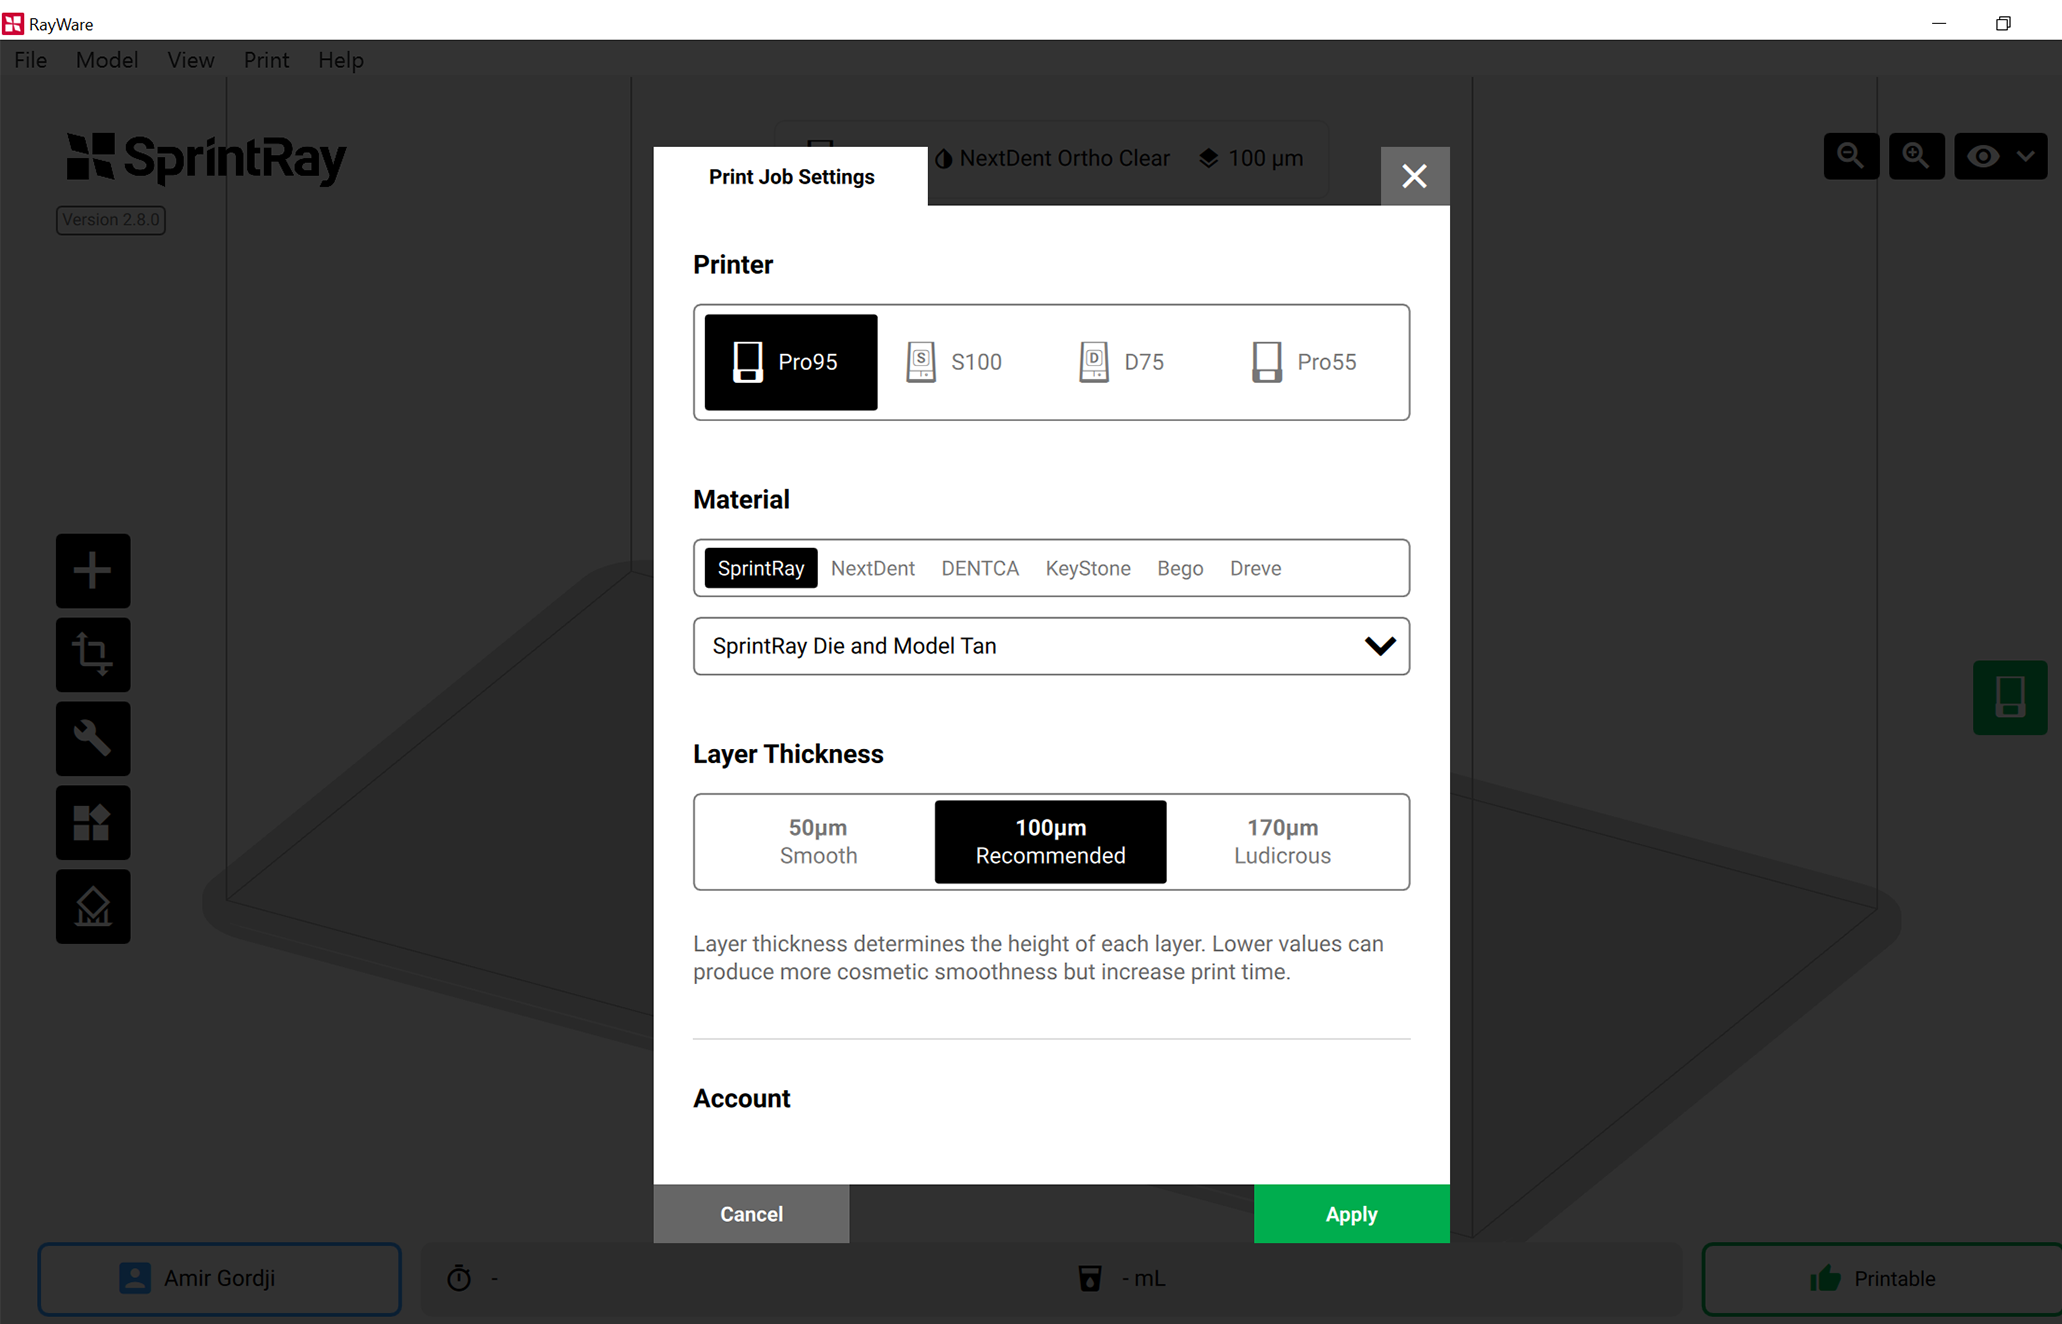
3.2. Print Settings and Configuration
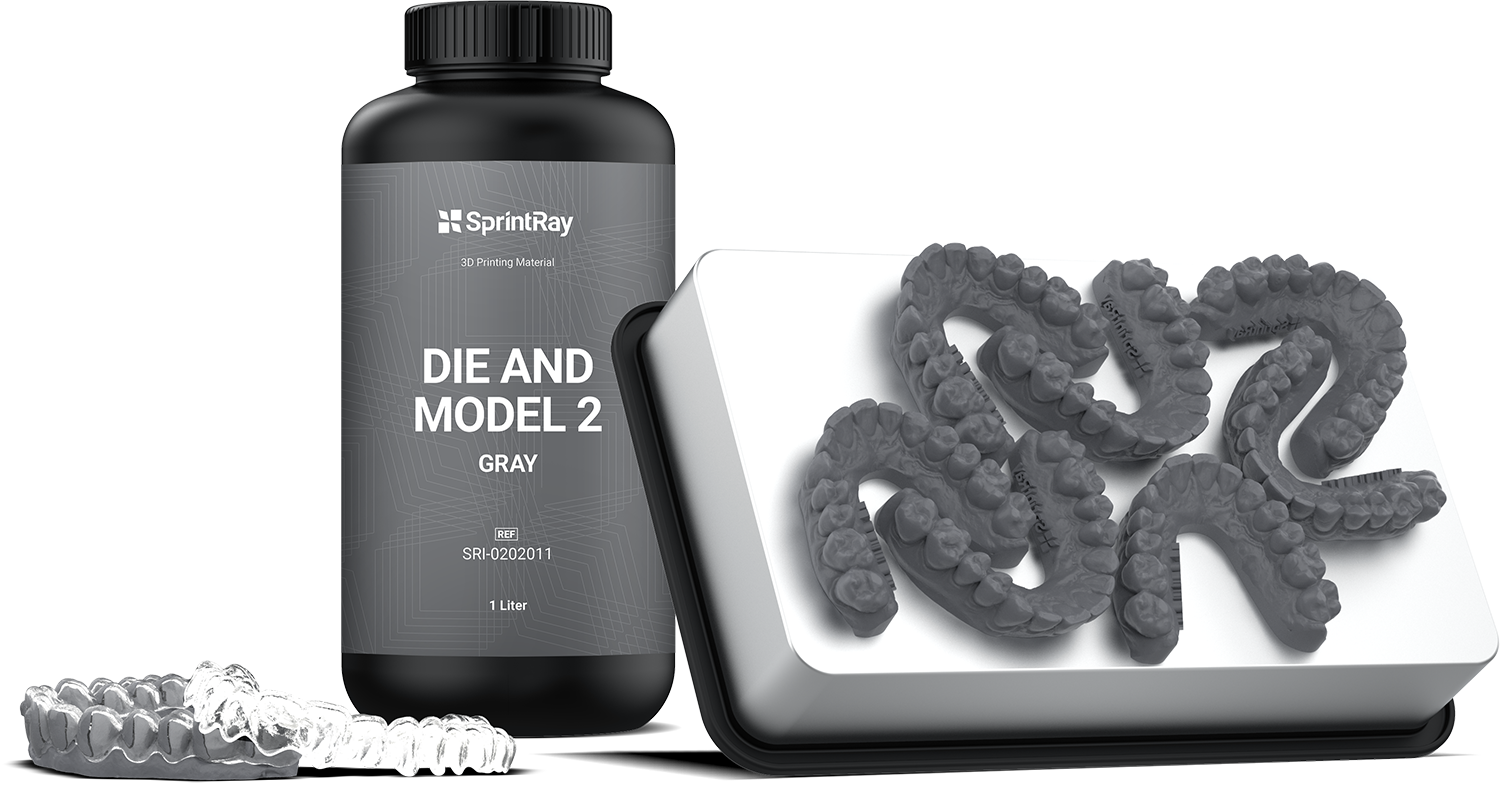
The recommended resin for printing models is Die & Model 2 resin (Tan or Gray), and the recommended thickness is 100 microns. This thickness provides great accuracy for aligner fabrication. There is a 50-micron option that will provide a slightly better finish; however, it increases the print time dramatically.

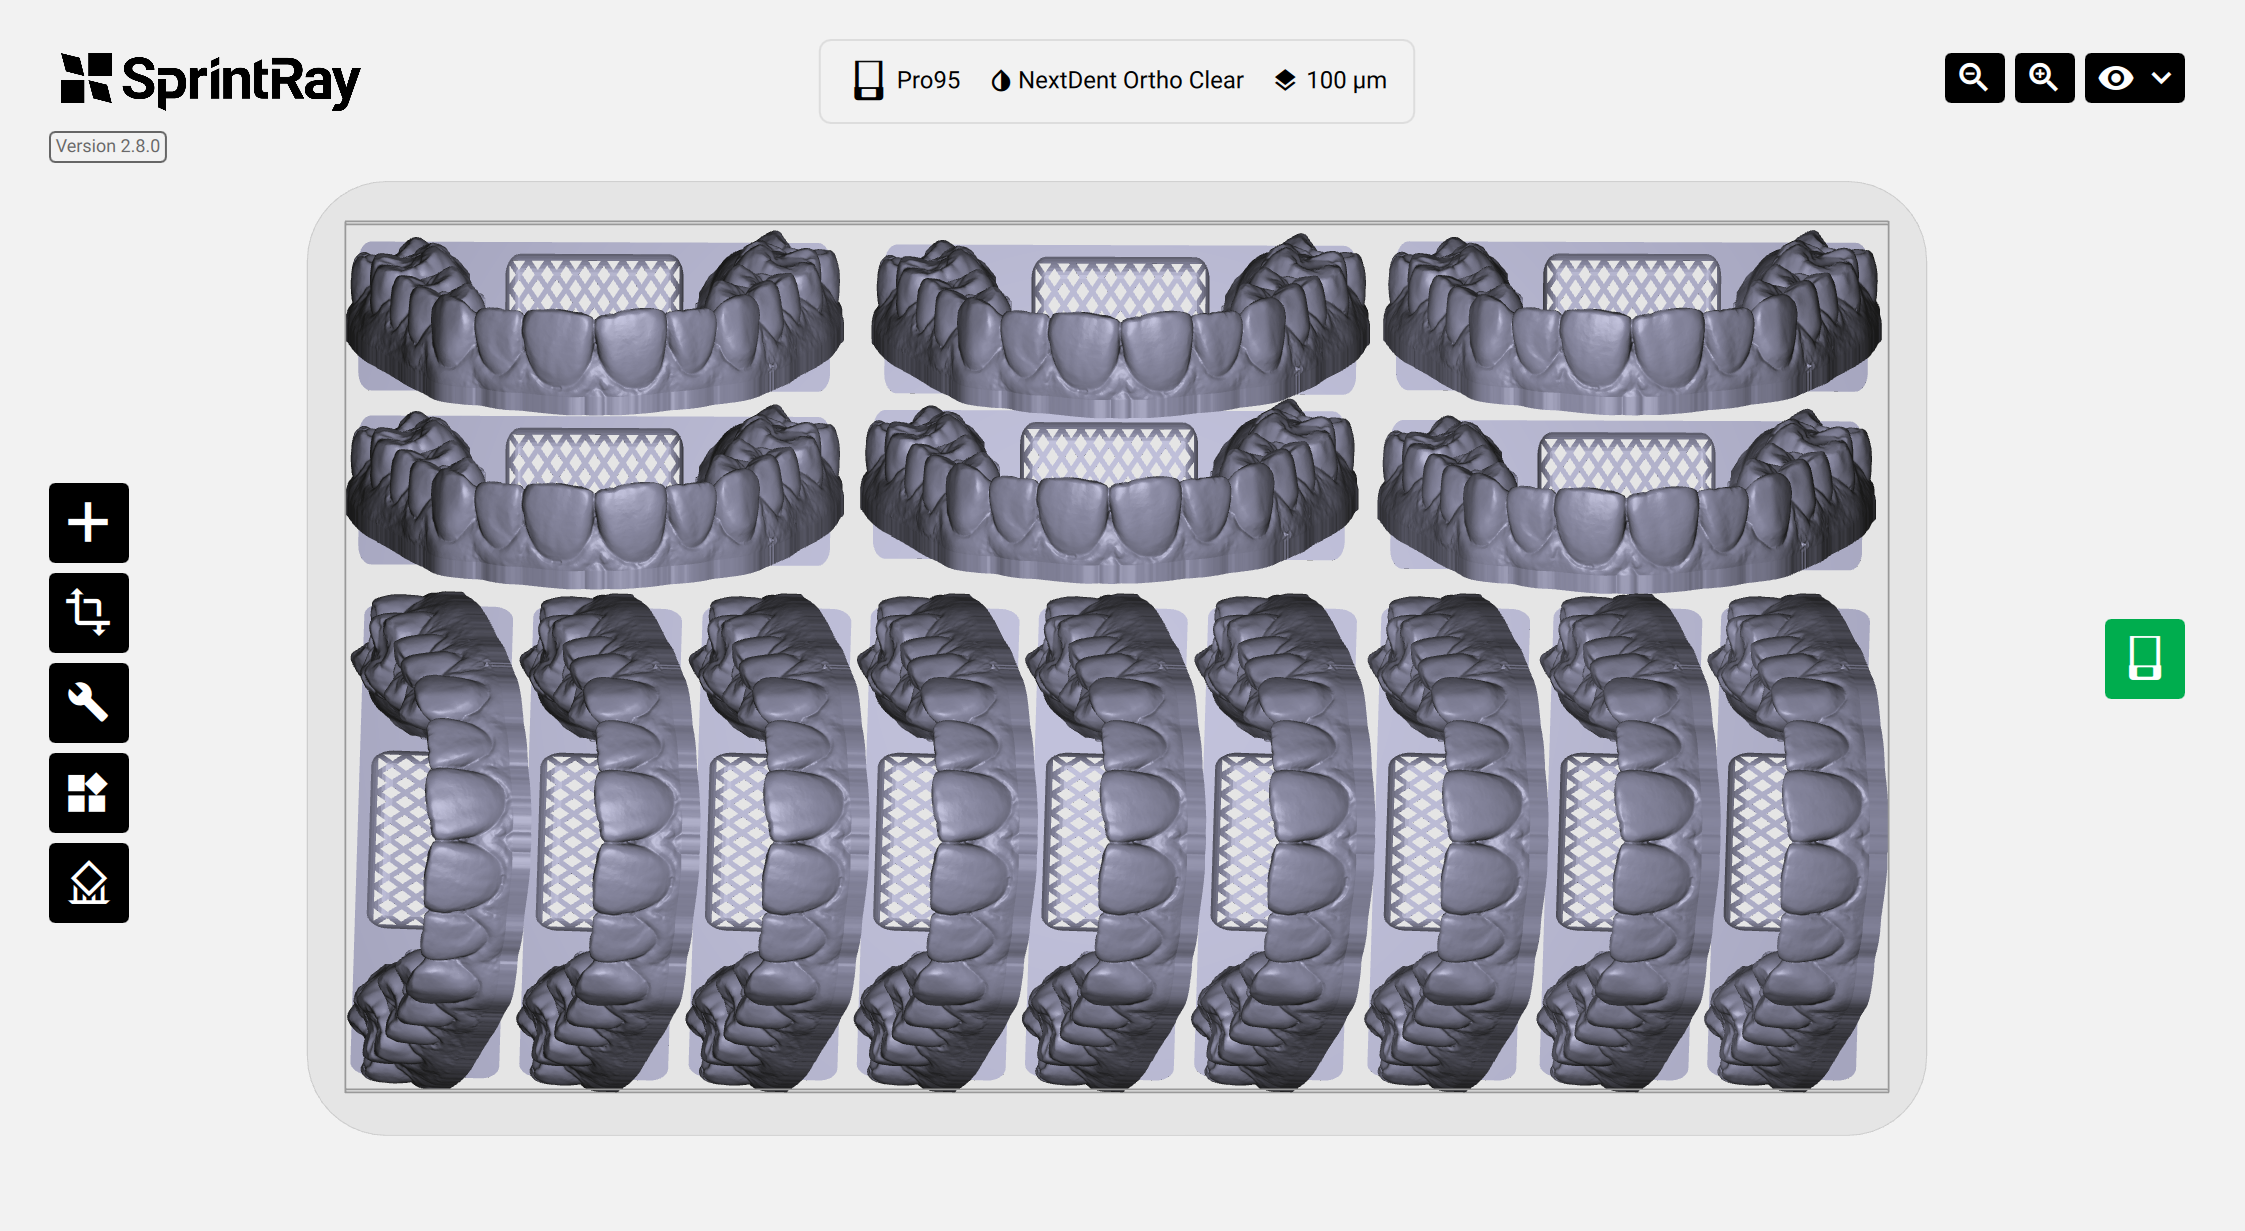
3.3. Print Orientation
The print orientation/angulation is an important printing factor. We recommend printing the models horizontally (flat on print-platform) to get the best and the most accurate result; however, some dentists prefer to have them printed vertically to accommodate the maximum number of models on a single print platform.
3.4. Choose Tightness
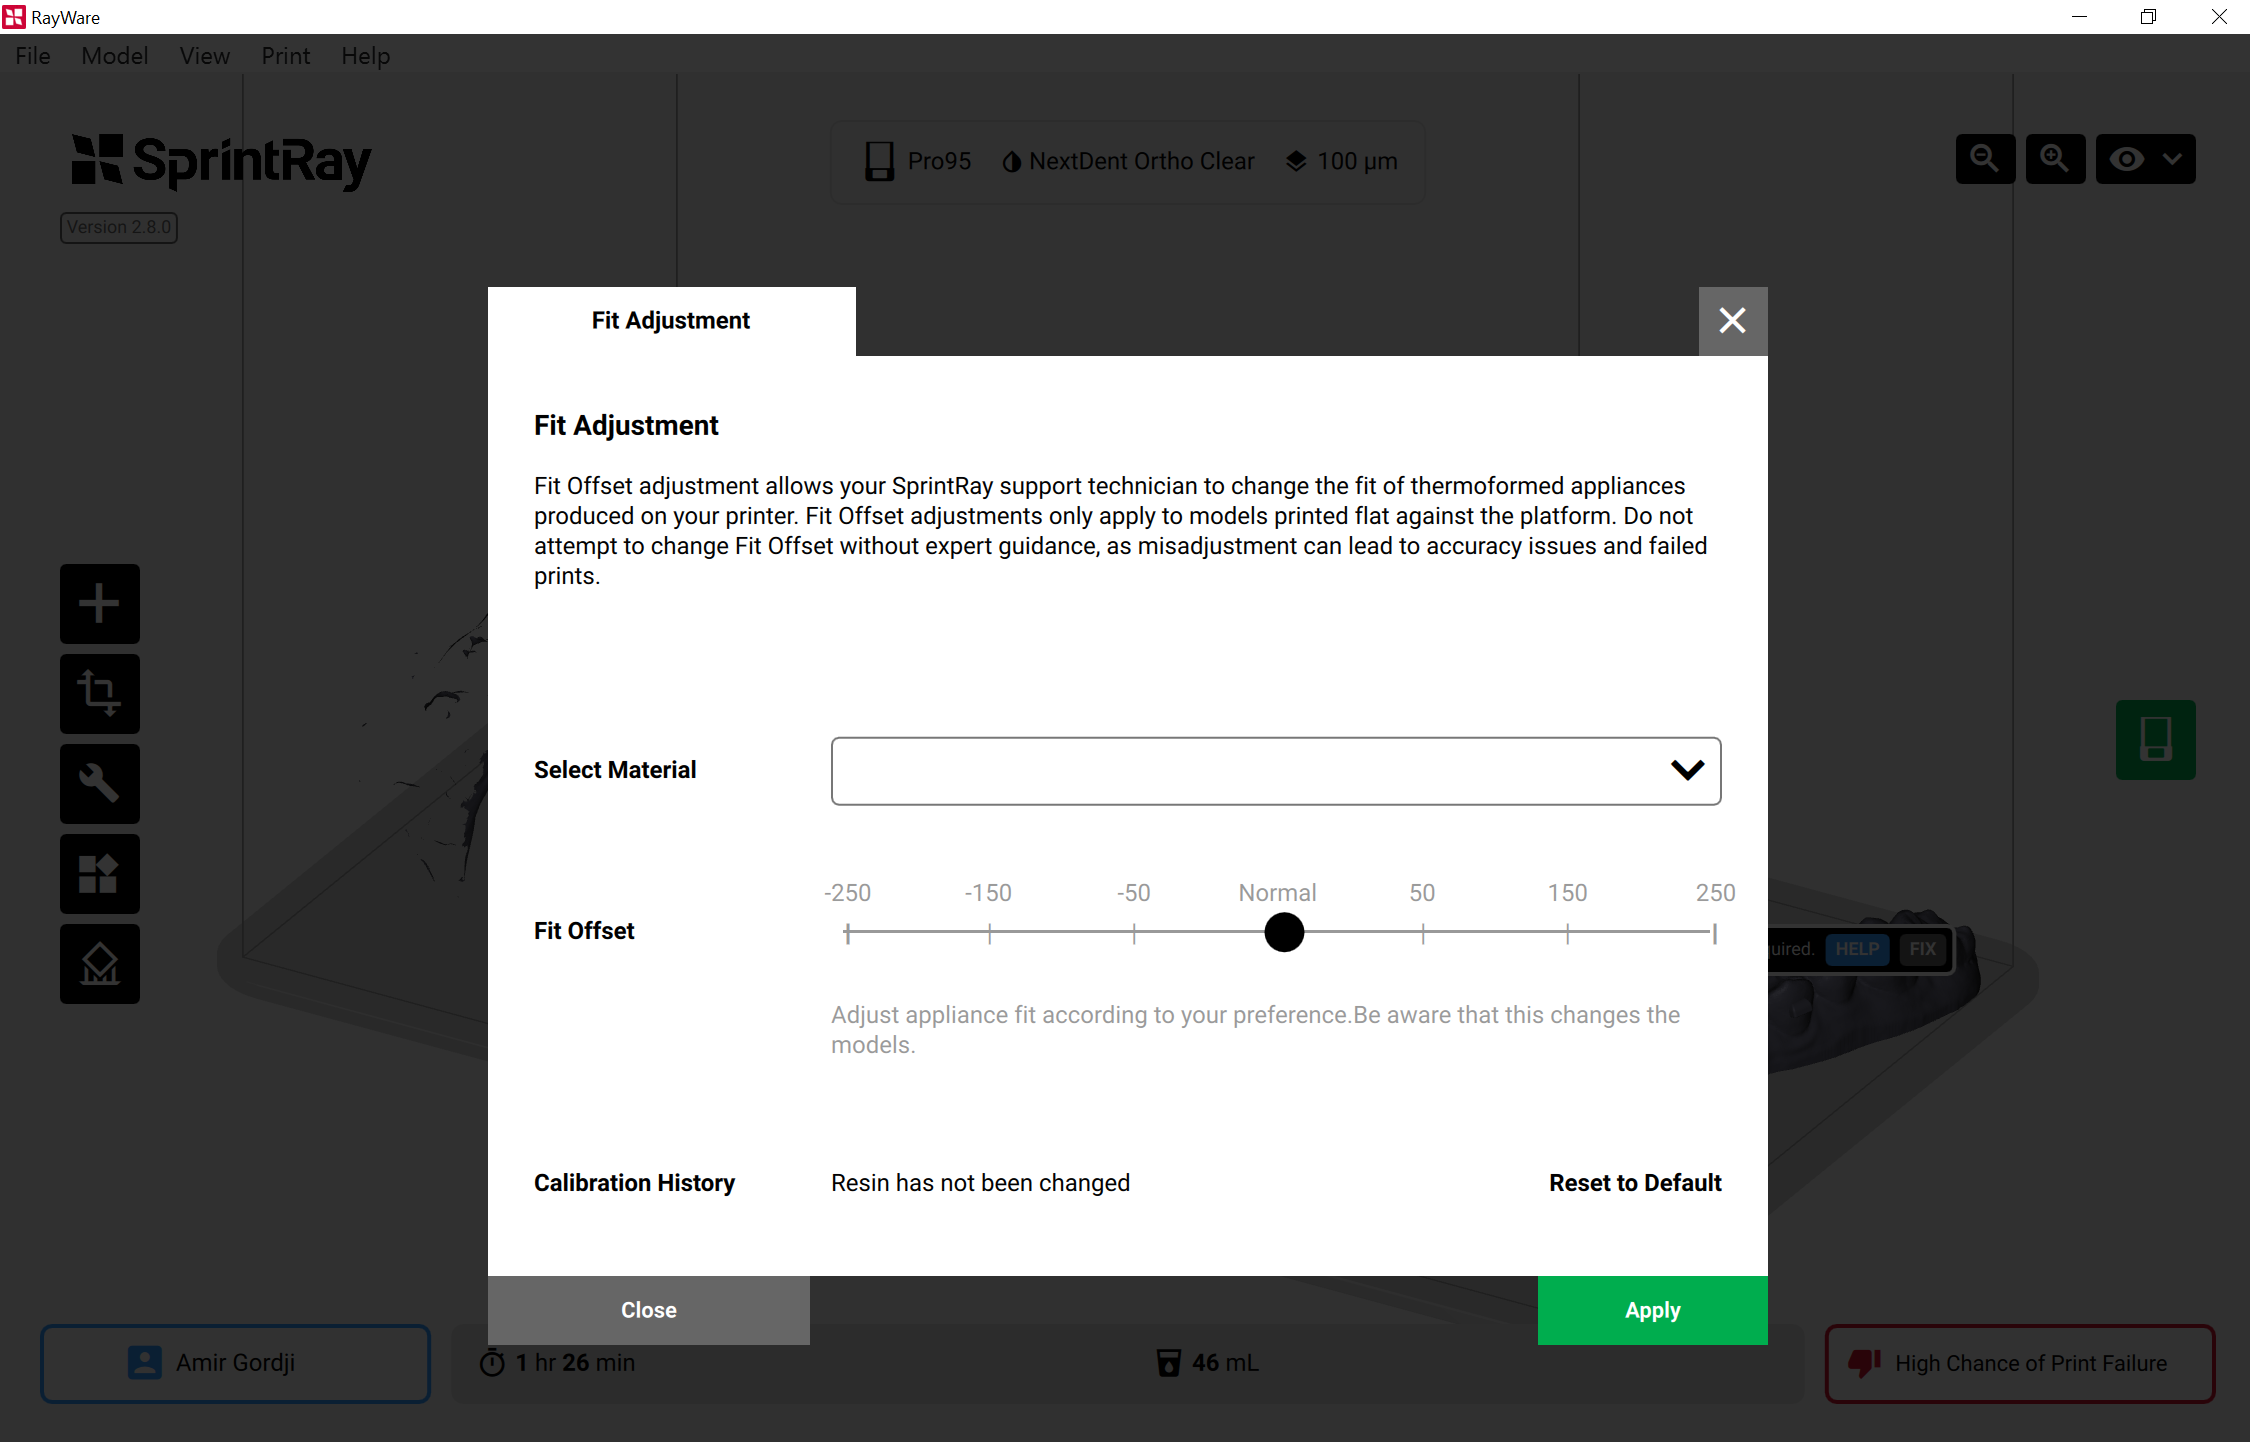
This is an optional step. You may adjust the fitting by making the fit tighter (go negative) or looser (go positive) on “Appliance Fit Adjustment” menu (On RayWare; go to “Print” tab, and then “Fine Tuning” option, to choose “Appliance Fit Adjustment” menu).

3.5. Prepare 3D printer and set print settings
Once settings are complete, check the resin level in the resin tank. It should stand between the minimum and maximum lines. If there is leftover resin in the tank from the previous print, use the provided resin wiper to stir the resin before printing. This ensures that the resin is properly mixed and clean. Make sure the resin tank is fully secured in place.
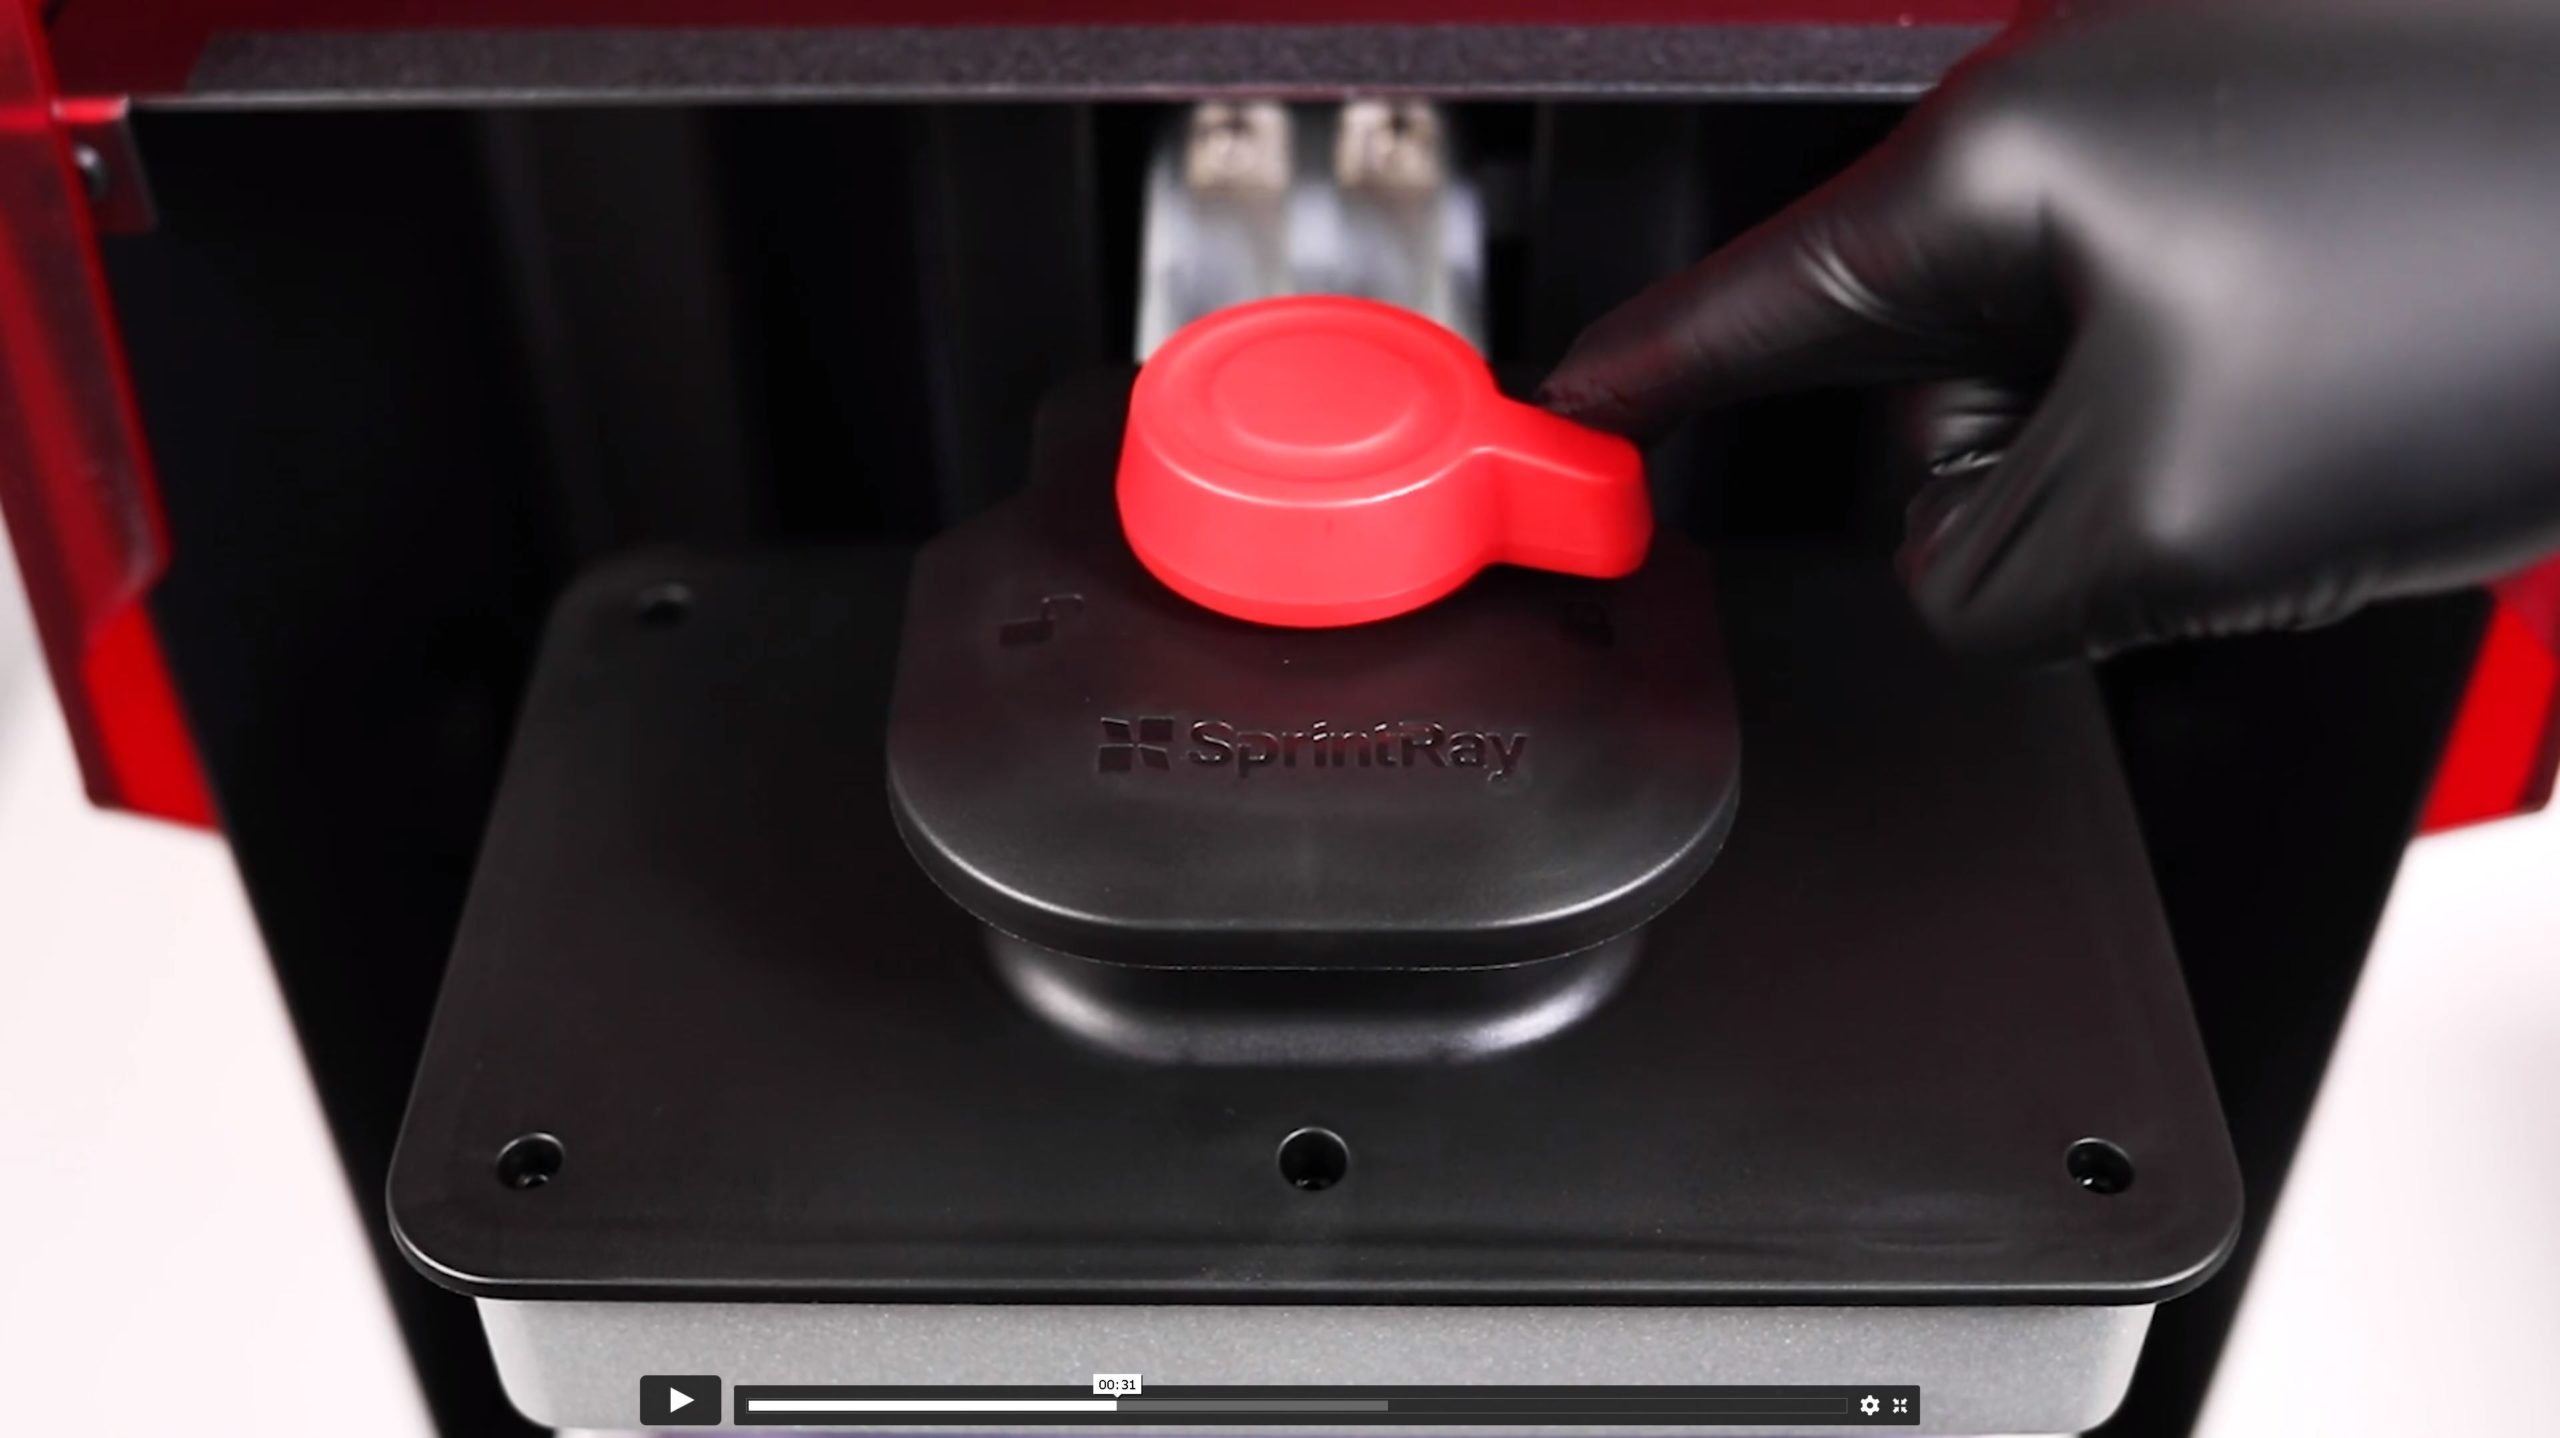
3.5.1. Platform check
Make sure the print platform is clean, dry, and securely placed, and locked on the platform-arm.
3.5.2. Print Button
In RayWare, click on the “Print” button to send the design to the printer for printing or place it in the queue to print later.
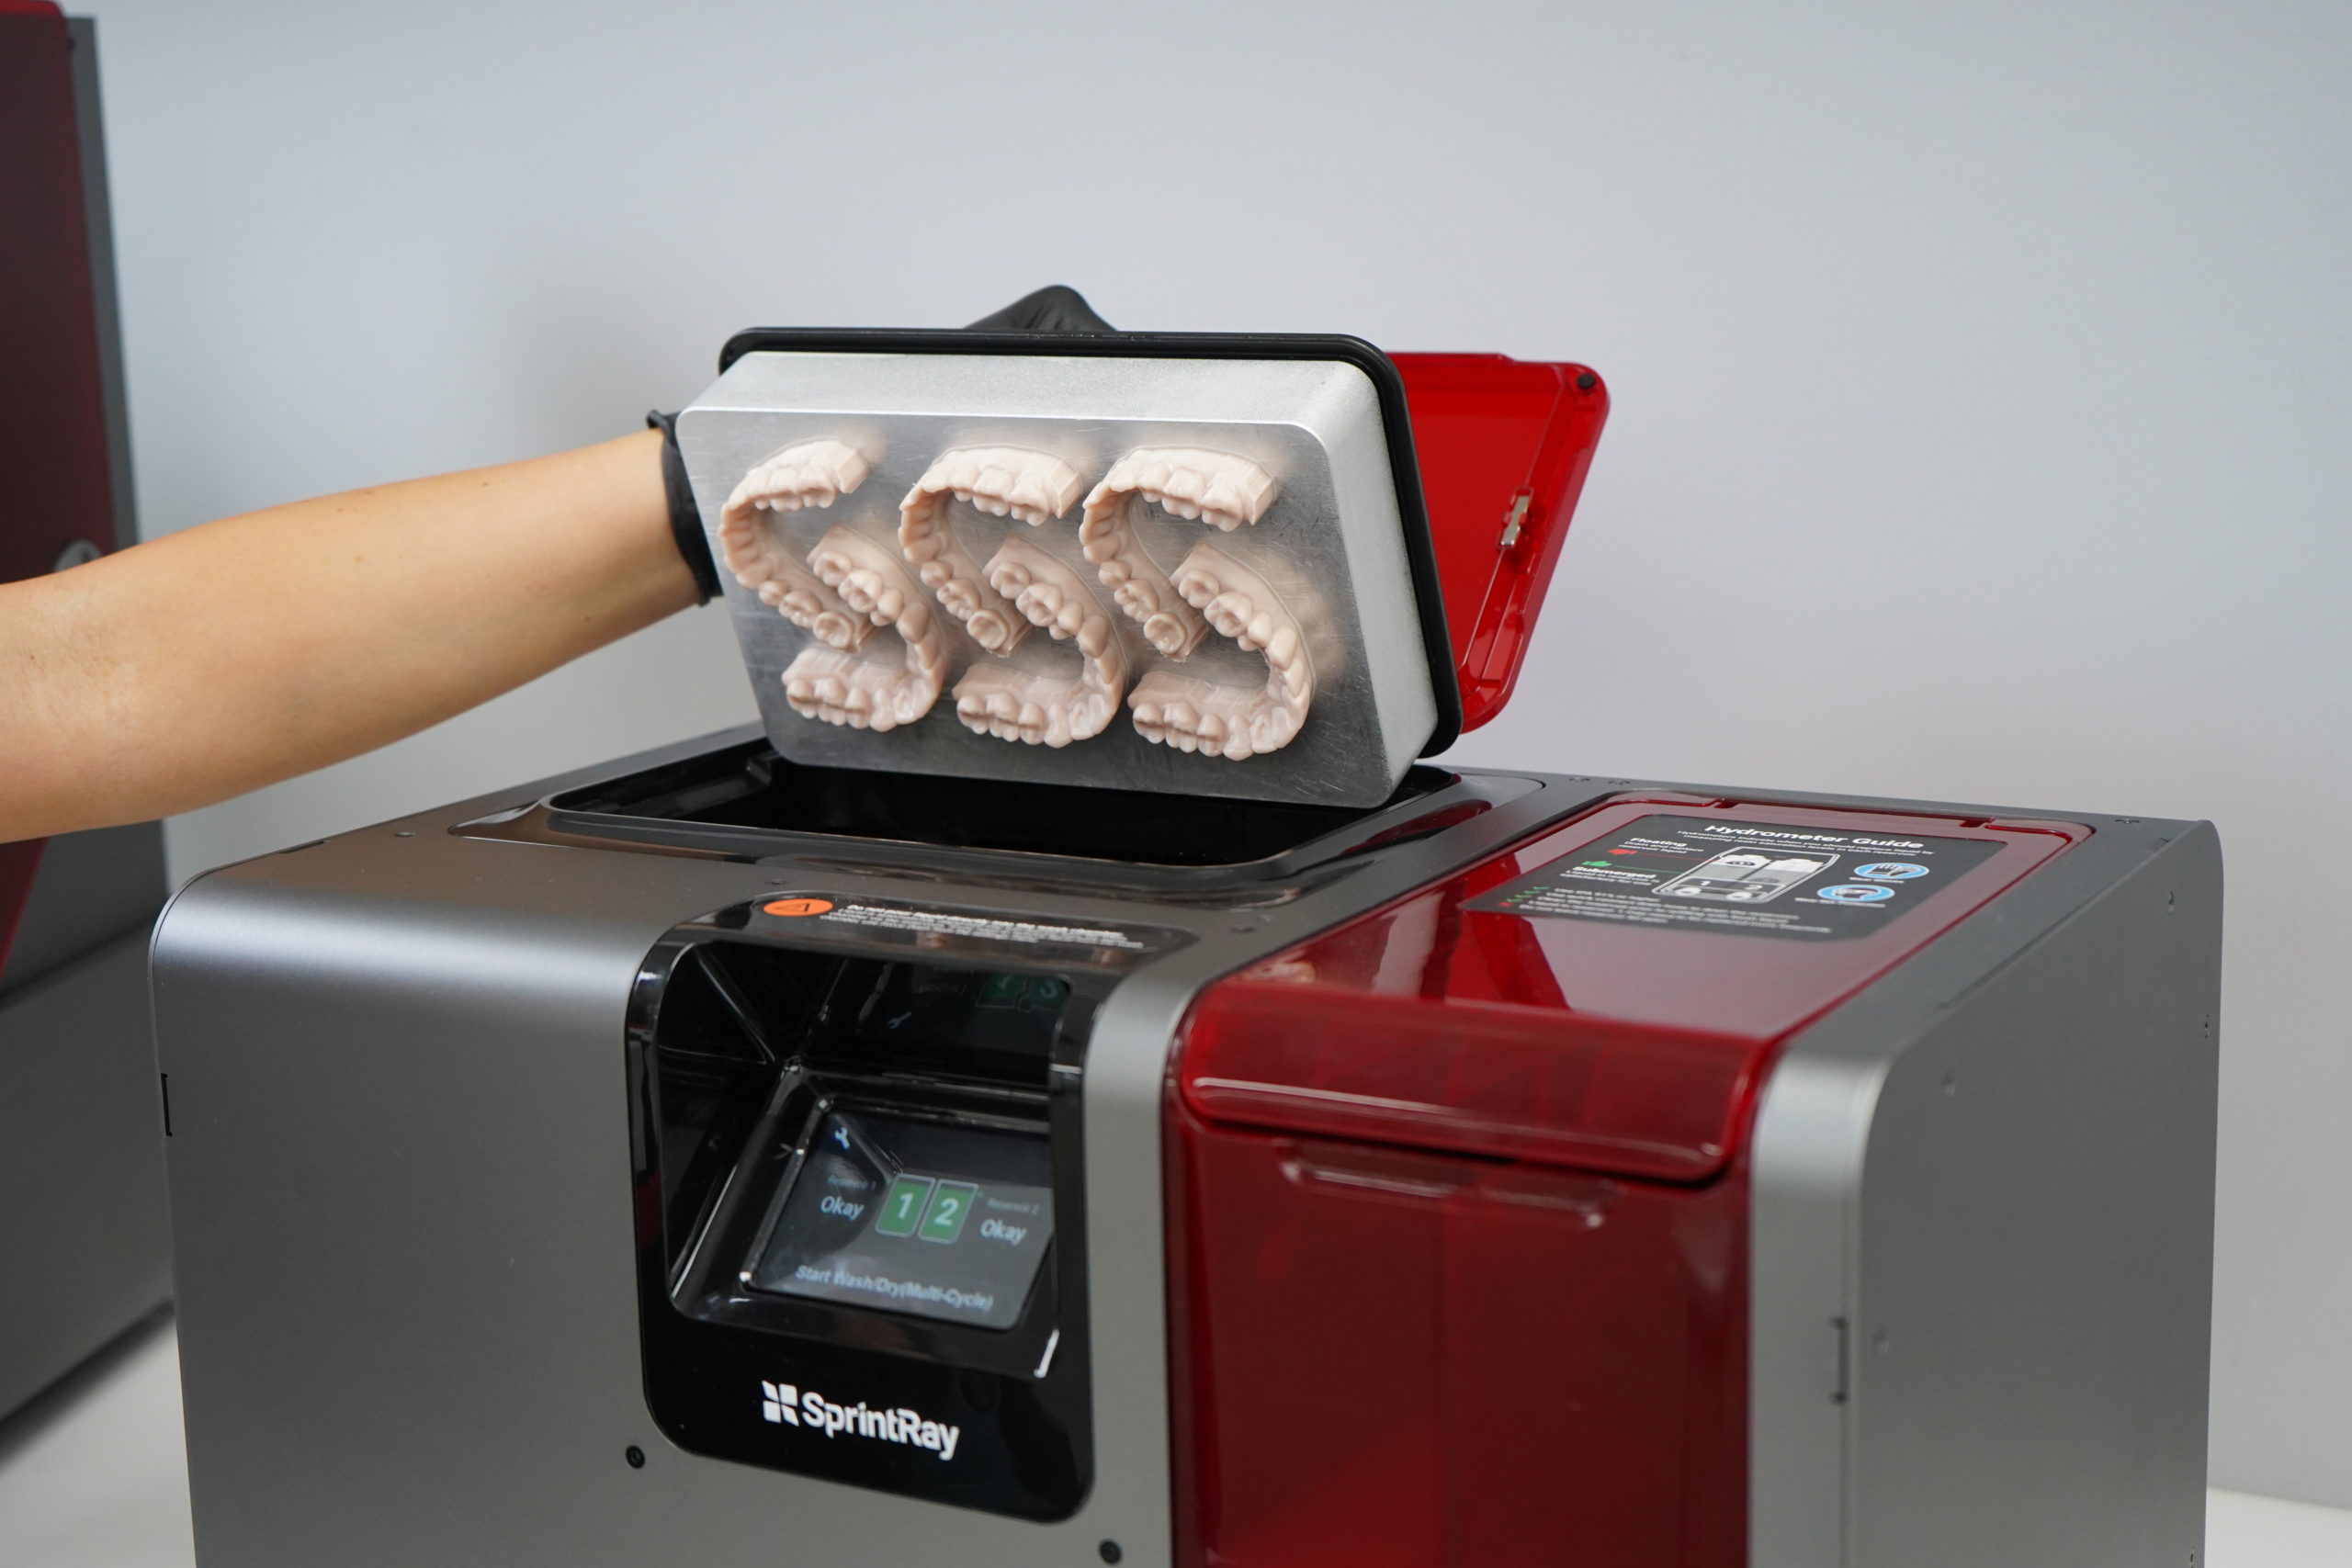
3.6. Cleaning the Models
Once the printing is done, the models need to be cleaned from the remaining liquid resins and then dried. We recommend using the SprintRay ProWash/DryTM, which is designed to provide the best cleaning experience in the shortest time with the lowest IPA usage.
3.7. Removing the Printed Models
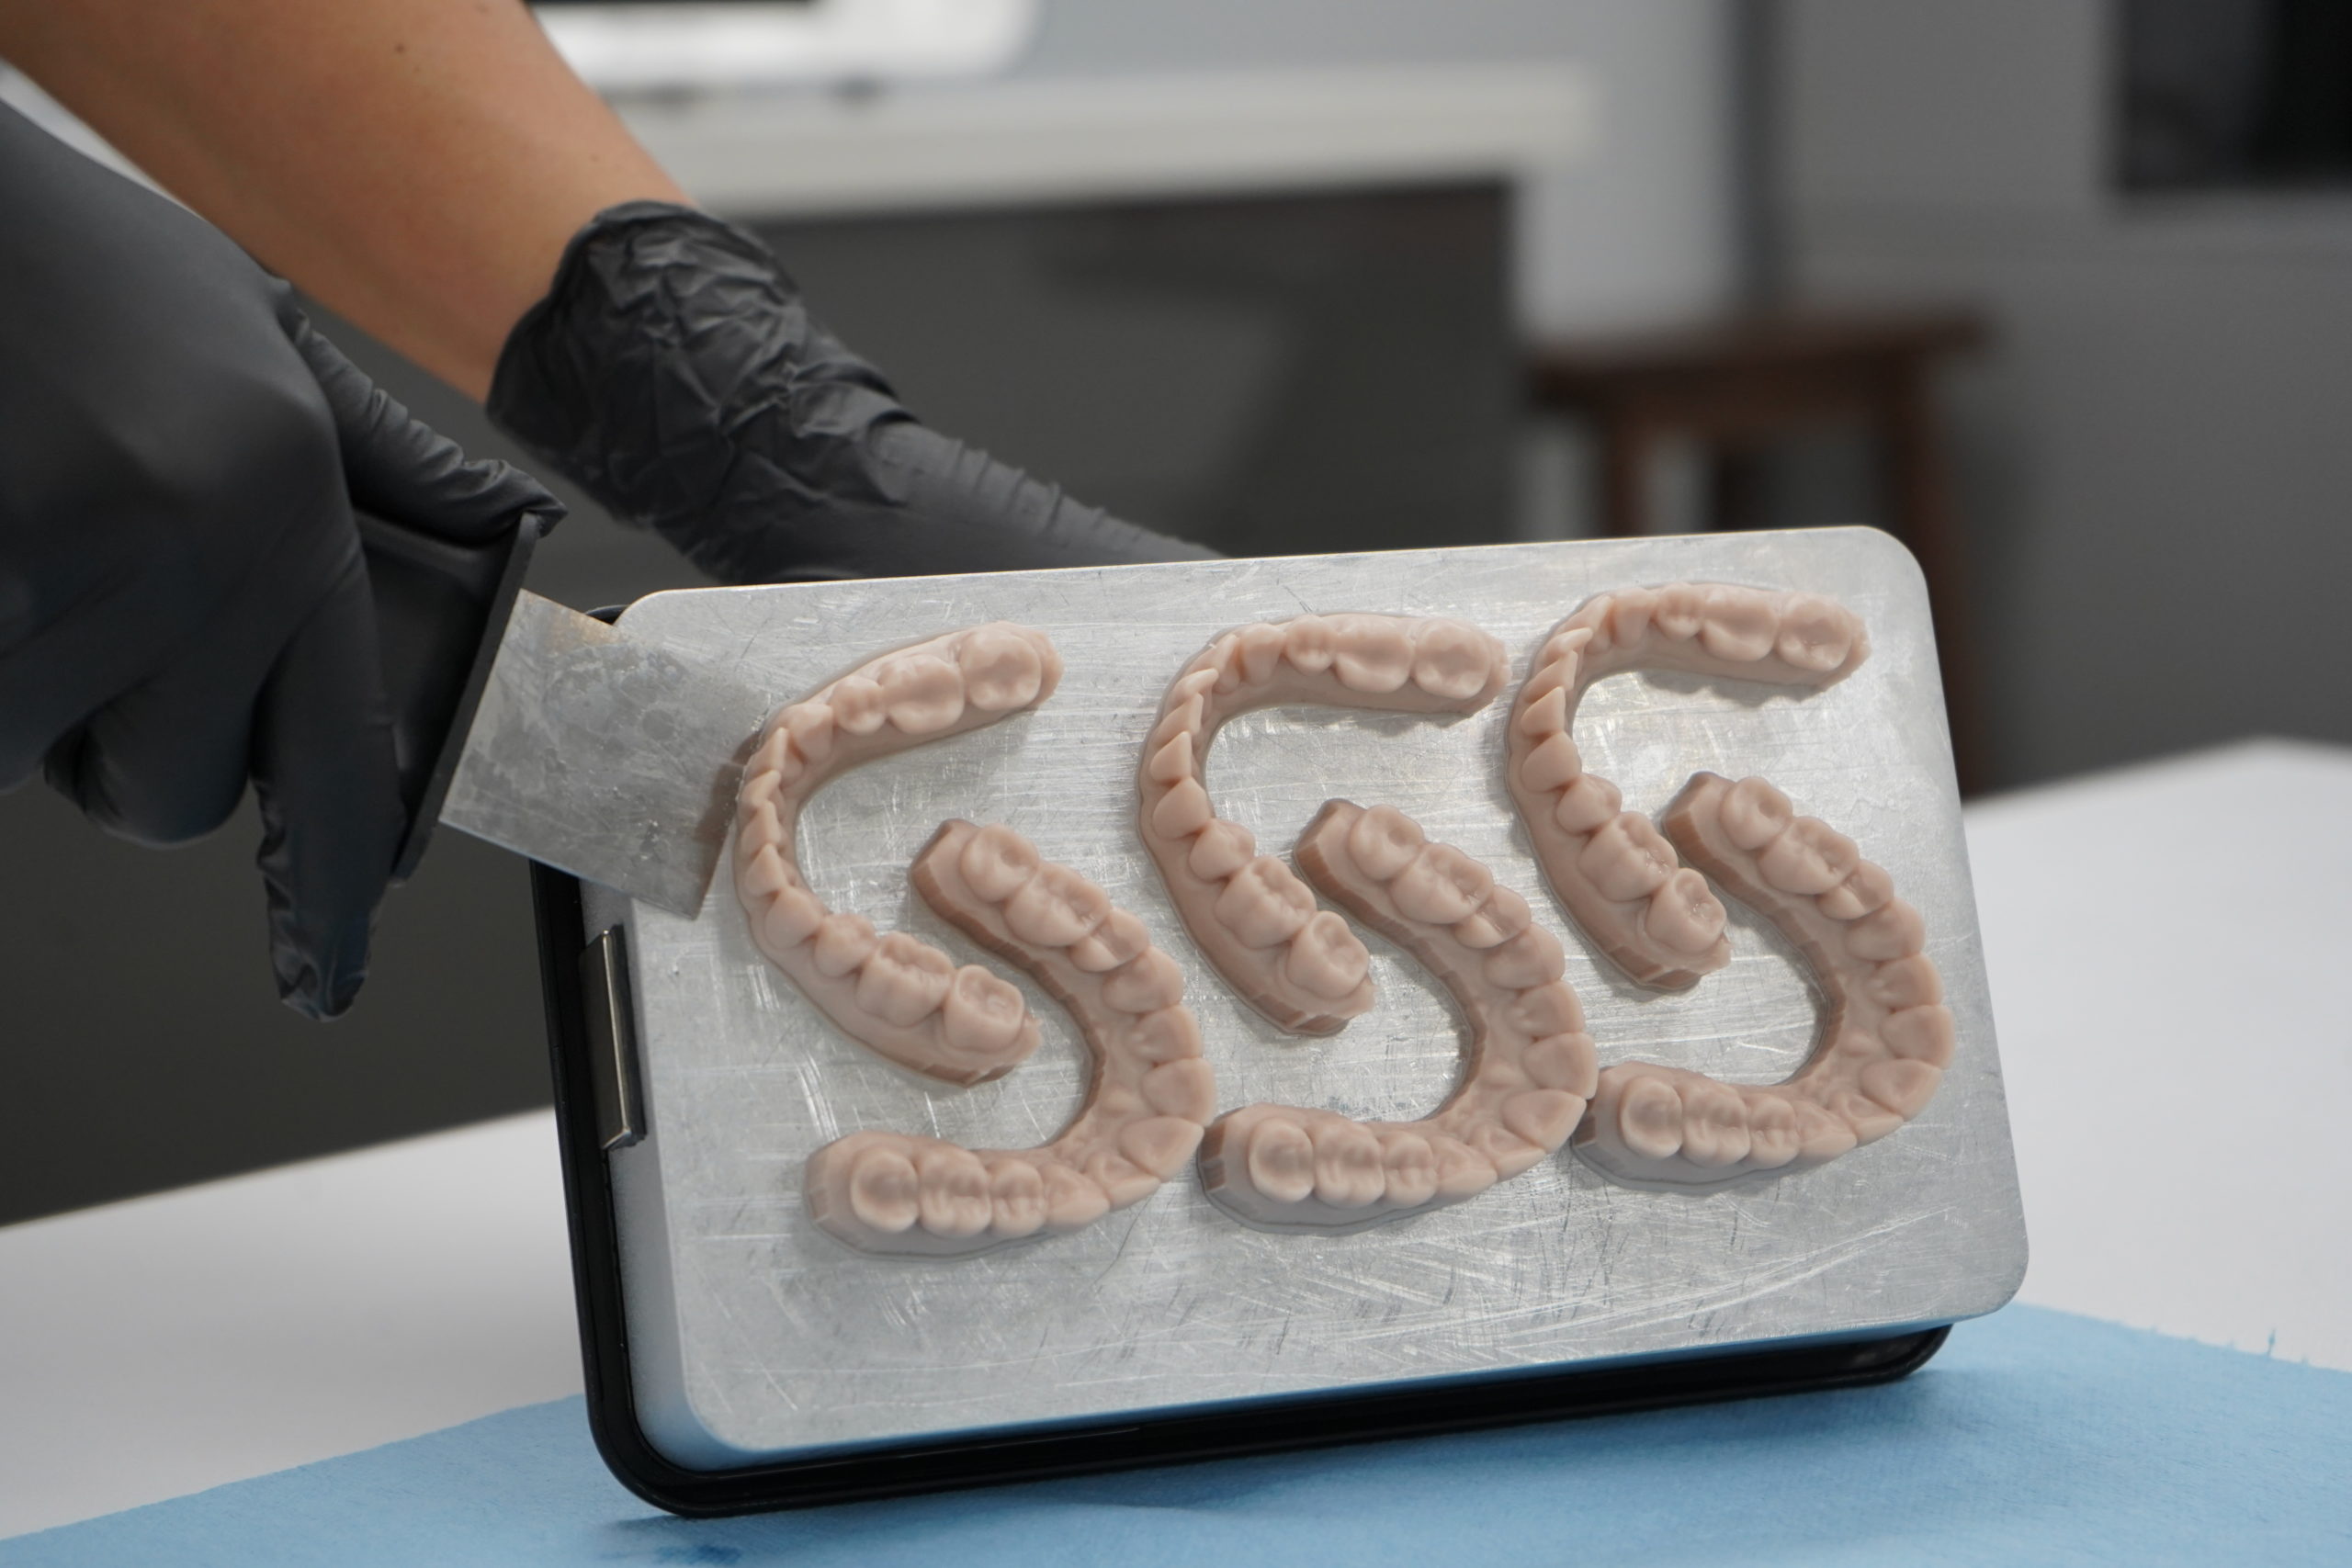
Remove the 3D printed models using the Part-Removal-Tool by pressing it firmly underneath the base in the posterior end of the model, and gently twisting it from side to side. Before attempting to remove the printed models, make sure the platform is secured and placed on a flat surface (table/countertop).
3.8. Post-Curing the Printed Models
The 3D printed models must be properly cured to the resin manufacturer’s specifications before use. This will help to obtain the complete curing as well as the best mechanical properties and accuracy. The color of the models might slightly change during the post-curing process. Since this is a very important step, we highly recommend using the Pro Cure, where all the settings are preset to the resin’s/manufacturer’s specification regarding the cure time and temperature.
3.9. Finishing the Models
In case you had added supports/raft to your models, you need to remove them at this step. Obviously, if you printed the models horizontally and you did not add any support/raft you may skip this step. Note: You may use a model trimmer for quick and clean support removal.
Pro Tips
- Use protective eyewear and nitrile gloves at all times to avoid eye/skin contact with uncured resin.
- Always keep the printer door closed to avoid premature curing of the resin.
- Always shake the resin bottle well before pouring into the resin tank.
- Always remove the print platform before removing the resin tank to avoid excess resin dripping inside your printer.
- ProCure may need to warm up for a few minutes before the UV lights start to shine.
- Visit https://sprintray.com/software/ to download the latest version of RayWare.
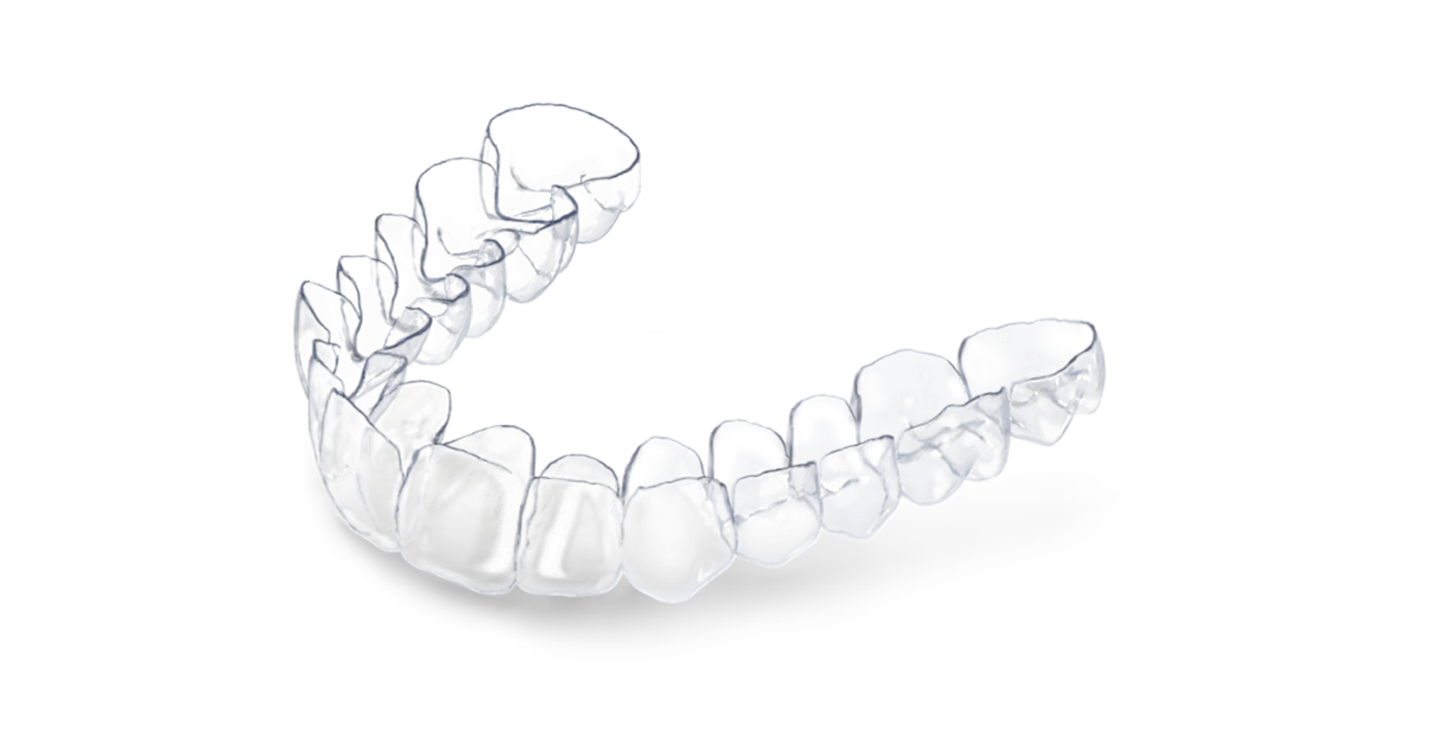
Retainer Fabrication
Fabricating the retainer is the last step in this workflow. Retainer fabrication is done by thermoforming a plastic sheet on a printed model. This step is very similar to traditional retainer fabrication, where you used to thermoform an aligner sheet on the stone model, followed by trimming and finishing. Below, we will show you the steps involved in fabricating retainers.
Time required: 4-6 min.
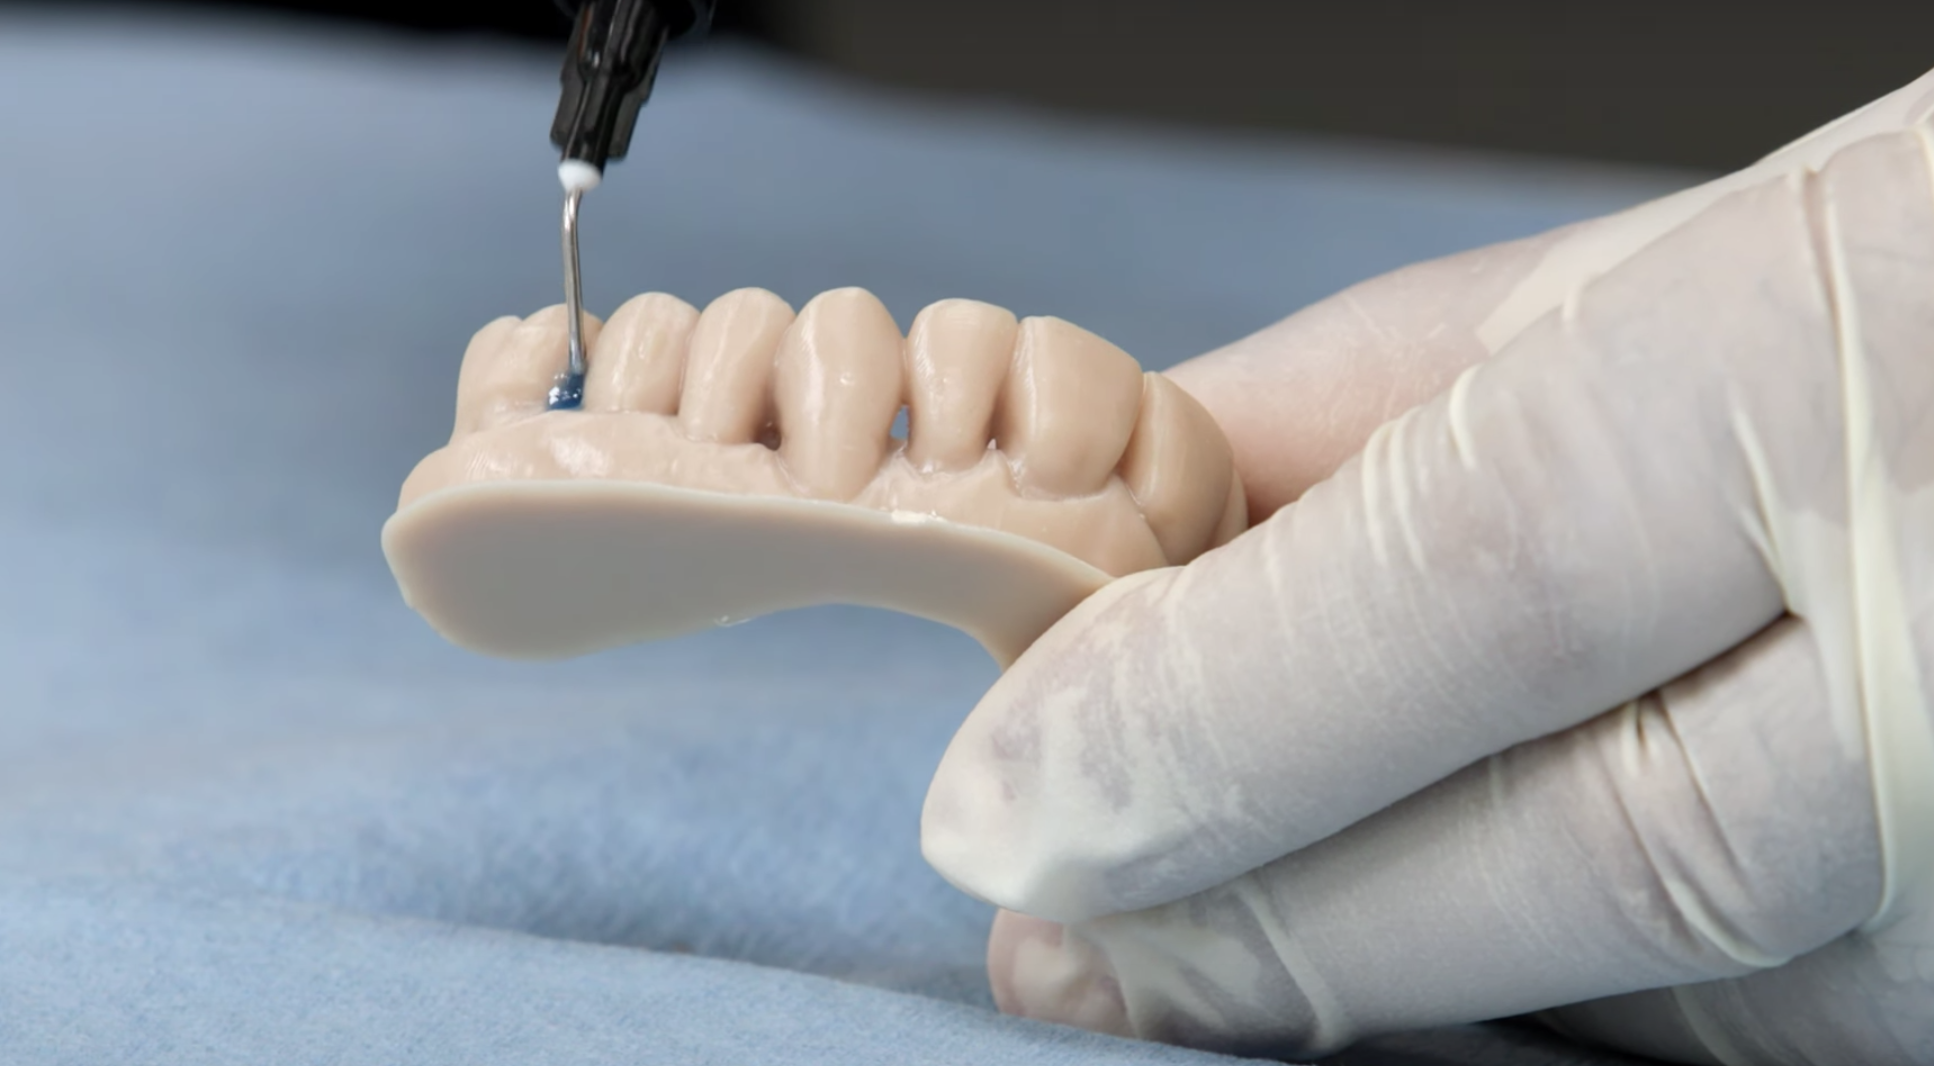
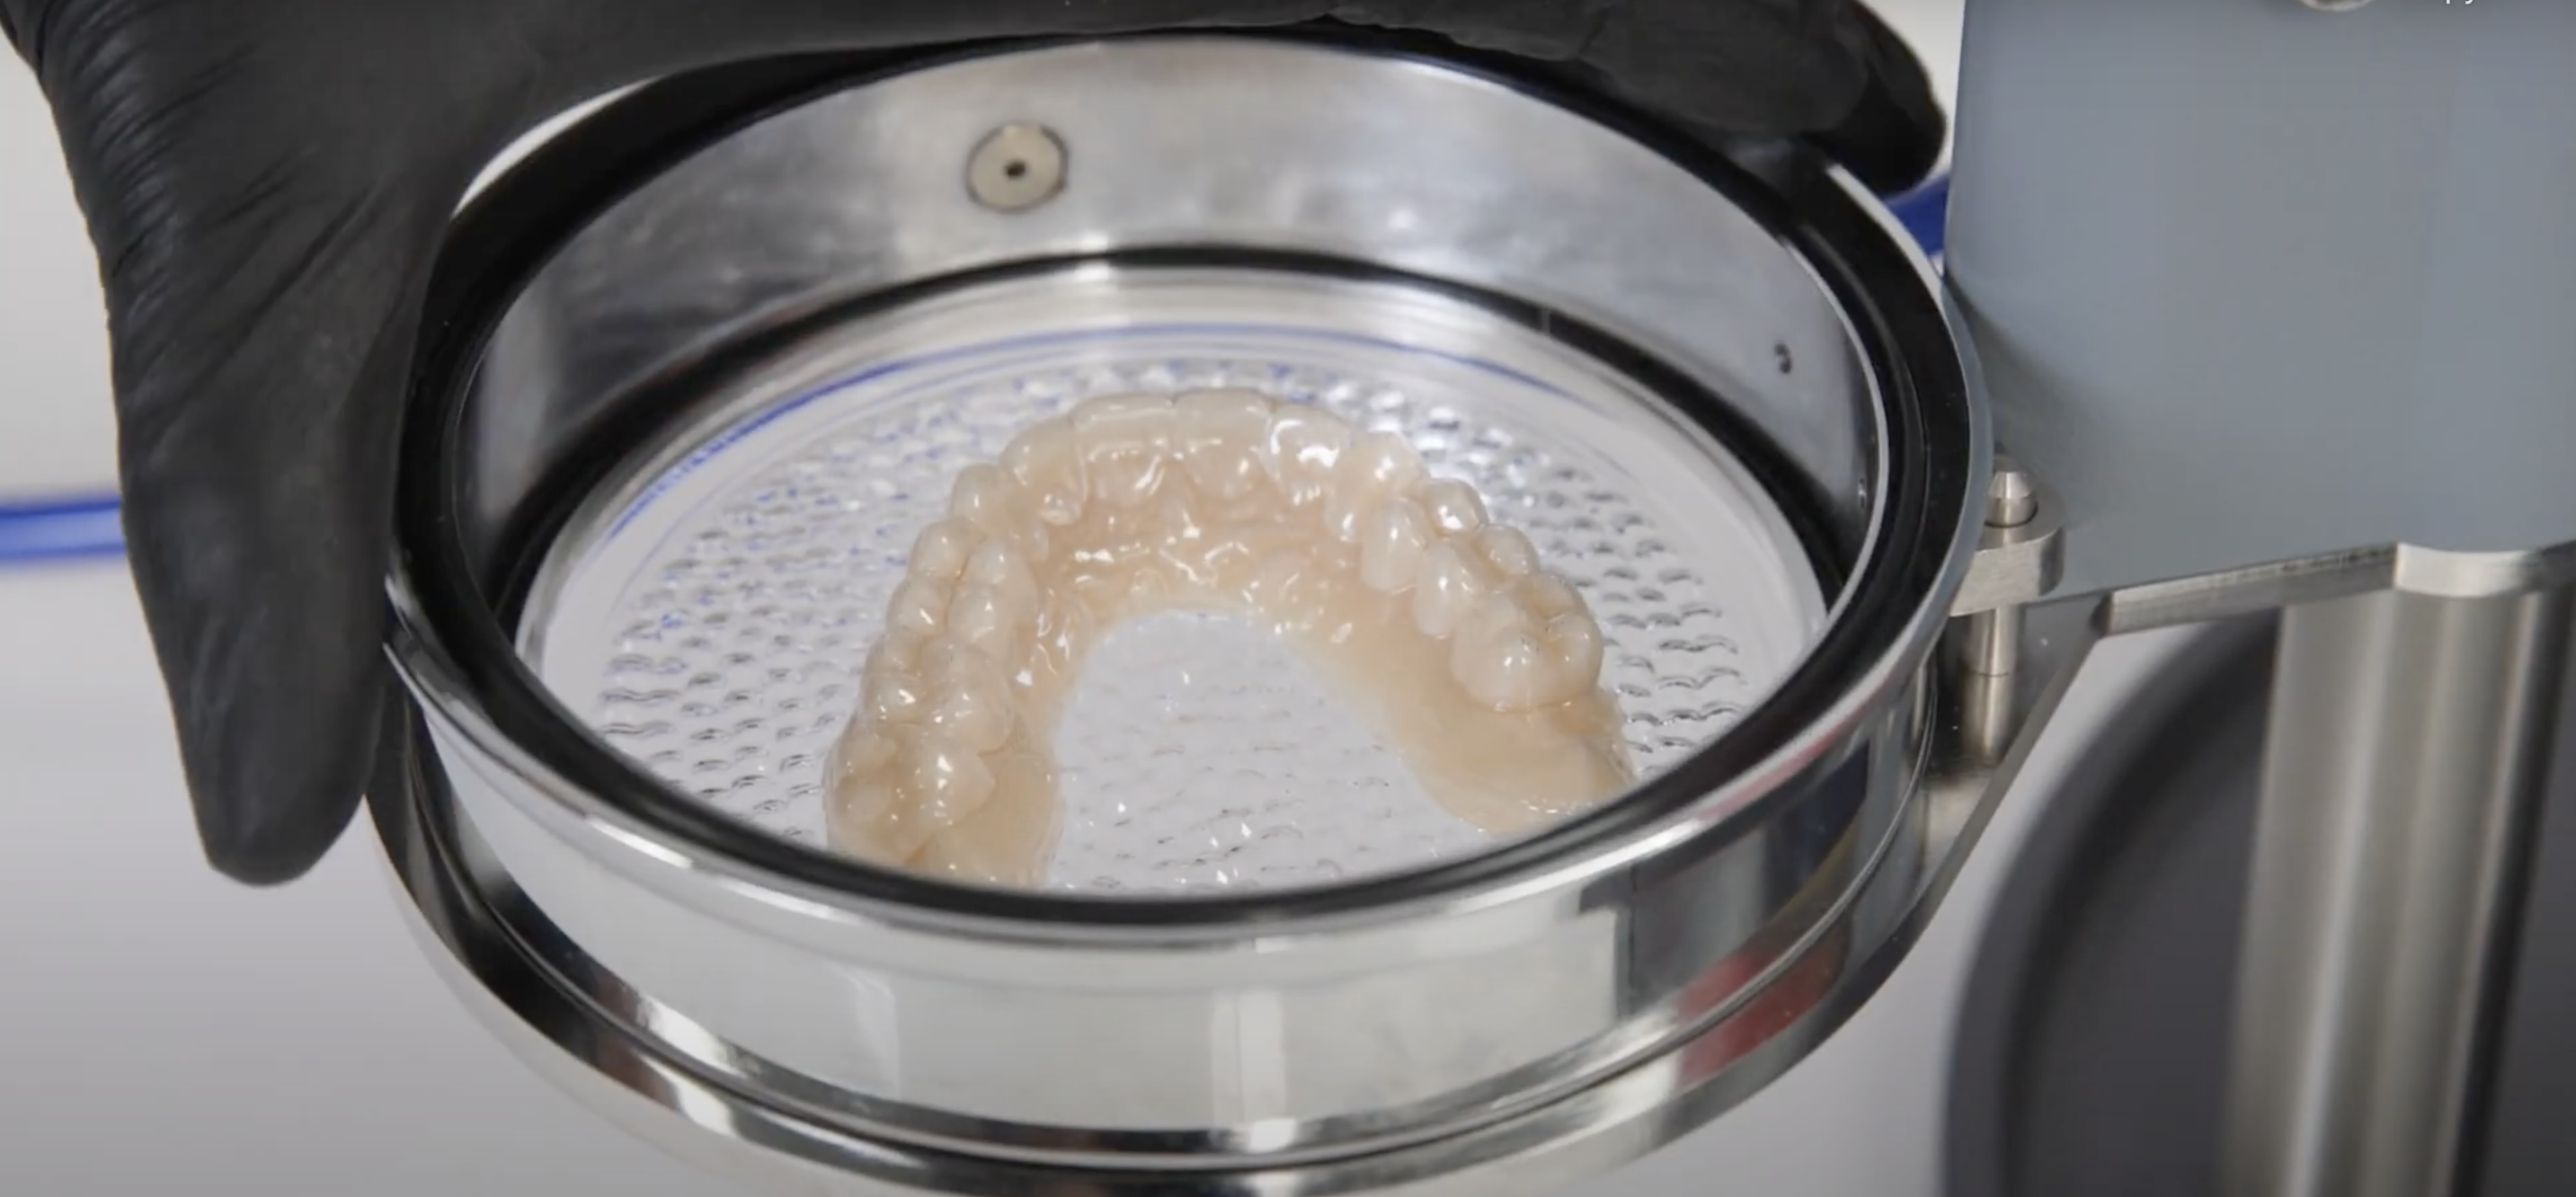
4.1.1. Preparation of Models
Before starting the thermoforming on the models, we need to prepare them. Unless you have done so in orthodontic CAD software, start by blocking any undercuts using block-out resin. Over/under blocking the undercuts would result in poor fitting of retainers.
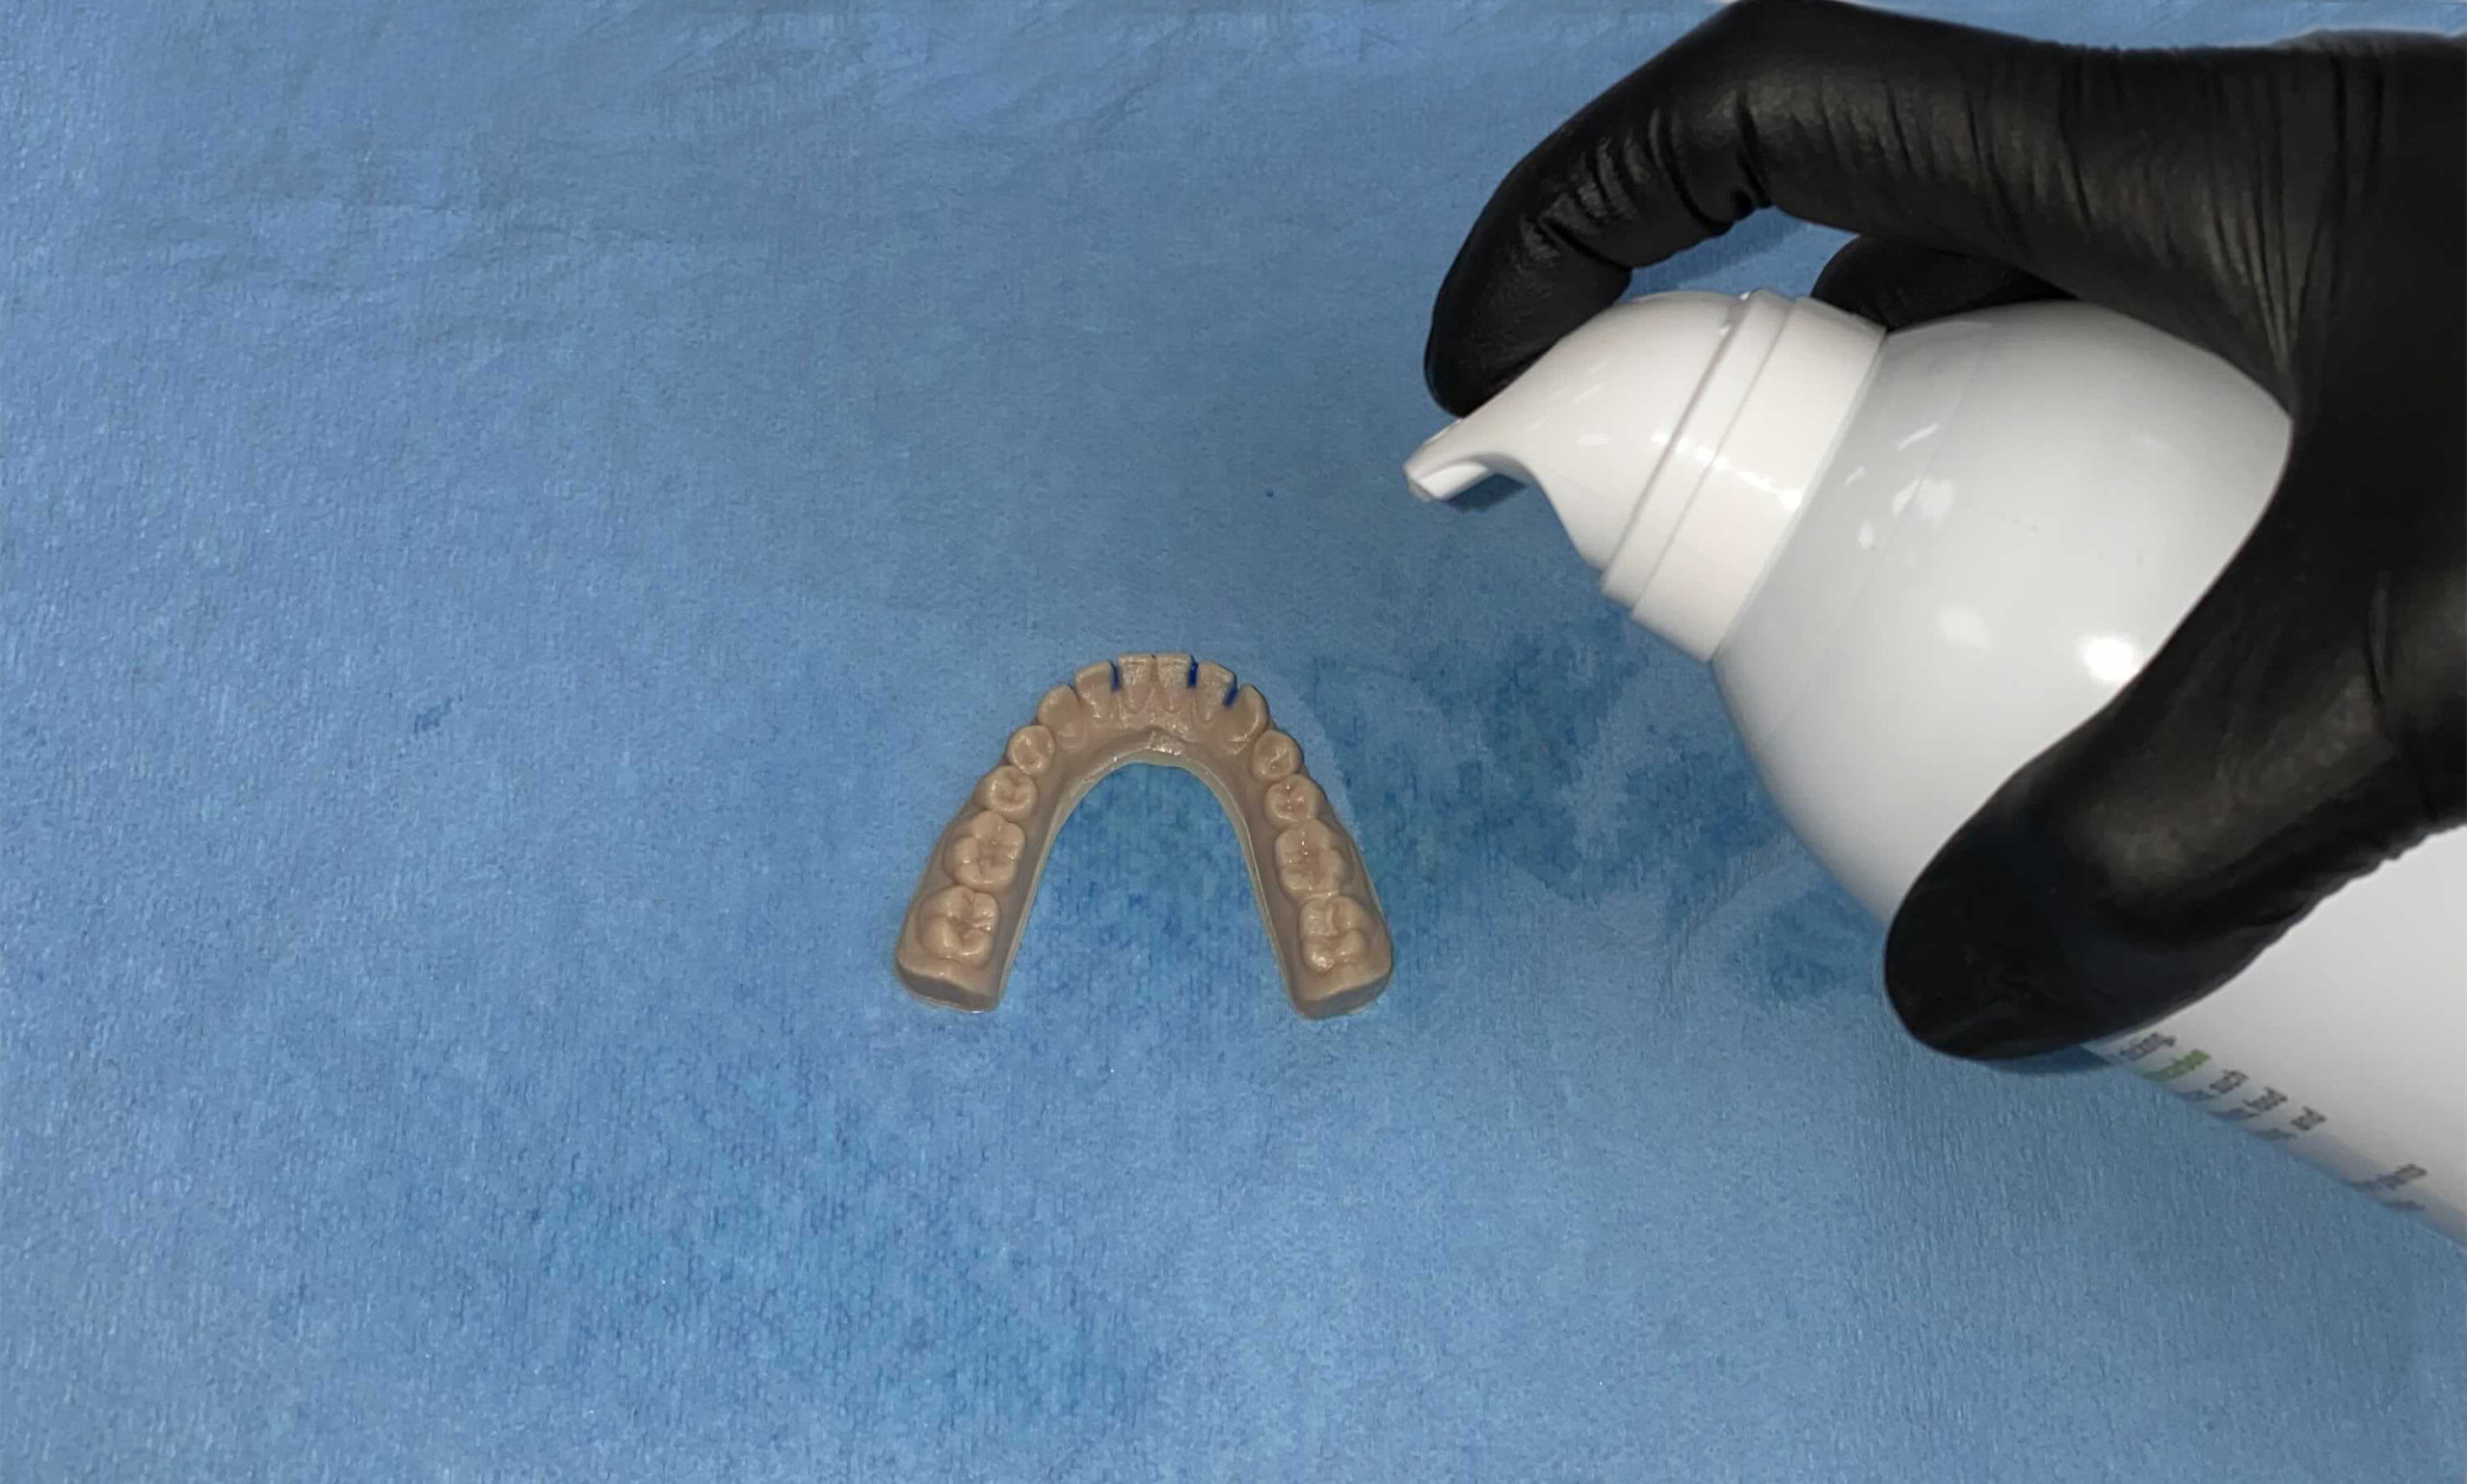
4.1.2. Apply a releasing agent
You may use releasing agent sprays such as Trim-Rite by Dentsply Sirona, or silicon spray such as Tri-Epoxy by Keystone, or even vegetable oil spray. Wipe off the excess.
4.2.1. Thermoforming
To fabricate a standard retainer with uniform wall thickness and no distortion.
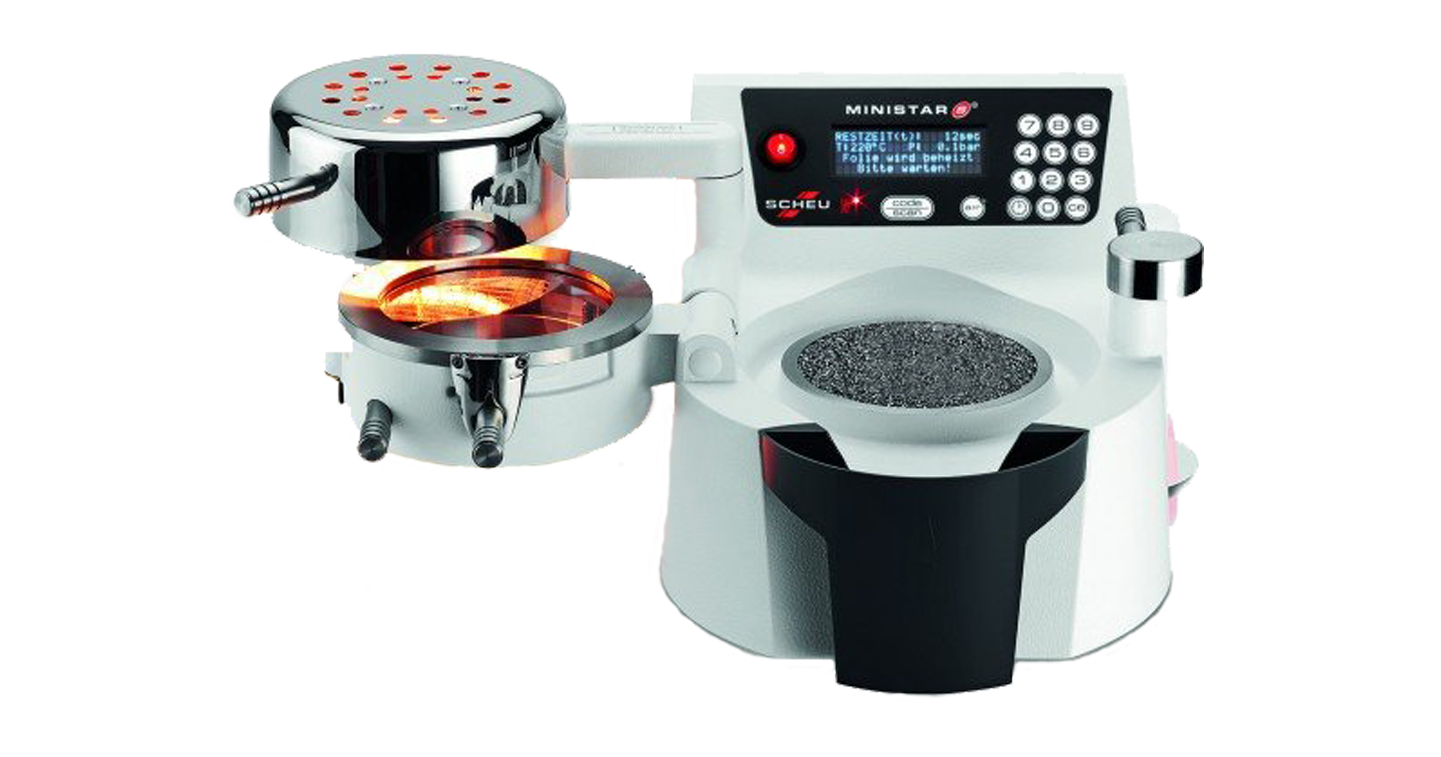
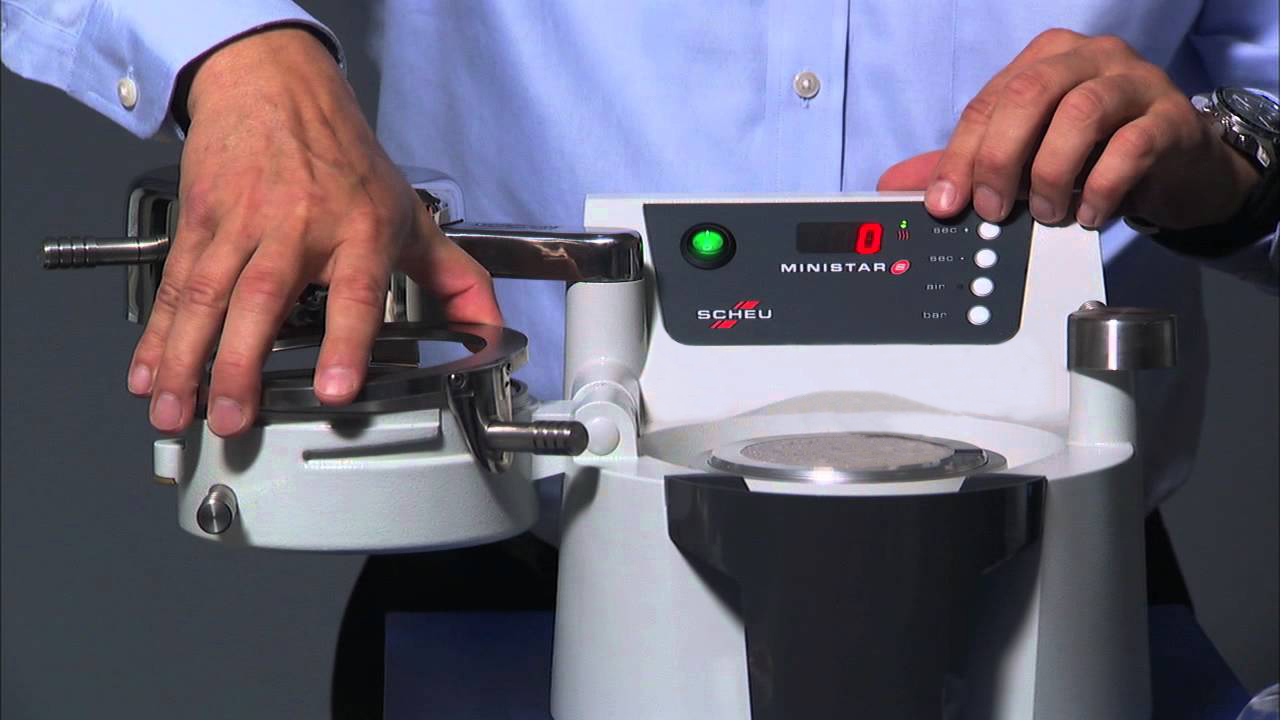
Use a positive pressure thermoforming machine such as Drufomat (by Dentsply Sirona, BioStar (by Scheu Dental), or MiniStar S (by Scheu Dental).
Use the recommended settings provided by the machine manufacturer.
4.2.2. Recommended retainer sheets
We recommend using any of the following retainer sheets for a better and consistent result: Zendura by Bay Material, Essix Ace by Dentsply Sirona, Essix A+ by Dentsply Sirona, or Invisacryl A by Great Lakes. For the best results, use a plastic sheet thickness of 0.75-1mm for aligners. Enter the manufacturer's recommended setting for the sheet into the thermoforming machine.
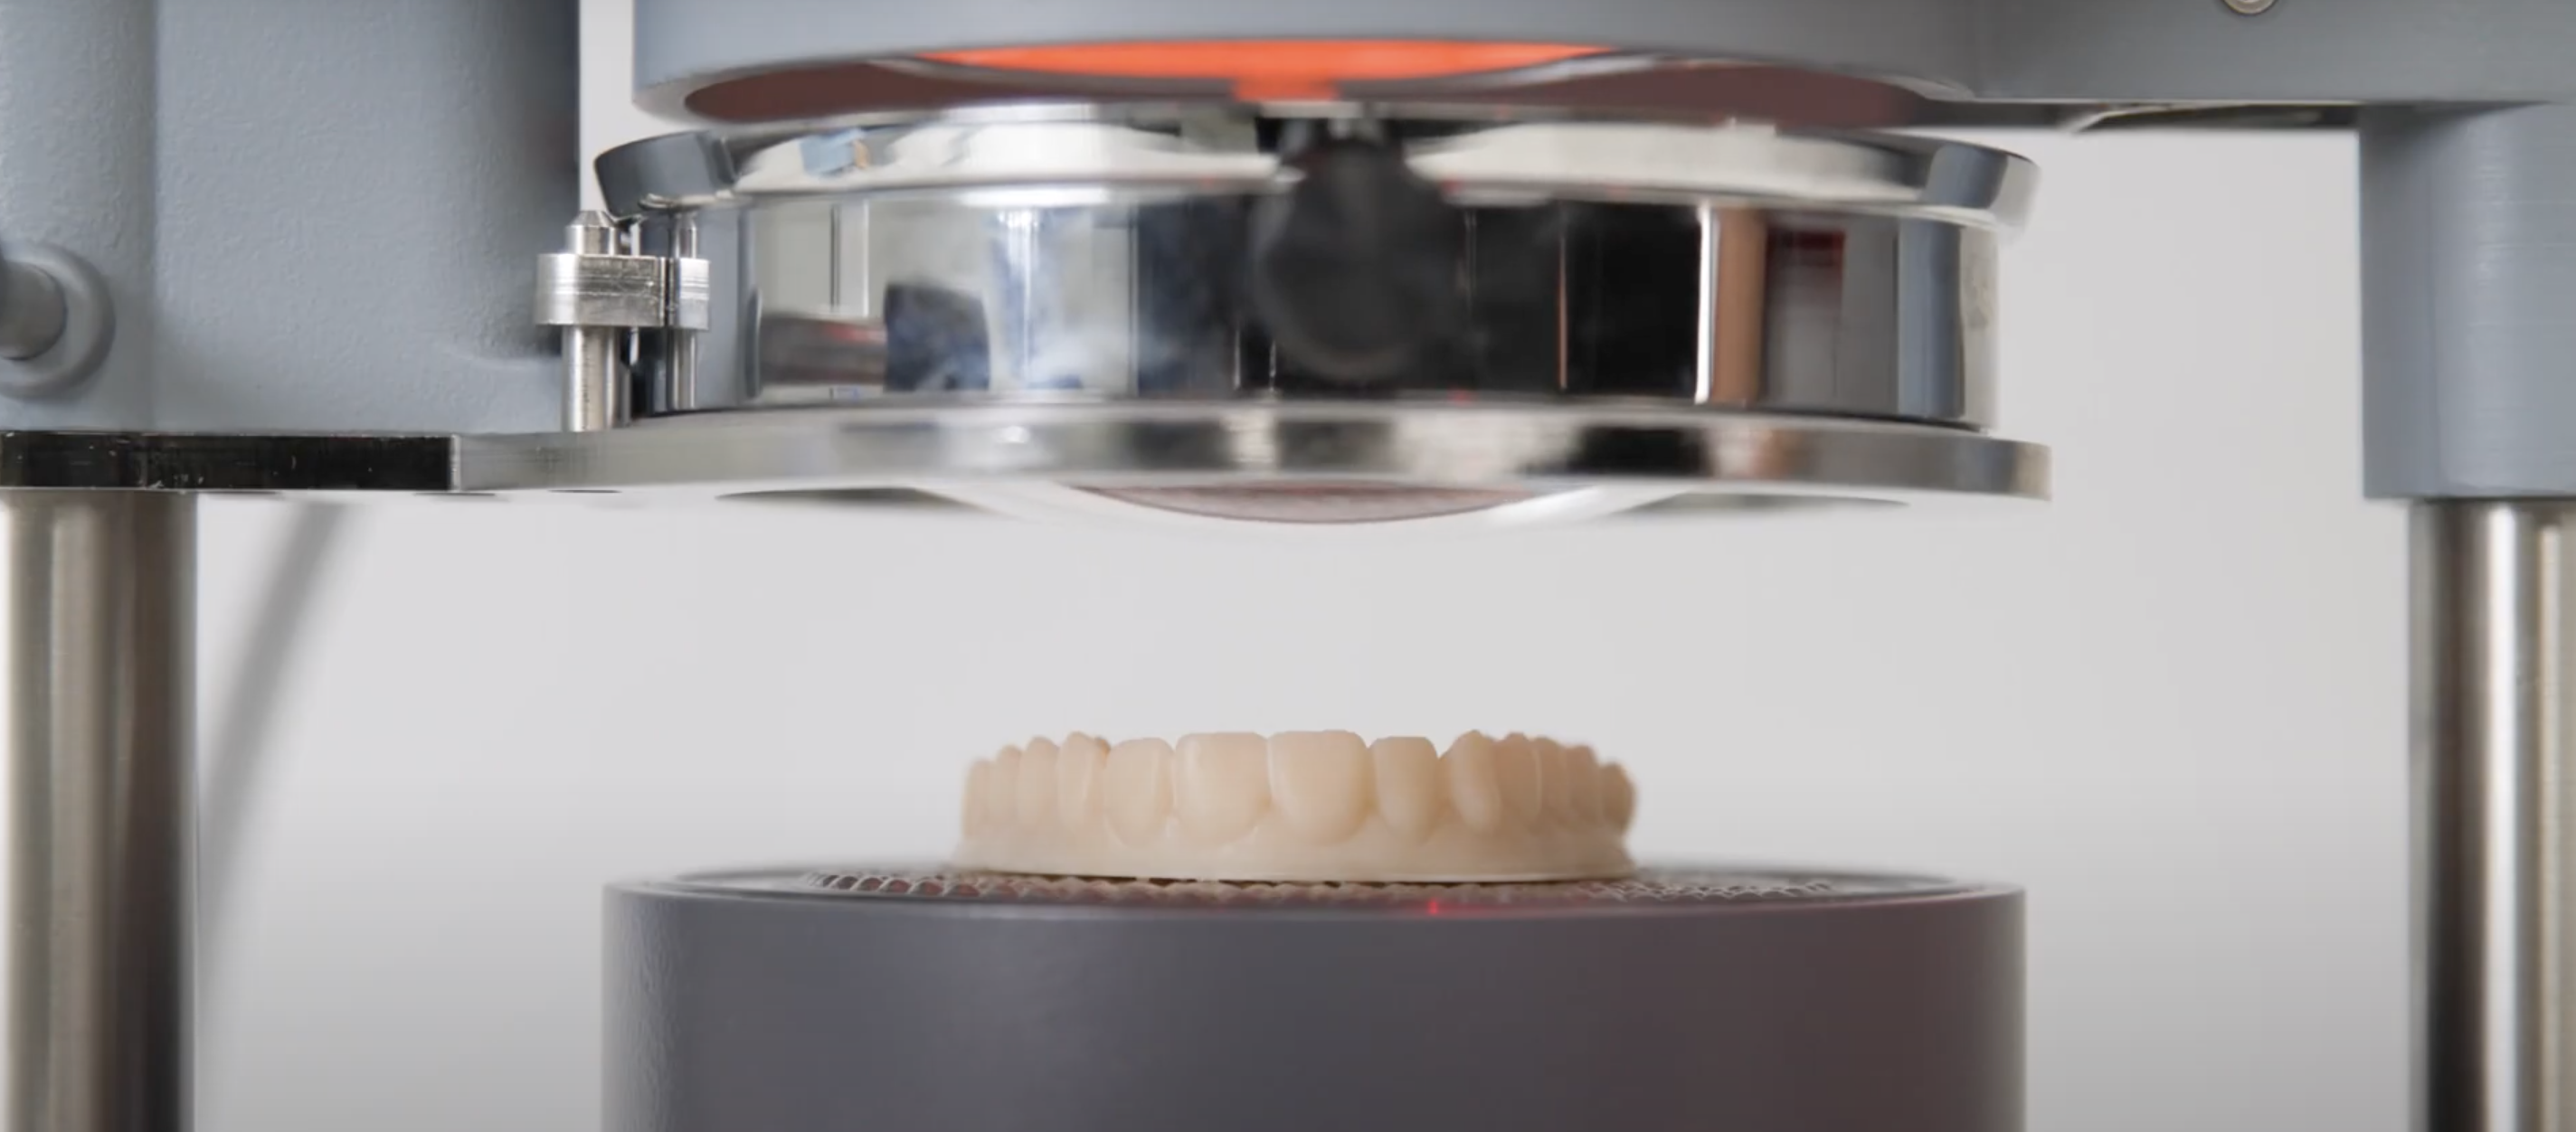
4.2.3. Retainer Height
Make sure the maximum height of your model is no more than 19mm, and that the central incisors’ axis is perpendicular to the machine’s platform.
4.2.4. Thermoforming Performance
Perform the thermoforming and wait for the model/sheet to cool before removing the model/thermoformed sheet from the machine.
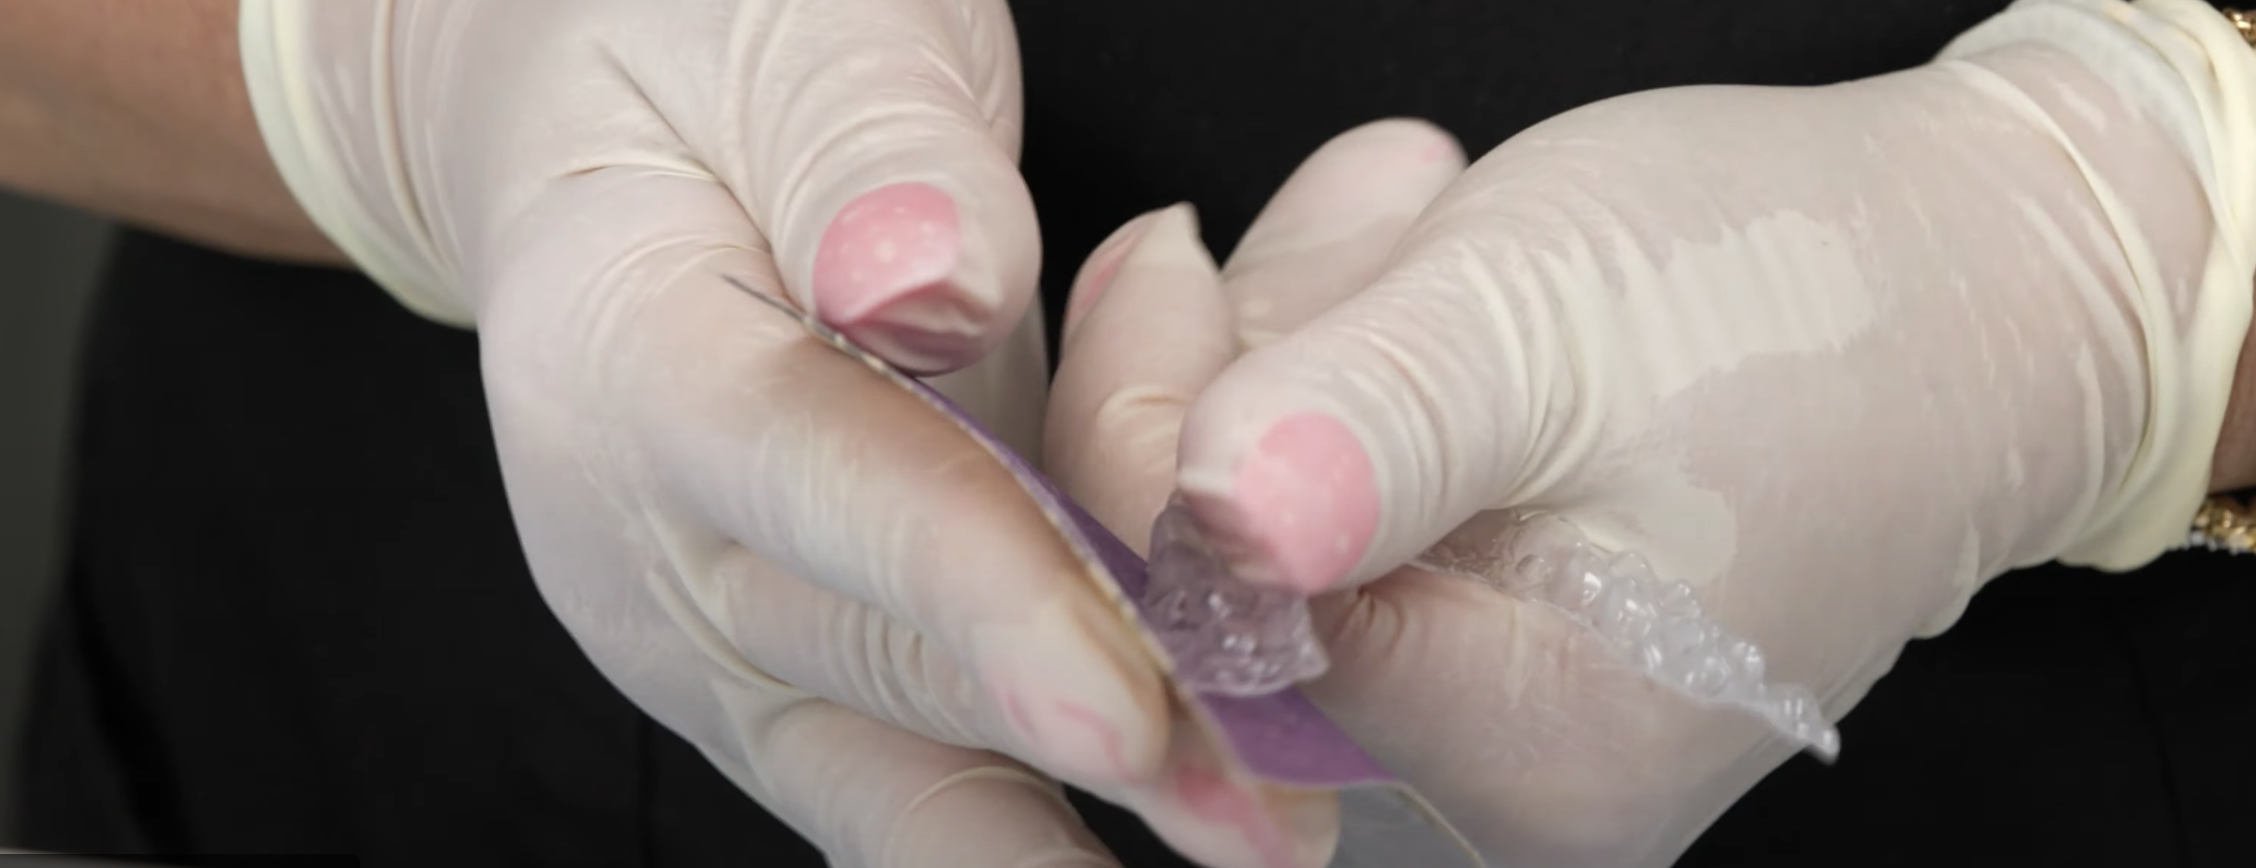
4.3.1. Cutting and Finishing
For the best cutting practices, deburring, and finishing the aligner, please follow these steps:
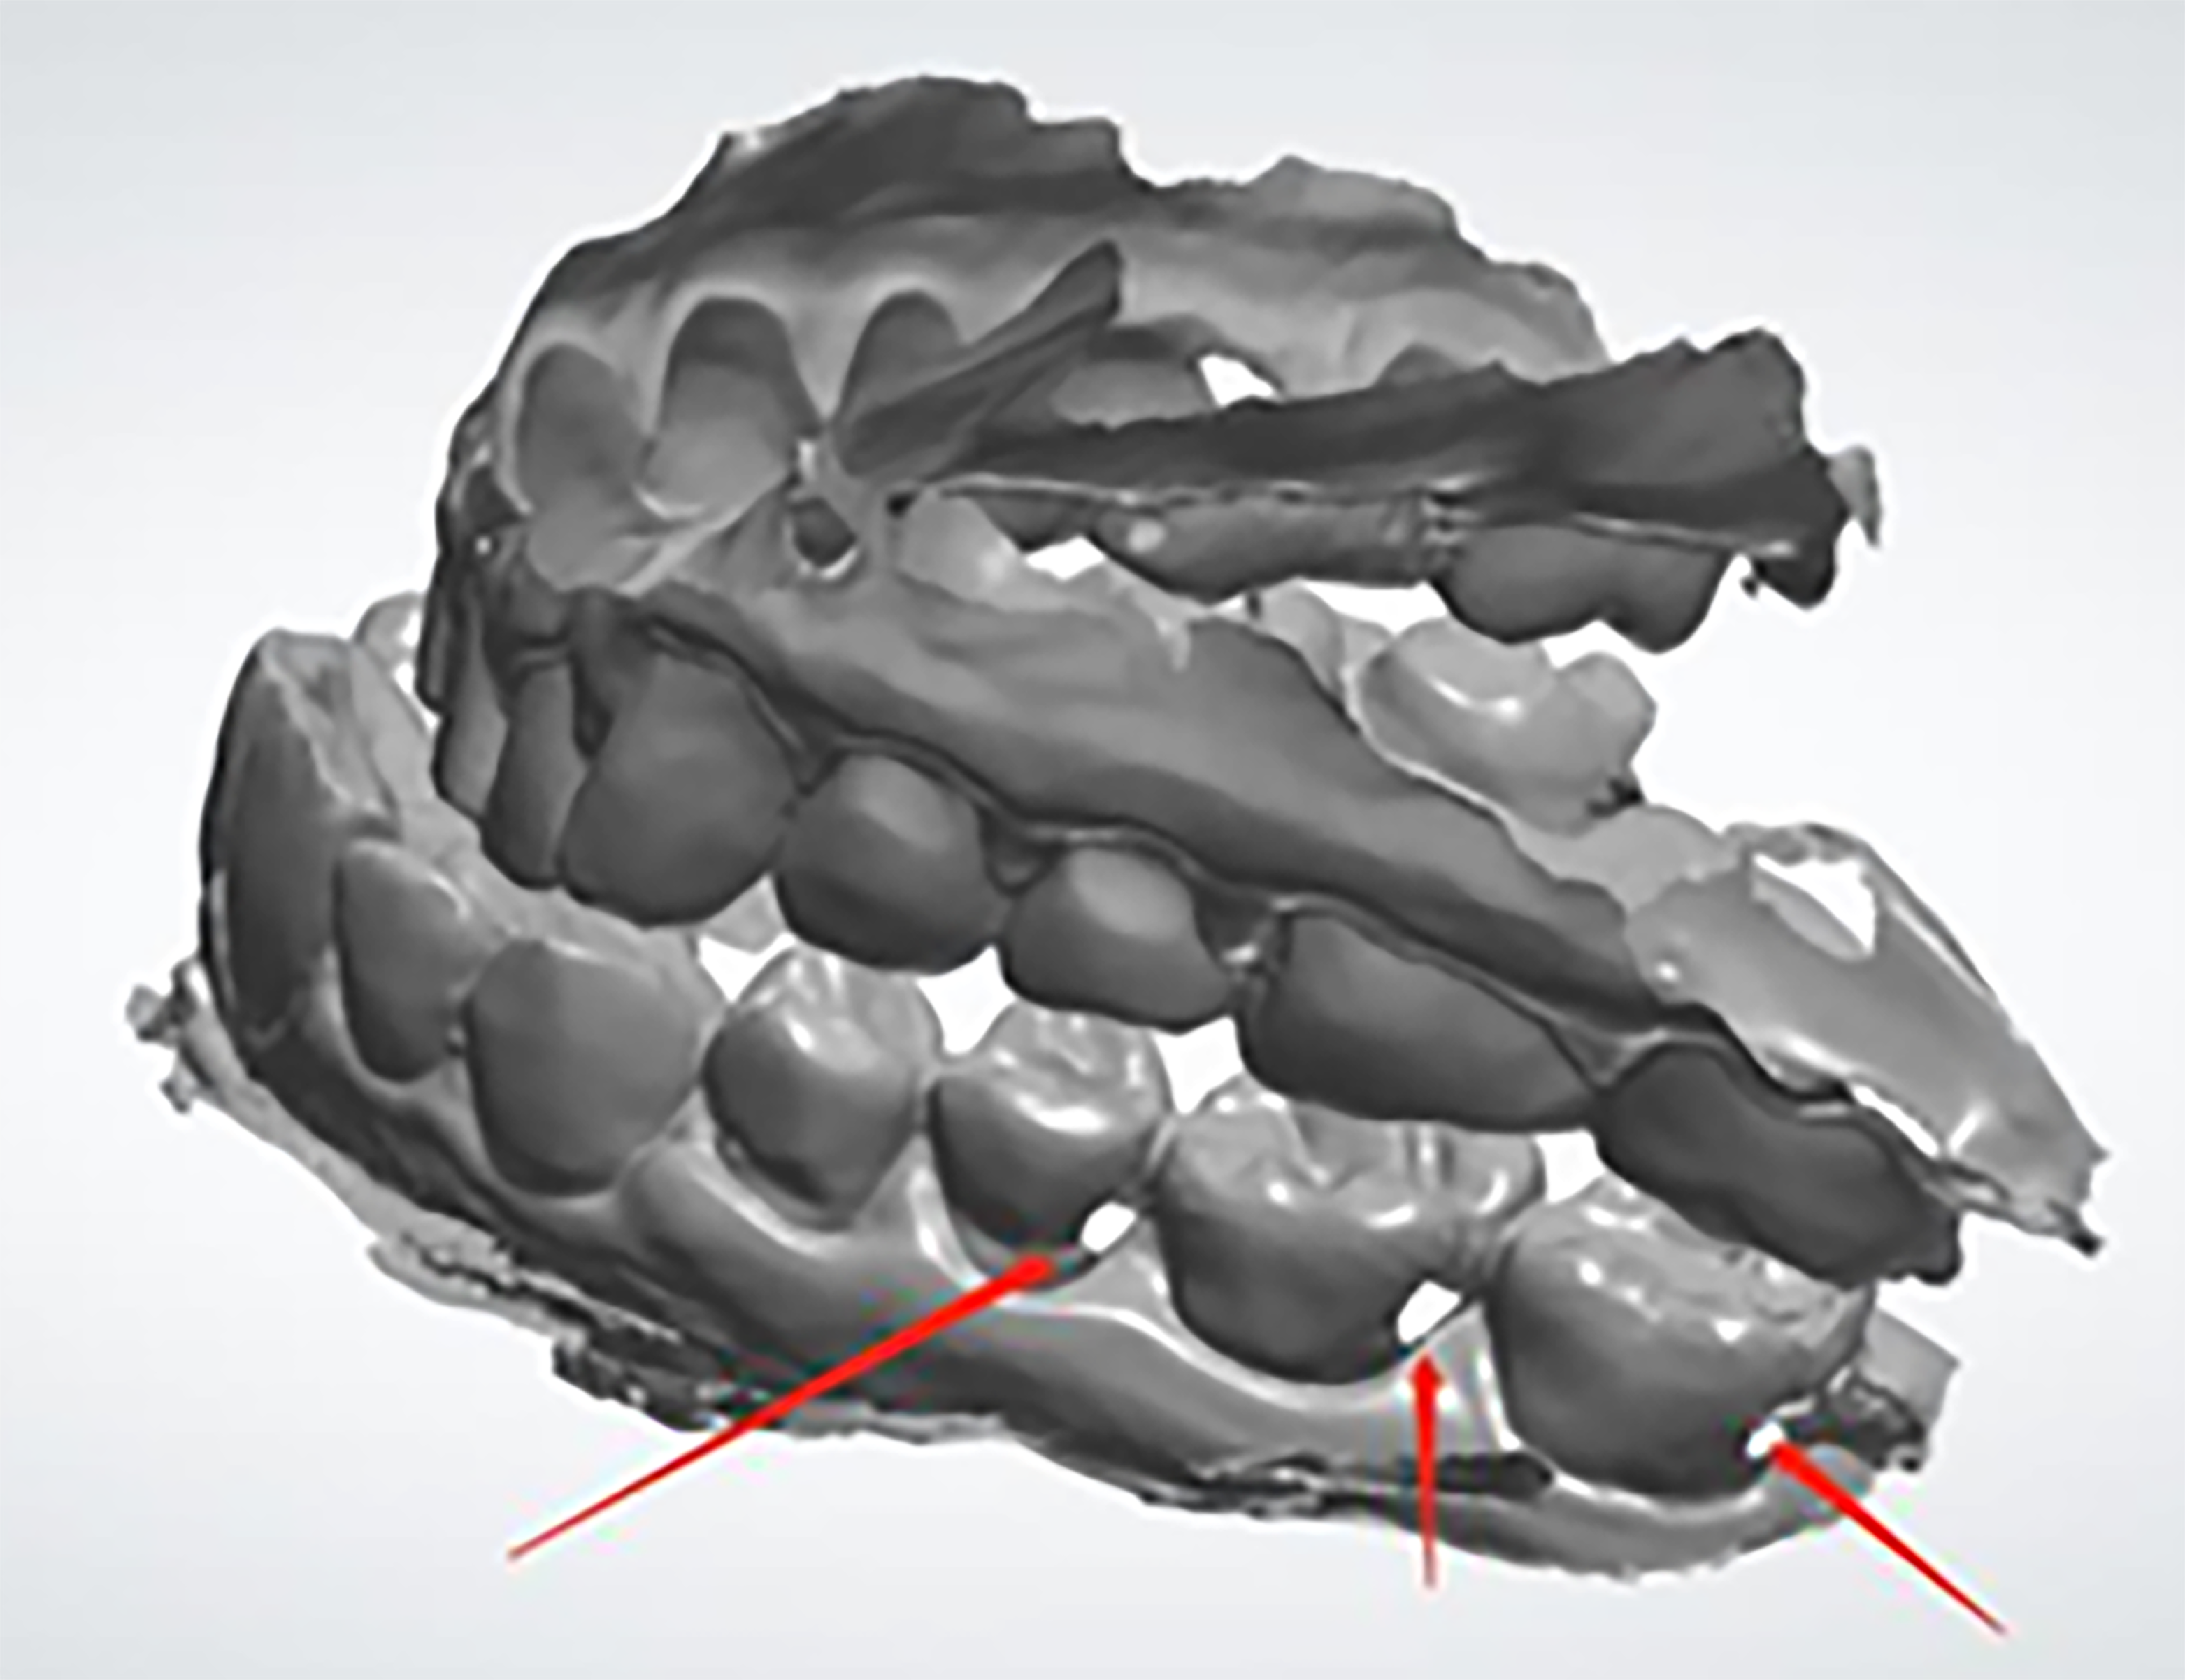
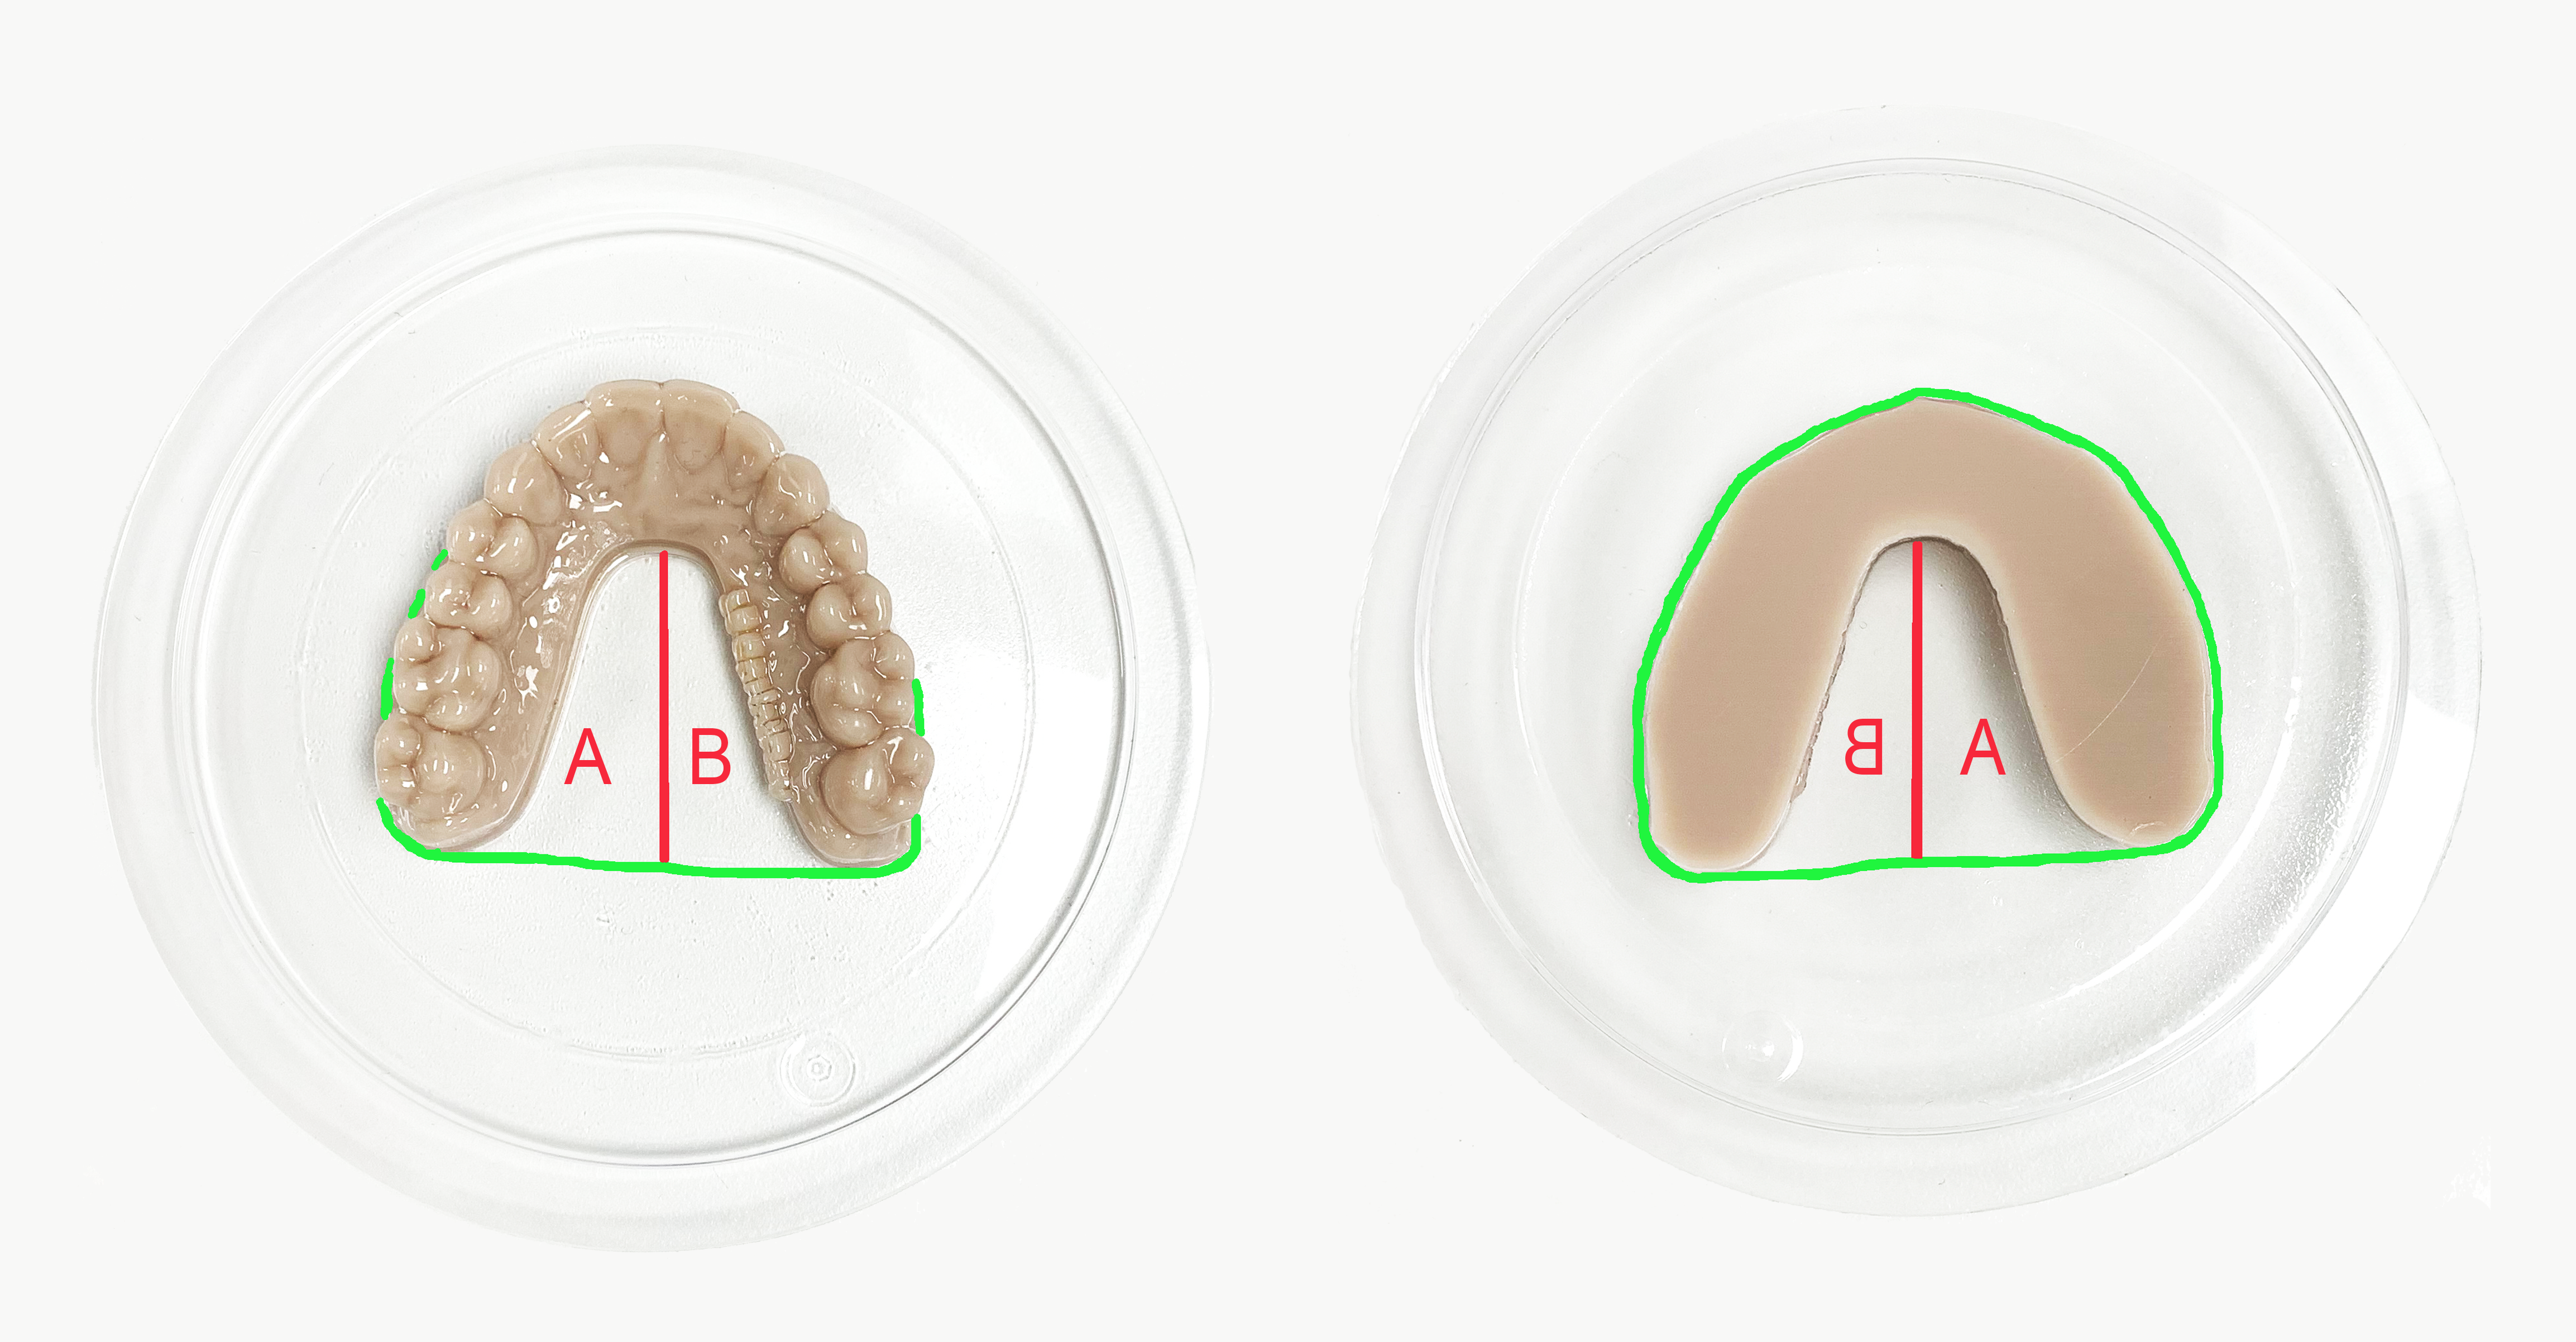
Cut and remove the excess sheet around the model using trauma shear scissors. Try to stay as close as possible to the model margin (green line). Once the excess is removed, cut through the plastic trapped in the middle of the model (red line) creating 2 wings (A and B).
4.3.2.
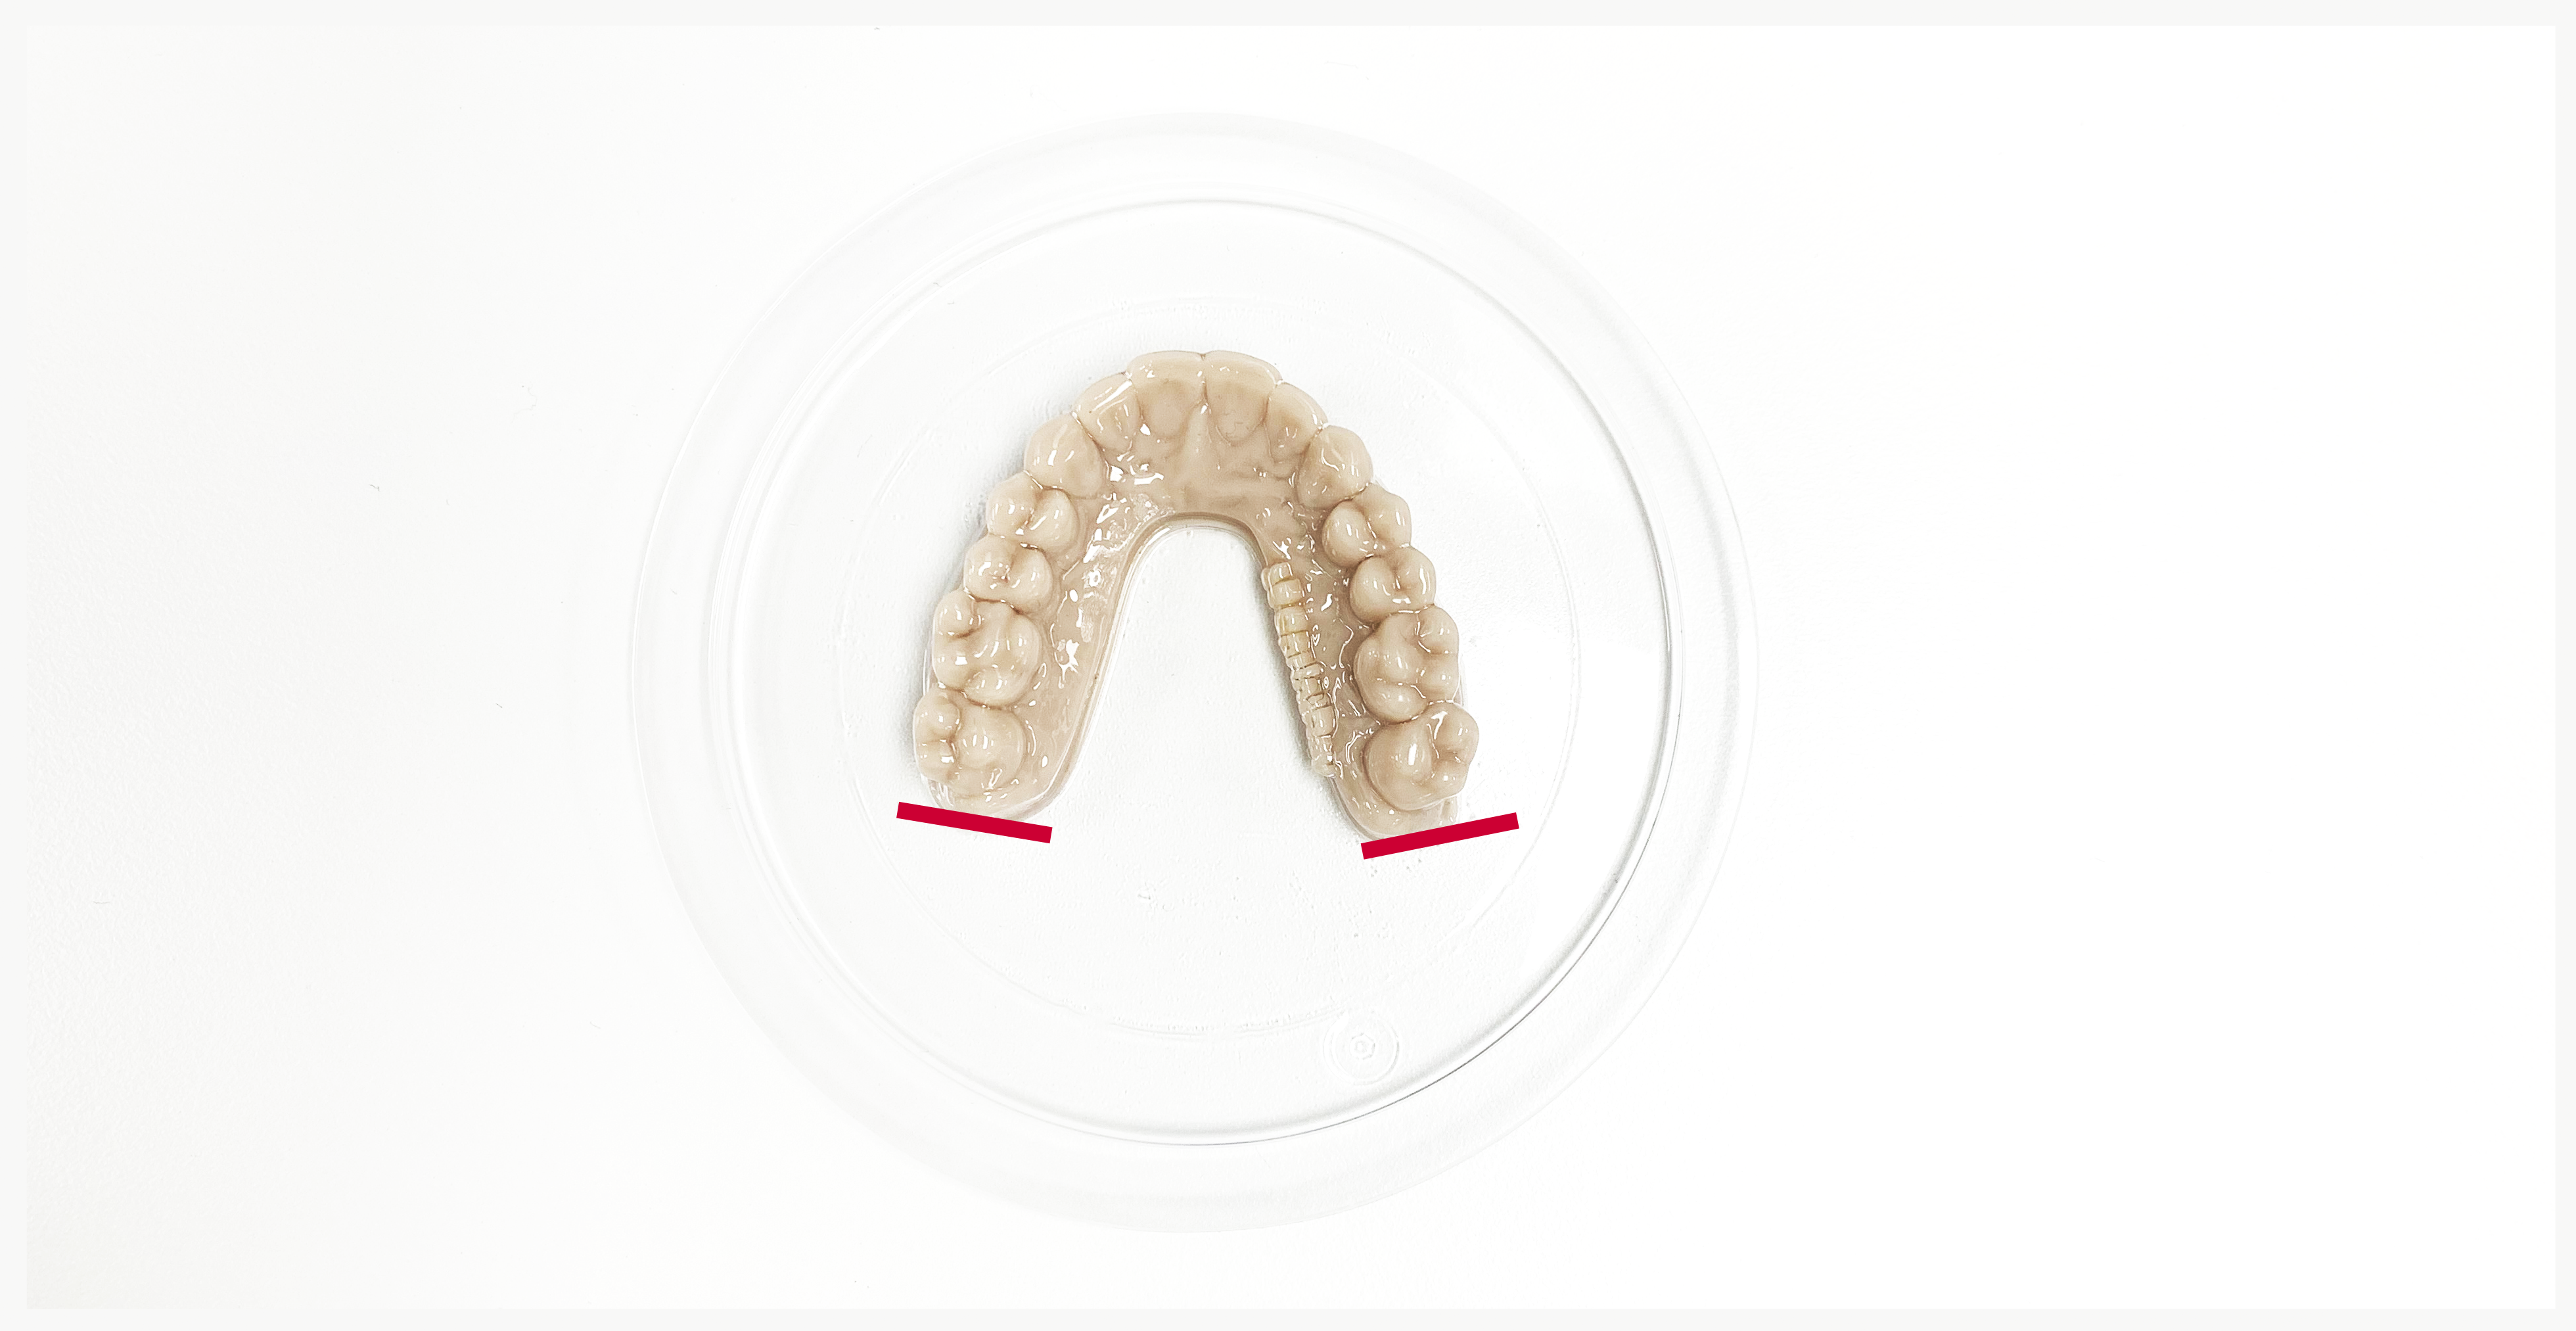
To make sure the posterior region is clear and there are no under-cuts, use the same scissors and cut with an angle on the posterior end of the model (purple line).
4.3.3. Removal
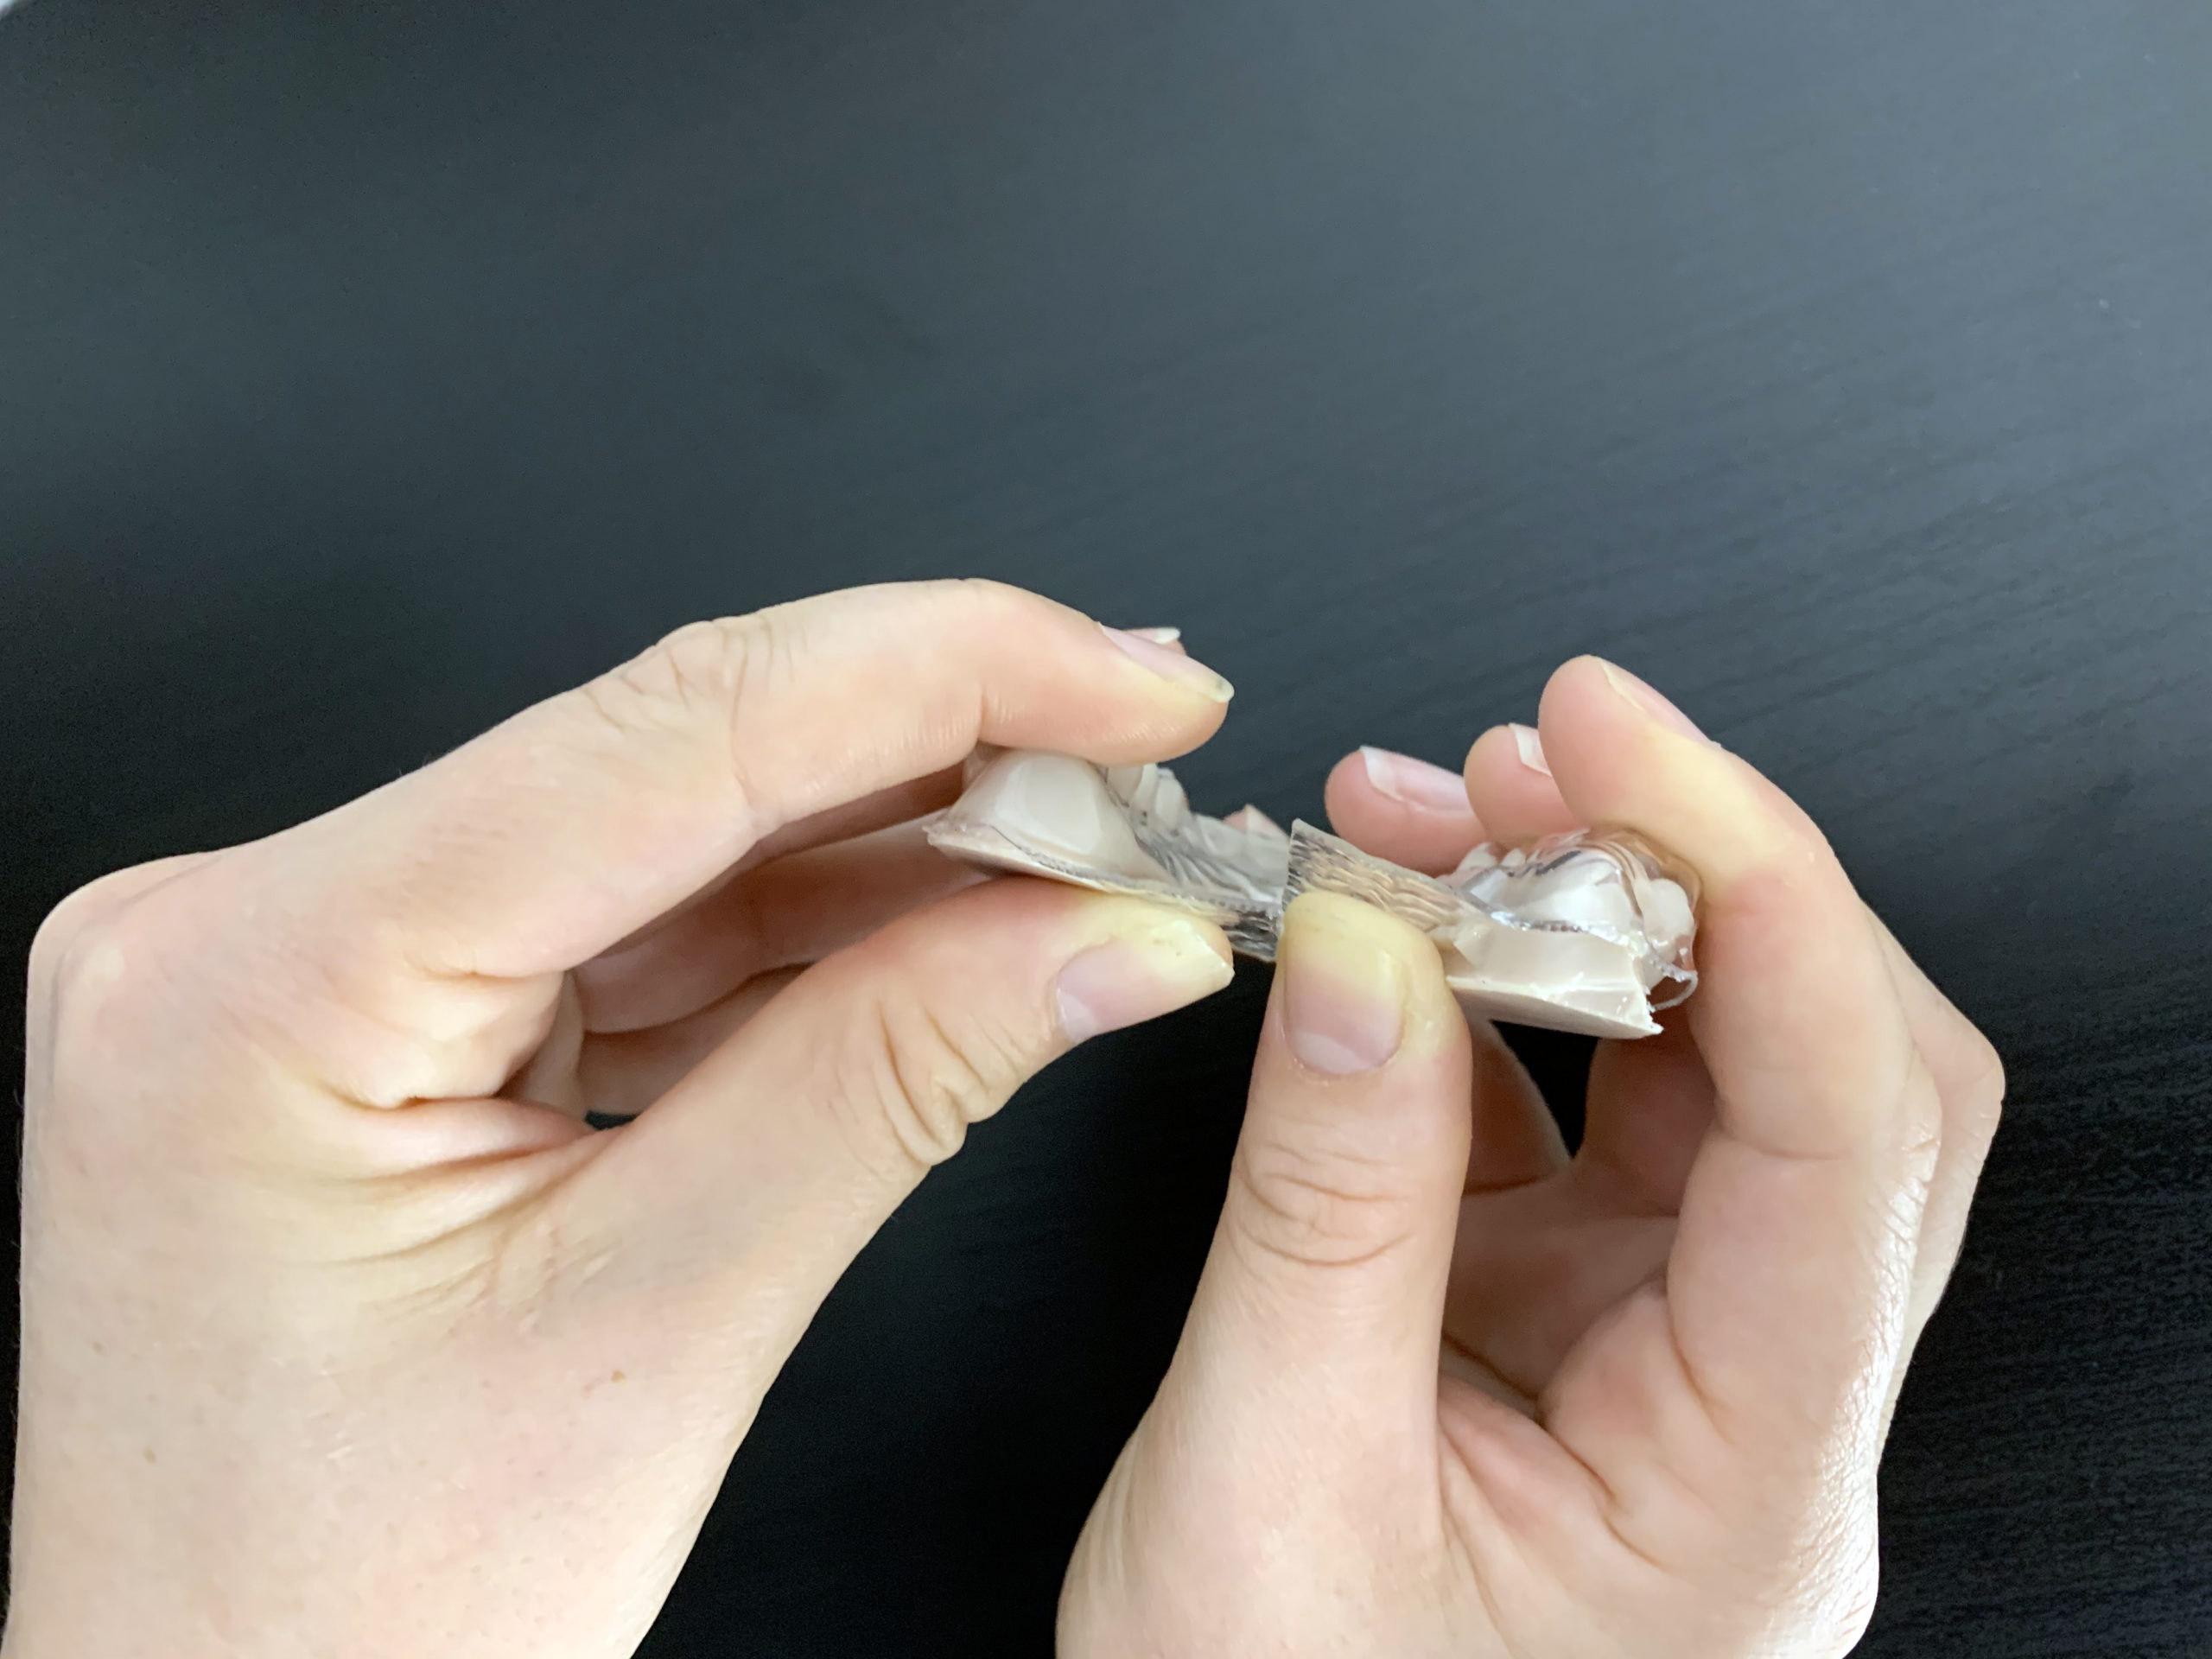
Try removing the retainer from the model by slowly pressing the wings up and away from the model. Alternate and slowly apply pressure on wings A and B to finally remove the aligner from the model. Avoid contorting and warping. (For easier removal, you may blow air under the edges of the retainer).
4.3.4. Completion
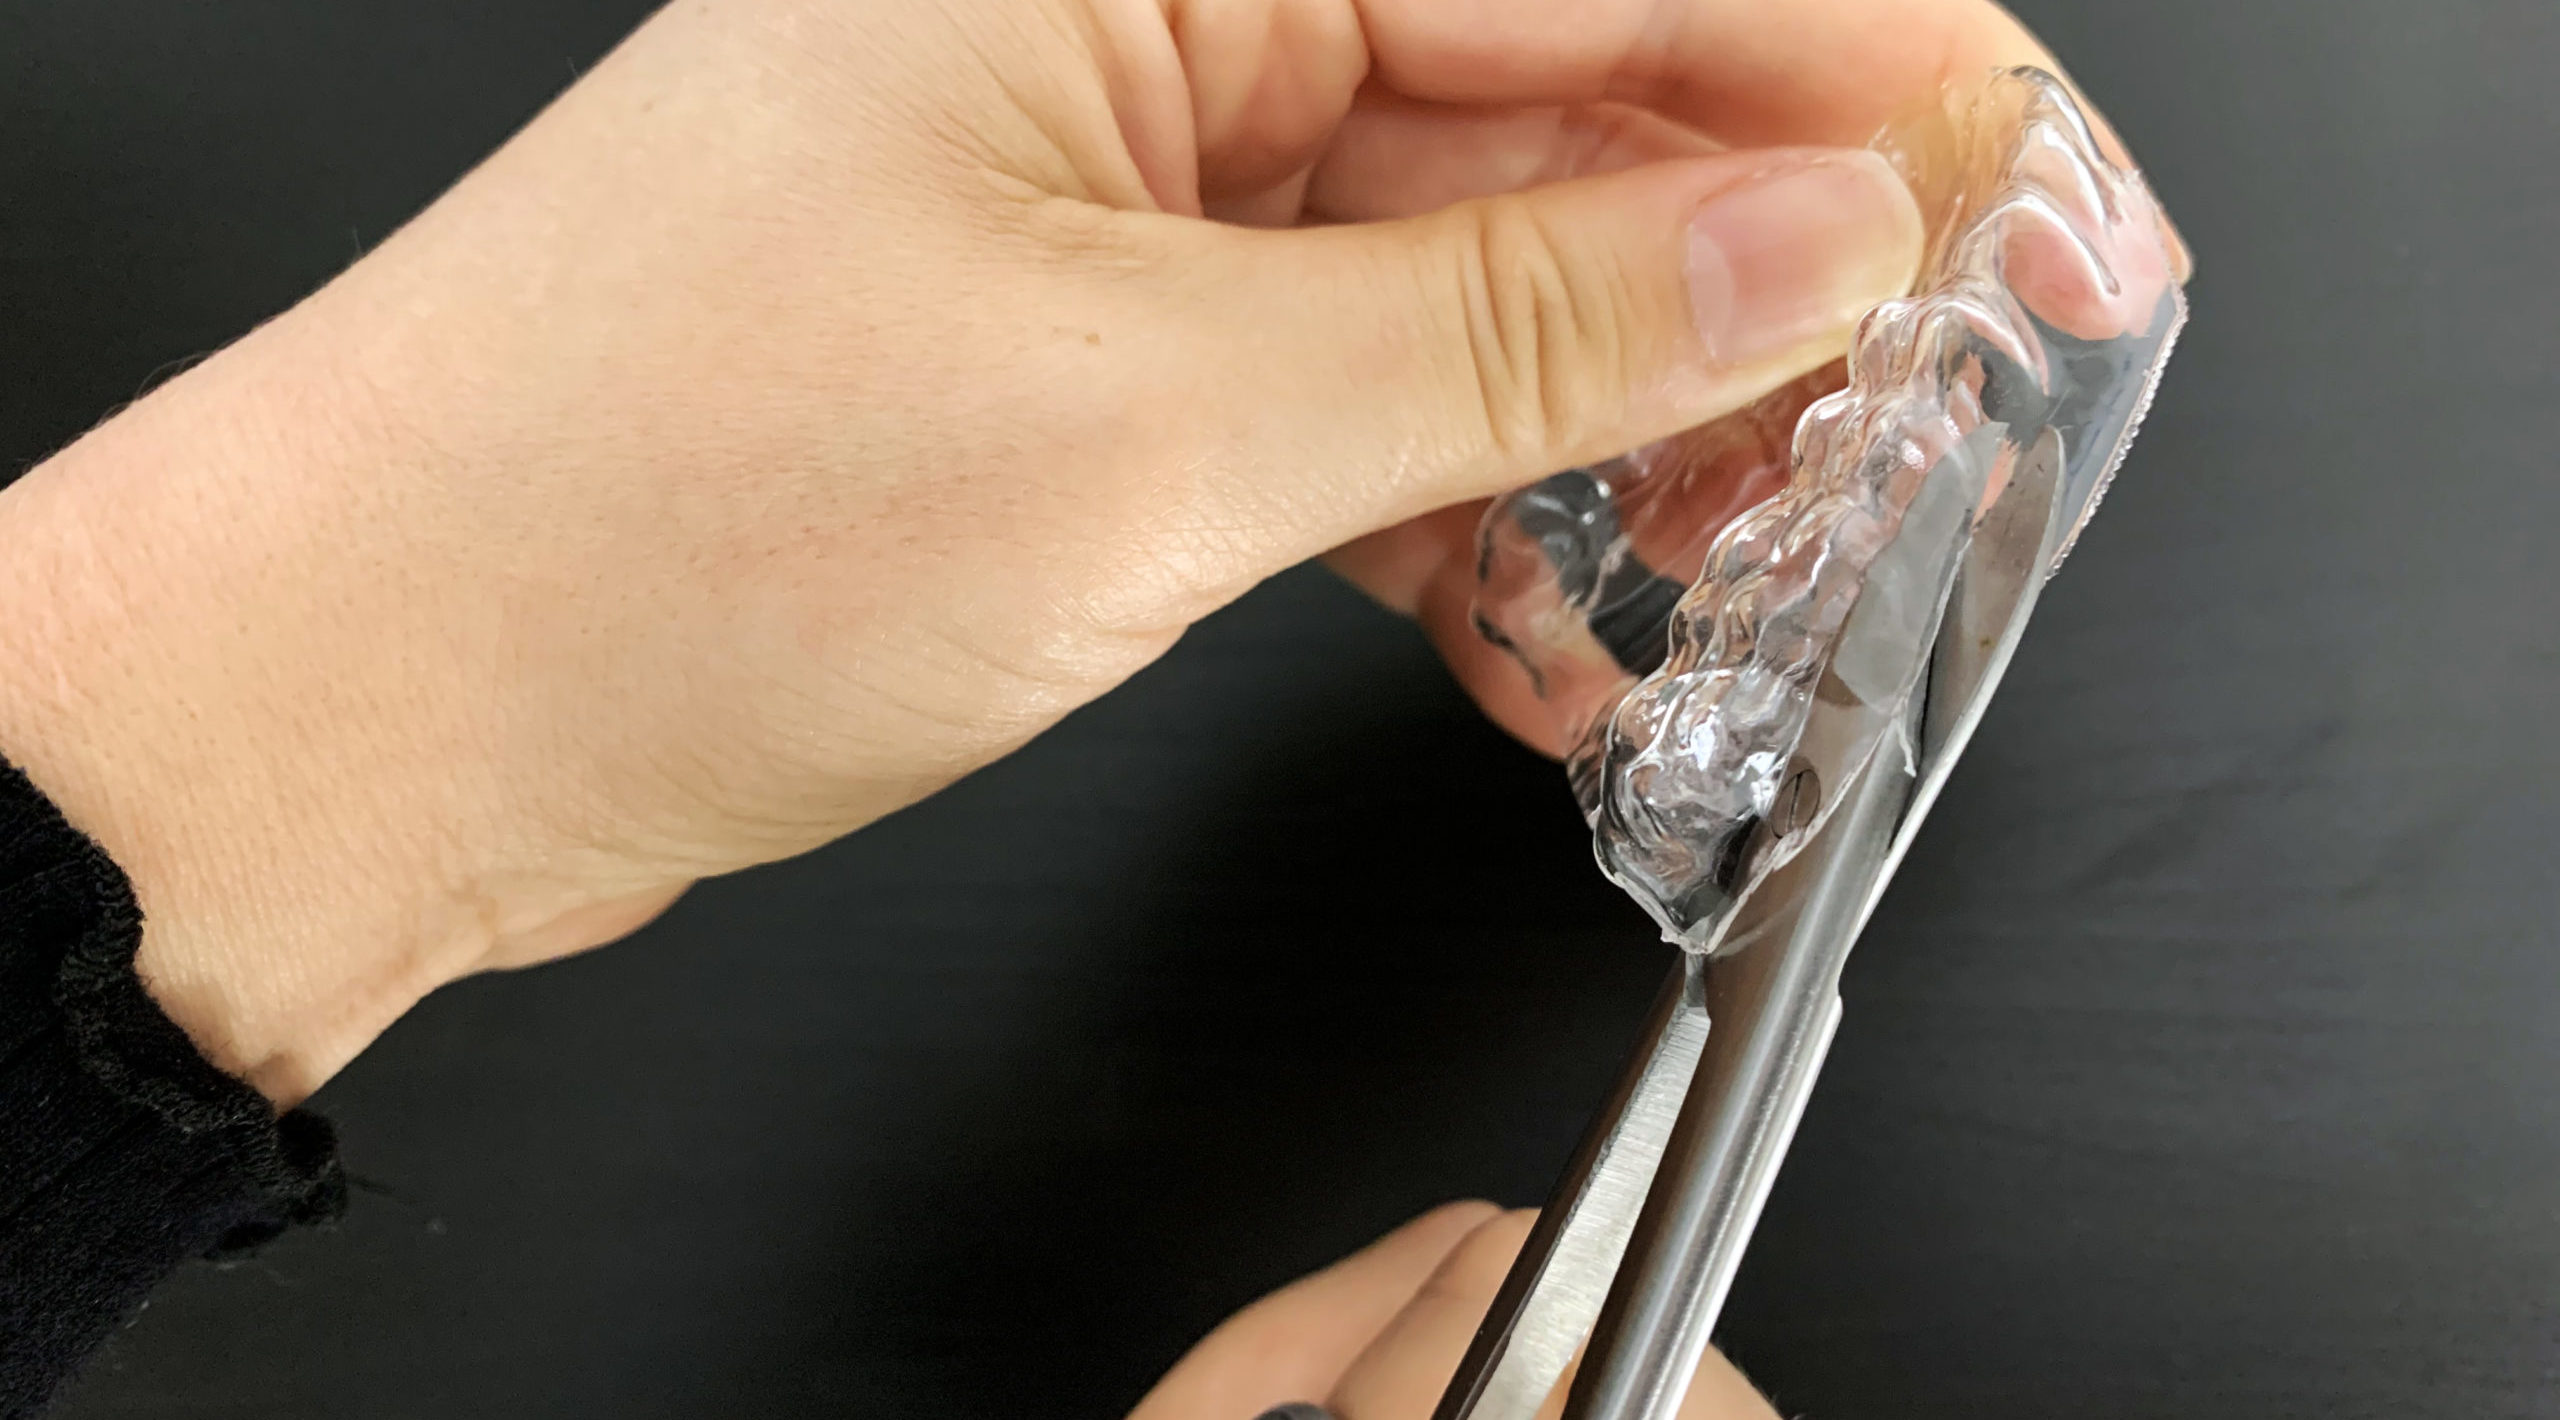
Use the smooth stainless steel crown scissors to complete the final cut. We recommend keeping the cutline (edge of the retainer) straight and just beneath the gingival margin. However, if your treatment involves extensive tooth movements, you may want to create scallops by using a lab carbide bur to avoid trapping and pressure on the gingiva.
4.3.5. Polishing
Polishing is done to smooth the edges of the retainer. You may use fine sandpaper or a FuzziesTM polishing wheel to remove any residue or sharp edges/points.
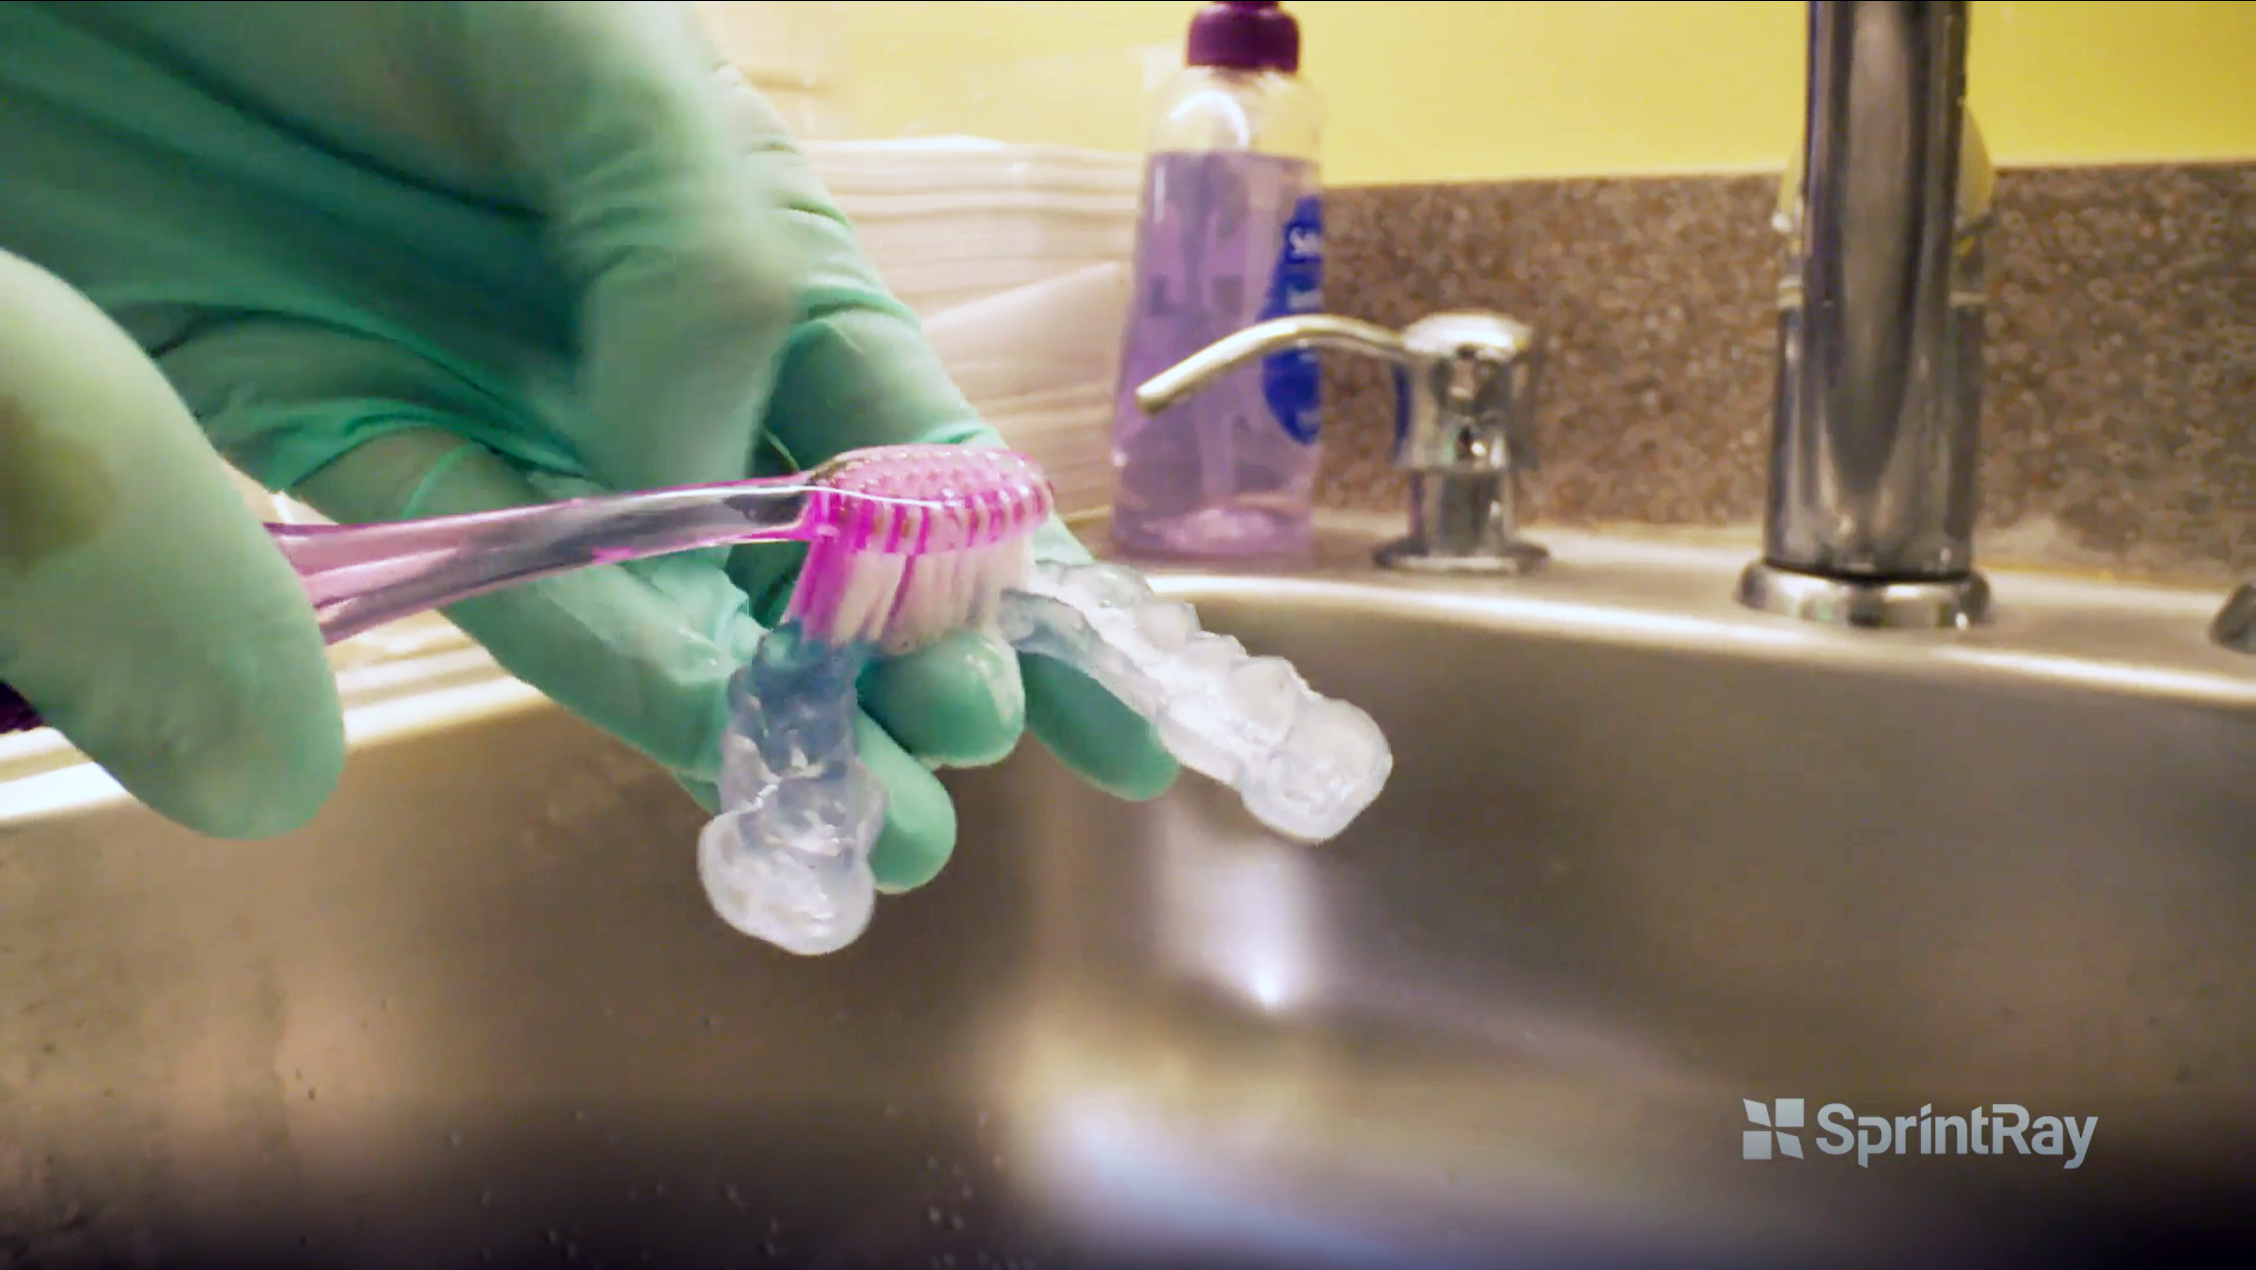
4.3.6.Cleaning the Retainer
Use water and liquid soap to clean the retainer. Then, rinse the retainer under running water. You may do a light brushing with a soft toothbrush.
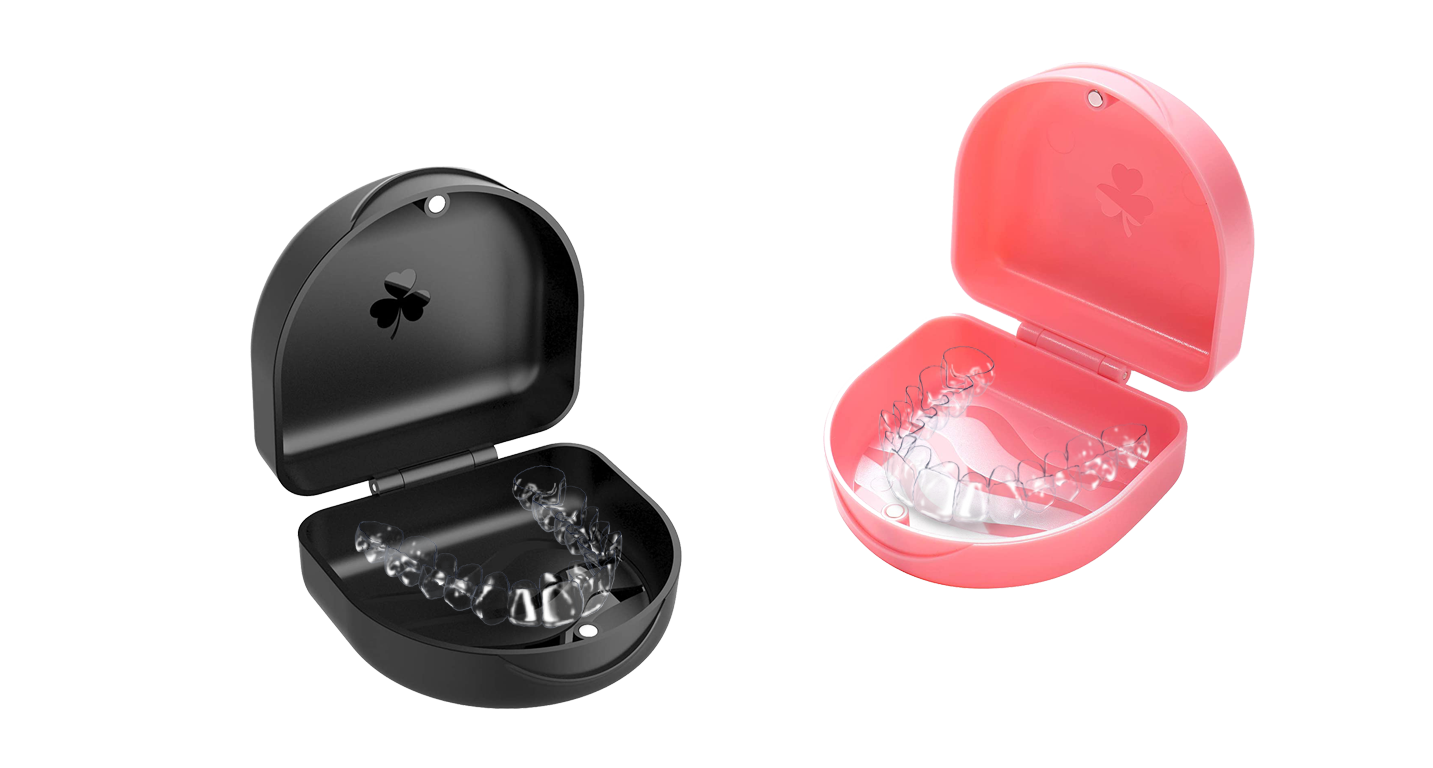
4.3.7. Packaging
Pack the fabricated retainer in a retainer-box, which has patient name/patient file number on it. Provide patient with instructions on how to use and clean the Retainer.
Pro Tips
- Use protective eyewear at all times to avoid eye injuries.
- Check the PSI of the thermoforming machine. A PSI range of 35-40 (2.5-3 Bar) is critical for proper appliance creation, however, you may want to follow the manufacturer’s instructions.
- It is better to have a dark background for better detection and easy checking of the edges.
- You may want to use curved stainless steel crown scissors for reaching the lingual/palatal side of anterior teeth.
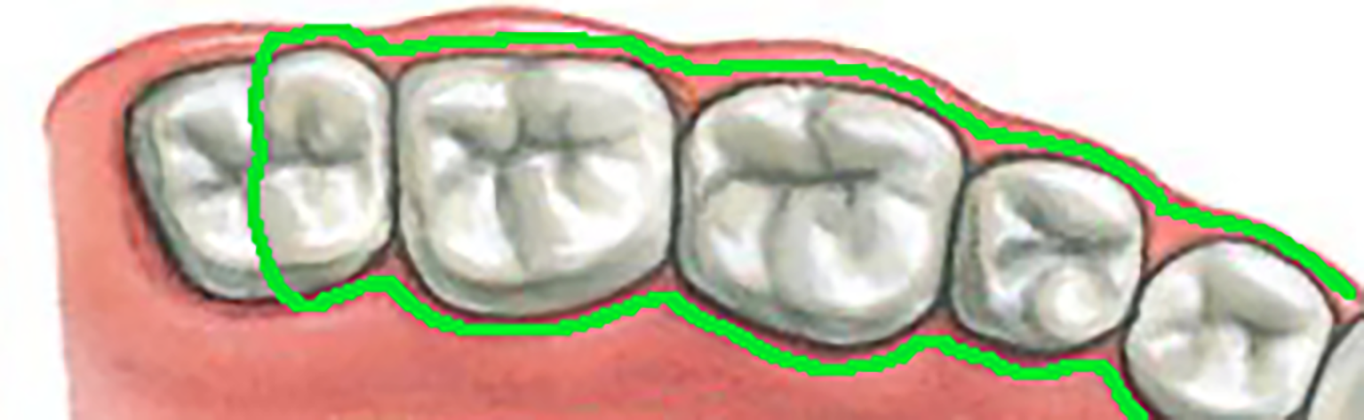
- In case there is 3rd molar present, follow the cutline below:
For further information or any questions, please contact our Customer Support team from Monday through Friday, 7AM - 5PM PST at (800) 914 8004, or visit www.support.sprintray.com.