






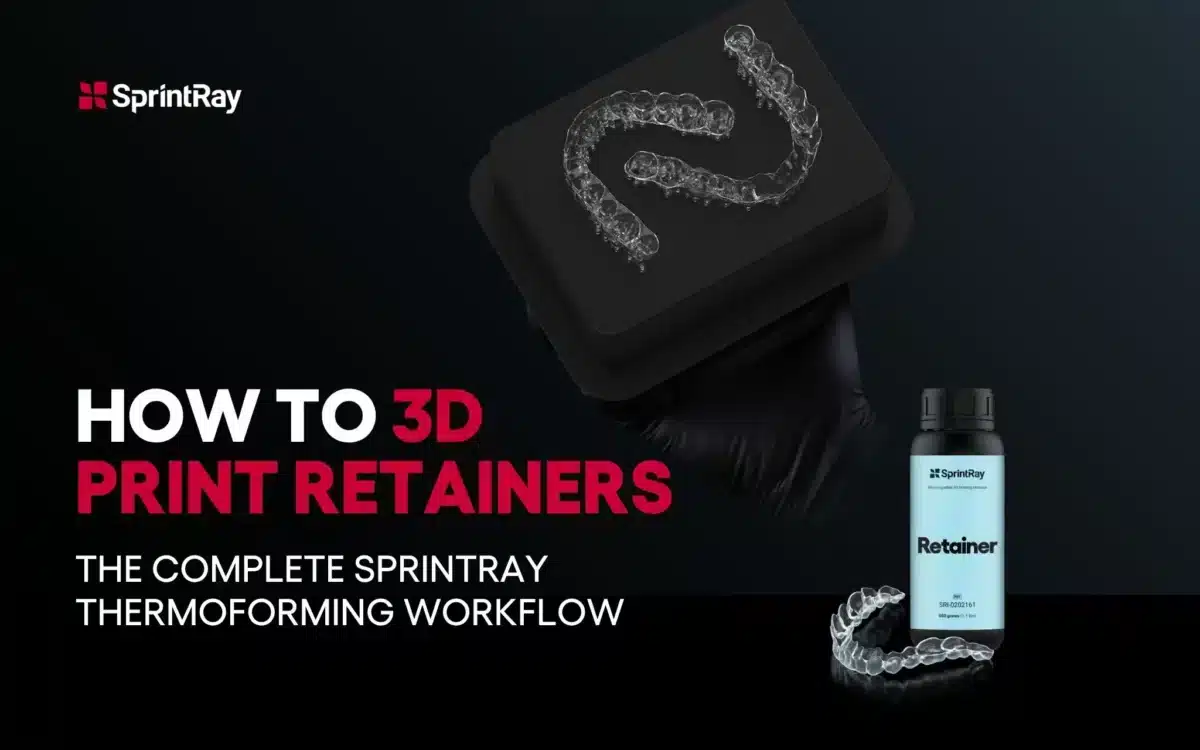
Most retainers still leave the office in a UPS box and come back two weeks later. That gap is where practices lose retention, where margin disappears into lab invoices, and where the practice fields the awkward call about a snapped wire on a Saturday.
The SprintRay thermoforming workflow closes that gap. You scan the patient, design the model, print it while you see your next case, and thermoform a finished retainer over it before the patient removes their bib. This guide walks the whole process end to end. It mirrors the demonstration in SprintRay’s step-by-step tutorial video, but it pulls in the numbers and material recommendations from SprintRay’s official workflow documentation so you can run the protocol off this single page.
Workflow at a glance:
- Digital impression: 5–10 minutes
- Debonding and model design: 9–20 minutes in-office, near zero if outsourced
- 3D printing the model: 60–80 minutes, mostly unattended
- Thermoforming, trimming, finishing: 4–6 minutes
- Total elapsed time: roughly 80 to 116 minutes
- Hands-on chair time: roughly 20 to 40 minutes
Why In-Office Retainer Fabrication Is Worth Doing
The traditional lab route of taking an impression, pouring a stone model, shipping it out, and waiting one to two weeks, is now a dated process. The kicker? In a world where you can get almost anything within a day or two, your patient likely knows there’s a faster way. Or at minimum, expects it. The SprintRay route hands the patient a finished retainer the same day, with no second visit and no lab invoice. That workflow matches patient expectations and improves their experience.
Where the workflow earns its keep:
- Same-day delivery. Patient walks out with the appliance, not a follow-up appointment.
- Lower per-retainer cost. No outsourced lab fee on routine cases.
- Replacement retainers in hours, not weeks. Once a patient is in the system, scan and design files live in SprintRay Cloud. A broken retainer becomes a same-day fix.
- Better retention compliance. No retention gap during the lab-turnaround window.
- No new printer needed. Offices already running a Pro 2 or Pro S for crowns, models, surgical guides, or night guards can add retainers as incremental utilization.
What You Need on the Bench Before You Start
Run through this checklist before the first scan. Missing one item, especially the release agent, will stall the workflow at the worst moment.
Hardware
- Intraoral or desktop 3D scanner
- SprintRay wash device: ProWash S or Pro Wash/Dry
- SprintRay post-curing unit (ProCure 2)
- Positive-pressure thermoforming machine: Drufomat (Dentsply Sirona), BioStar (Scheu Dental), or MiniStar S (Scheu Dental)
- Curing light for the block-out resin
- Lab handpiece with carbide bur and a Fuzzies polishing wheel
Software
- RayWare (cloud or desktop) for print preparation
- An orthodontic CAD package for debonding, or SprintRay Cloud Design if you outsource the design step
Consumables
- Die & Model 2 resin in Tan or Gray
- Retainer thermoforming sheets, 0.75–1 mm thick. Tested brands: Zendura (Bay Material), Essix Ace and Essix A+ (Dentsply Sirona), Invisacryl A (Great Lakes)
- Block-out resin or composite
- Release agent: Trim-Rite (Dentsply Sirona), Tri-Epoxy silicon spray (Keystone), or a clean vegetable oil spray
- 91% IPA, nitrile gloves, protective eyewear, shop towels
- Trauma shear scissors, curved stainless-steel crown smooth scissors, straight surgical scissors
- Fine-grit sandpaper, labeled retainer storage boxes
The Four Steps of the SprintRay Retainer Workflow
Four phases, in order. Each one is simple in isolation. The value is in stringing them together, so the patient walks out same day.
- Capture a digital impression
- Debond and design the working model
- Print, wash, and cure the model
- Thermoform, trim, and finish the retainer
The sections that follow break each step down. Timing figures come from SprintRay’s official workflow documentation.
Step 1: Capture the Digital Impression
Time required: 5–10 minutes.
Every digital workflow starts with clean scan data. For retainers you need full upper and lower arches captured in occlusion, no holes around the gingival margin, and enough surrounding tissue for the design software to find a stable boundary.
Use an Intraoral Scanner
The fastest path. Scan chairside and export STL files. SprintRay’s workflow is compatible with all major scanners on the market:
- Primescan and Omnicam (Dentsply Sirona)
- iTero (Align Technology)
- Trios (3Shape)
- Emerald (Planmeca)
- Medit
- CS3700 (Carestream)
Practices already using iTero benefit from the direct SprintRay integration. Scan files move into the SprintRay environment without a manual export step.
Use a Desktop Scanner
If a chairside scan isn’t practical, take a VPS impression and scan it on a desktop scanner, or scan the stone model. Export maxillary, mandibular, and bite scans at the highest available resolution in STL format.
Avoid the Four Most Common Scan Failures
Bad scans don’t produce a good retainer. Watch for these four failure modes, all of them force a rescan:
- Unclear occlusion or bubbles trapped in the scan
- Scraps and stray artifacts on the surface
- Coincident or distorted areas in the data
- Incomplete arches missing critical anatomy
Scanner-Specific Export Notes
- Primescan: Default export gives upper and lower files only, not a separate bite scan. If your design software needs a separate bite scan, follow the Primescan workaround linked from SprintRay’s retainer workflow page.
- iTero: Use the “File Per Arch (Arches Oriented in Occlusion)” export option, or the case will fail in the design step.
Step 2: Debond Brackets and Design the Working Model
Time required: 9–20 minutes if done in-office. Near zero hands-on time if outsourced.
If the patient still has brackets in the scan, this step digitally removes them, so the printed model reflects the cleaned teeth. If the patient was clinically debonded before the scan, this step is just preparing the geometry for printing.
Option A: Outsource to SprintRay Cloud Design
Upload the scan and prescription to SprintRay Cloud Design. The AI-assisted service returns a print-ready STL of the designed model. Skip ahead to Step 3 once the file is in hand. This is the right path for practices without an in-house orthodontic CAD designer.
Option B: Debond In-House
If you have orthodontic design capability, do it locally. RayWare accepts any STL-formatted design file, so you can use whichever CAD tool your team already knows. Common options:
- uLab
- Blue Sky Bio
- Exceed
- Orchestrate 3D
- 3Shape
- Easy Rx
- Meshmixer
Treatment design and bracket removal should be performed or supervised by a licensed orthodontist.
Model Geometry Rules That Matter
Whichever route you take, the model has to meet a few non-negotiable geometric rules:
- Base height: about 3 mm from the lowest gingival margin
- Maximum model height: no more than 19 mm from base to occlusal surface
- Central incisors: axis perpendicular to the base
- Base style: solid, not hollow, for uniform thermoforming
- Optional: embossed patient ID or stage annotation on the model for tracking
Get these three rights (base height, total height, incisor angulation) and the retainer drops in cleanly. Get them wrong and you’ll retrim, refit, or remake.
Export the finished design as STL or OBJ.
Step 3: Print, Wash, and Cure the Model
Time required: 60–80 minutes, mostly unattended.
This is where the digital file becomes a physical model. The goal is dimensional accuracy and a clean surface so the thermoforming sheet vacuum-forms against it without distortion.
Import the File Into RayWare
Open RayWare and import the STL or OBJ. Smart Print AI handles layout decisions automatically, but you’ll confirm the print settings before sending the job.
Print Settings SprintRay Recommends
- Resin: Die & Model 2, Tan or Gray
- Layer thickness: 100 microns (a 50-micron option exists but the time penalty is steep, and the accuracy gain isn’t needed for this indication)
- Why this resin: Die & Model 2 is SprintRay’s purpose-built model resin and gives the dimensional accuracy needed for aligner and retainer thermoforming
Pick a Print Orientation
- Horizontal (flat on the platform): SprintRay’s recommended orientation. Best accuracy because supports don’t touch the intaglio surface.
- Vertical: Useful when you need to fit several models on one platform for batched throughput. Slightly less accurate than horizontal.
Default to horizontal in a low-volume practice. Move to vertical only when batching five or more models per platform.
Fine-Tune the Appliance Fit (Optional)
In RayWare, open the Print tab, then Fine Tuning, then Appliance Fit Adjustment. Going negative tightens the retainer fit. Going positive loosens it. Most offices leave this at the default after one or two calibration prints. Pull this lever only when you notice a consistent fit bias across multiple cases.
Prepare the Printer
- Resin level between the minimum and maximum lines
- Stir leftover resin with the wiper before printing so the material is uniform
- Resin tank fully seated
- Print platform clean, dry, and locked into the arm
- Door closed (ambient light pre-cures resin)
Click Print in RayWare to send the job, or queue it for later.
Wash the Print
Uncured resin coats the printed model. Get it off before curing. SprintRay’s wash devices handle this with minimal IPA use:
- ProWash S is fully automated
- Pro Wash/Dry is the previous-generation wash and dry unit
Remove the Model from the Platform
Set the platform on a flat surface. Use the SprintRay Part Removal Tool. Press firmly under the posterior end of the model’s base, then twist gently side to side until the model releases. Don’t force it.
Post-Cure
Place the model in ProCure 2 and select Die & Model 2 from the resin list. Post-curing is what gives the model its final mechanical properties and dimensional accuracy. Skipping it or shortcutting it is the most common reason for retainers that don’t fit. A slight color shift in the model during cure is normal.
Finish the Model
If you printed horizontally with no supports, skip this. If you printed vertically with supports or a raft, snip them off with a flush cutter. A model trimmer is faster than a hand cutter once you’re running volume.
Step 4: Thermoform, Trim, and Finish the Retainer
Time required: 4–6 minutes for the thermoform cycle. Roughly 20 minutes total to go from a cured model to a polished, packaged retainer.
Anyone who’s fabricated a thermoformed appliance over a stone model already knows this routine. The protocol is identical. The model just happens to be digital in origin.
Block Out the Undercuts and Apply Release Agent
Use block-out resin or composite to fill any undercuts that the CAD design didn’t handle. Over-block and the retainer ends up loose. Under-block and the sheet traps. Aim for just enough material to fill the undercut without spilling onto surrounding anatomy. Light-cure the block-out.
Spray release agent across the model so the thermoformed sheet doesn’t bond to it. SprintRay-tested options:
- Trim-Rite (Dentsply Sirona)
- Tri-Epoxy silicon spray (Keystone)
- Clean vegetable oil spray
Wipe off the excess. Twenty seconds here saves five minutes of fighting the retainer off the model later.
Run the Thermoform Cycle
Use a positive-pressure thermoforming machine. SprintRay specifically tests with these three:
- Drufomat (Dentsply Sirona)
- BioStar (Scheu Dental)
- MiniStar S (Scheu Dental)
Set the machine to the manufacturer’s recommended settings for your sheet.
Recommended retainer sheets, 0.75 to 1 mm thick:
- Zendura (Bay Material)
- Essix Ace (Dentsply Sirona)
- Essix A+ (Dentsply Sirona)
- Invisacryl A (Great Lakes)
Pressure target: 35 to 40 PSI (2.5 to 3 Bar). Outside this window the wall thickness loses uniformity. Always cross-check against your thermoforming machine’s manufacturer instructions.
Seat the model so the central incisors are perpendicular to the machine’s platform and the model height stays under the 19 mm ceiling. Both rules you already set in Step 2.
Run the cycle. Wait for the model and sheet to cool fully before removing them. Pulling a hot sheet warps the retainer every time.
Cut, Free, and Remove the Retainer
Trim the bulk excess with trauma shear scissors as close to the model margin as possible. Then make a relief cut through the center of the sheet, creating two wings (call them A and B). Alternate slow upward pressure on each wing. The retainer pops free. Avoid twisting, which will distort the appliance.
A puff of compressed air under the edges helps with stubborn cases. If a third molar is in the arch, follow the angled posterior cut line shown in SprintRay’s retainer workflow guide to keep the area clear of undercuts.
Final Trim Around the Gingival Margin
Switch to curved stainless-steel crown smooth scissors. Cut just below the gingival margin. Aim for a straight line around the arch. For patients whose treatment involved significant tooth movement, scallop the margin with a lab carbide bur to avoid pressure on the gingiva.
Polish, Clean, and Package
- Polish: Use fine sandpaper or a Fuzzies polishing wheel to smooth all edges. Round off sharp points. A patient who feels a rough edge with their tongue won’t wear the retainer.
- Clean: Rinse with water and a small amount of liquid dish soap. A soft toothbrush lifts polishing residue. Rinse clean under running water.
- Package: Place in a labeled retainer storage box with patient name or chart number. Include written care instructions for the patient.
How Much Chair Time Are You Actually Saving?
Add the timings up. Most of the elapsed time is unattended print time, not chair time.
| Step | Time |
| Digital impression | 5–10 min |
| Debonding and model design (in-office) | 9–20 min |
| Printing the model | 60–80 min, largely unattended |
| Thermoforming and finishing | 4–6 min, plus polish/package time |
| Total elapsed | Roughly 78 to 116 min |
| Hands-on chair time | Roughly 20 to 40 min |
The 60 to 80 minutes of print time is passive. You can see other patients, work other indications, or finish charting while the model prints. The hands-on time concentrates in scanning, design (if you keep it in-house), and the final thermoform-and-trim sequence.
Compare that to the typical one-to-two-week lab turnaround on the same appliance. Same-day delivery wins on patient experience, on margin, and on schedule predictability.
Replacement retainer cases are even faster because the scan and design files persist in SprintRay Cloud. Skip straight to print.
A Faster Alternative: Direct 3D Printing
The thermoforming workflow in this guide is the proven path. It runs on Pro-series printers using consumables most offices already stock.
SprintRay also offers a direct 3D printing alternative that skips the thermoforming step entirely. The direct-print SprintRay Retainer workflow prints the appliance itself from SprintRay Retainer resin on a Pro 2 or Pro S, then washes, post-cures it in NanoCure, and finishes. No printed model. No plastic sheet. No thermoforming machine.
When the thermoforming workflow is still the right call:
- Your office already owns a thermoforming machine and has a stable thermoform protocol
- You stock retainer sheets in volume and don’t want a second consumable line
- Your team is trained on thermoforming and you don’t want to retrain right now
When direct-print starts to win:
- You’re investing in a greenfield workflow and haven’t bought a thermoforming machine yet
- Volume is high enough that the thermoforming step has become the throughput bottleneck
- You want to simplify the appliance stack down to one resin, one printer, one cure
Troubleshooting: When the Retainer Doesn’t Fit
Most issues trace back to one of six causes. Run through them in order.
- Retainer is too tight. Re-check the undercut block-out first. If that’s clean, dial Appliance Fit Adjustment slightly positive in RayWare and reprint.
- Retainer is too loose. Confirm the release agent was wiped off and didn’t leave a thick film. Then dial Appliance Fit Adjustment slightly negative.
- Retainer warps after thermoforming. You pulled it from the machine before it cooled. Wait longer. Confirm the thermoformer’s PSI is in the 35 to 40 PSI range.
- Model surface is rough or blurry. The resin wasn’t stirred, or post-curing was skipped or cut short. Always stir. Always cure to spec.
- Design step keeps rejecting the scan. Check the four scan failure modes: bubbles in occlusion, scraps, coincident or distorted areas, missing anatomy. Rescan instead of trying to patch.
- Sharp edges the patient can feel. Spend an extra 60 seconds polishing. Run a fingernail along every edge before handoff. If you feel a rough spot, the patient definitely will.
Frequently Asked Questions
How long does it take to 3D print a retainer in-office with SprintRay?
The full workflow runs about 80 to 116 minutes from first scan to packaged appliance. Roughly 60 to 80 of those minutes are unattended print time. Hands-on chair time is about 20 to 40 minutes.
Which resin does SprintRay recommend for printing retainer models?
SprintRay recommends Die & Model 2 (Tan or Gray) at 100-micron layer thickness for retainer models. A 50-micron option exists for a finer surface finish, but the time penalty is significant and the accuracy gain isn’t needed for this indication.
Can I print retainer models vertically instead of horizontally?
Yes. Horizontal is SprintRay’s recommended orientation for the best accuracy, but vertical printing is acceptable and lets you fit more models on a single build platform. That’s useful for batched orthodontic production.
What thickness of plastic sheet should I use for the thermoformed retainer?
SprintRay recommends 0.75 to 1 mm sheets. Validated brands include Zendura (Bay Material), Essix Ace and Essix A+ (Dentsply Sirona), and Invisacryl A (Great Lakes).
What PSI should the thermoforming machine be set to?
The recommended range is 35 to 40 PSI, or 2.5 to 3 Bar. Always cross-check against the thermoforming machine manufacturer’s instructions.
Do I need an orthodontist on staff to run this workflow in-office?
Treatment design and digital debonding should be performed or supervised by a licensed orthodontist. If you don’t have one on staff, SprintRay Cloud Design handles the design step. You upload the scan and prescription and receive a print-ready STL back.
Which SprintRay printers support the retainer workflow?
The retainer workflow runs on the SprintRay Pro 2 and the Pro S. Both are Pro-series DLP printers built for chairside and lab use.
What’s the difference between thermoformed and direct-print retainers?
This guide describes the thermoformed workflow: print a model, then thermoform a sheet over it. The direct-print retainer workflow prints the appliance itself from SprintRay Retainer resin, post-cured in NanoCure, with no model and no thermoforming machine. Both are valid. Pick based on volume, equipment already on the floor, and how much workflow simplification matters to you.
Can I use this workflow for replacement retainers?
Yes. Replacement is one of the strongest use cases for the in-office workflow. Scans and design files persist in SprintRay Cloud, so a replacement case can usually skip straight to the print step. A patient who calls Monday about a broken retainer can have a new one Monday afternoon.
What scanners are compatible with the SprintRay retainer workflow?
Compatible intraoral scanners include Primescan and Omnicam (Dentsply Sirona), iTero (Align Technology), Trios (3Shape), Emerald (Planmeca), Medit, and CS3700 (Carestream). Desktop scanners that export STL files at high resolution also work.
Bring Same-Day Retainers Into Your Practice
Adding the SprintRay thermoforming retainer workflow is one of the lower-risk ways to expand same-day services in a practice that already runs digital scans. It uses equipment most digital practices already own and consumables most labs already stock.
Want to see it in action? Watch the video below for a step-by-step walkthrough and expert insights.|
To see the full workflow run end-to-end on your own scans, or get pricing on a Pro-series printer and the consumables stack above, schedule a consultation with a SprintRay specialist.
Schedule a digital dentistry consultation
Prefer to learn at your own pace first? Explore the free clinical training in SprintRay University, including the full Workflow Masterclass.